A Preservation Primer: Which Pavement Facelift is Right for Your Situation?

“Preserve” can be defined as to keep in good condition or to keep safe from harm; to prevent decay and maintain. Think about preserving or upkeeping your home’s exterior. Rather than tearing everything down and starting over, properly timed preservation techniques can help to keep your house looking like new and functioning properly and efficiently. Some of these techniques include painting or replacing the windows or the roof. Applying these treatments at the right time prevents costly repairs and even complete reconstruction.

Maintaining an asphalt pavement is like preserving your house. There are times you don’t have to do full reconstruction of the road or even mill off the surface of the pavement. There are treatments to extend the lifespan of the pavement, keeping it in good condition and safe for the driving public. Not only does this extend the life of the pavement, but it also benefits the bottom line. Roads are a capital investment. Maintaining them properly can save money and stretch a tight budget.

Simply stated, pavement preservation is applying the right treatment to the right place at the right time. An asphalt deterioration curve can help determine timing and treatment.

Surface preservation treatments are meant to delay the need for rehabilitation or milling of the structural asphalt. As the pavement moves from fair to poor condition, the treatments available to you must be more structural in nature. Figure 1 shows an asphalt deterioration curve with different treatments applied to the pavement as the condition deteriorates.

Pavement preservation treatments can be divided into four categories:

  • Surface treatments
  • Pre-treatments
  • Recycling and reclamation
  • Base treatments

Some common surface treatments are crack seal, rejuvenating fog seal, micro surfacing and thin lift HMA overlay. Let’s discuss those in some depth.

Crack Seal

Placement of material into existing cracks.

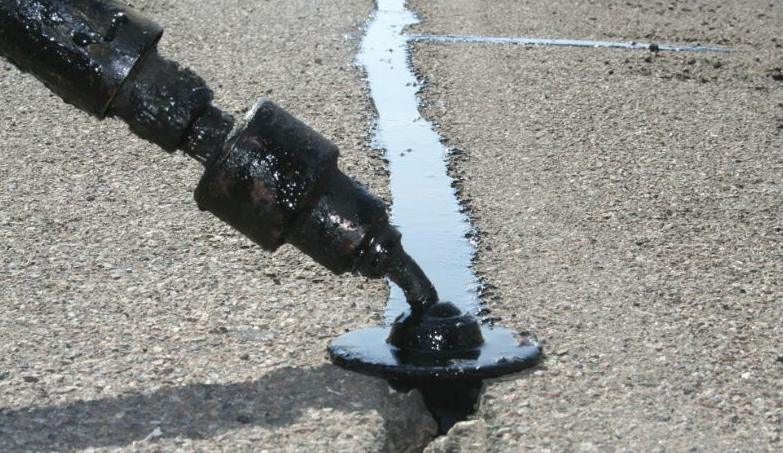
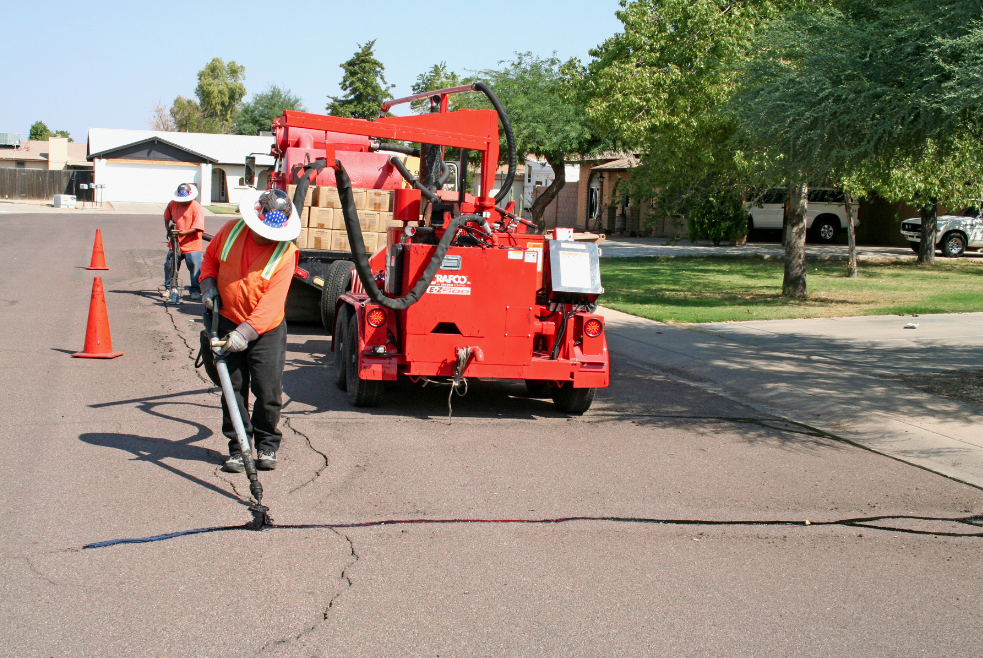
Crack filling is the placement of modified asphalt material into non-working cracks to prevent the infiltration of water and incompressible materials like gravel and sand. Routing and sawing is performed as needed to create a more uniform area for the filler allowing for better control and ensuring a proper seal to the existing pavement.

There are certain conditions that should exist for a pavement to be a good crack sealing candidate:

  • New or recently rehabilitated surface
  • Limited linear cracking
  • Little or no secondary cracking
  • Little or no raveling at crack face
  • Good base support
  • Limited structural deterioration

Cracks must be cleaned and dried prior to applying the filler or sealant. Having a dry road is even more important than the air or pavement temperature. It’s also important to keep the meter tank no less than ¾ full to maximize the effective melting point.

How to Crack Seal Right, Step By Step

Rejuvenating Fog Seal

Process of restoring chemical properties of the aged asphalt binder.

A rejuvenating fog seal or asphalt rejuvenation does not provide any structural improvement, rather it’s an emulsion that penetrates the top 3/8” of pavement restoring the aged asphalt binder. The effectiveness of the treatment is typically determined by the reduction of the binder viscosity. It is a “top of the curve” preventative maintenance and extends a typical pavement life by 3-5 years per treatment when applied at the right time.

Asphalt rejuvenation works by re-proportioning the aged fractions (asphaltenes) to the fluid portion (maltenes) of the asphalt binder. The maltene fraction gives the asphalt binder its flexibility. Asphaltenes effects the viscosity of the asphalt; as this fraction increases with age, the viscosity also increases making the pavement less pliable and prone to cracking. Thus, by restoring the maltene to asphaltene ratio like that of a new binder, the life of the pavement is extended. This process is not unlike a bowl of spaghetti (asphaltenes) with sauce (maltenes).

Over time the water in the sauce evaporates causing the sauce to dry out or age making it difficult to move or separate the spaghetti. Refreshing (rejuvenating) the sauce brings the bowl of pasta back to life, making it easier to separate the spaghetti noodles and move them around. Rejuvenation aims to restore the pavement’s flexibility and resistance to cracking.

MDOT, NCAT Show How to Place New Rejuvenating Fog Seal

Micro Surfacing

Surface treatment mixture of polymer-modified asphalt emulsion, mineral aggregate, water, and additives. The mixture is made and placed on a continuous basis by mixing the ingredients using specialized equipment.

The micro surfacing formulation is based on mix design parameters: resistance to raveling, lateral displacement and resistance to moisture damage. The emulsion plays a key part in micro surfacing. The wrong emulsion or an emulsion that doesn’t work well with the other components can cause issues such as long set times, durability, and delamination.

Remember that temperature, humidity, and wind conditions all affect emulsion break and cure times. If using a micro surface in combination with crack sealing, ensure crack sealing material is not excessive where it can be picked up by the paver tires and spreader box runners. Screen the material immediately prior to loading the mobile support unit so there is no possibility of contamination when re-handling the material. Treat vegetation with herbicide early to prevent it from returning after the project is completed.

Many agencies have reported ten years or more of service life when micro surfacing is installed on newer asphalt pavements in good condition. However, when used as a “band aid” or as a stop-gap measure on an asphalt pavement in marginal condition in order to delay rehabilitation/reconstruction, surface treatments including micro surfacing will have a shorter service life. Having the proper mix design for the micro surfacing is critical to ensure all materials work together. Some emulsion chemistries do not work with certain aggregate combinations, and some react poorly to excessive mineral filler.

How to Micro Surface

Thin Lift HMA Overlay

Applied thin layer (1.5 inches or less) of hot mix to the surface of the road.

Thin lift overlays can be used to extend the life of a pavement by sealing small cracks and providing a new riding surface. Overlays can be applied with or without milling, but the existing pavement must be in good condition since the overlay provides little additional structure. Thin lift overlays are available as conventional dense graded mix, open graded friction course (OGFC) and stone matrix asphalt (SMA).

Thin lift overlays improve ride quality and surface friction, correct surface defects, enhance appearance, seal the surface, and reduce splash and spray.

Regardless of the pavement preservation technique, quality control and quality assurance (QC/QA) are vital prior to, during, and after construction. Look at these three elements of the typical preservation project—the emulsion, the distributor truck, the aggregate.

Emulsion

  • Certificate of Analysis (Manufacturer)
  • QC Sampling and Testing
  • Temperature

Distributor Truck

  • Calibrate ➔ Quantity
  • Proper Pressure, Spray and Coverage
  • Speed

Aggregate

  • Proper Certified Test Results
  • Quality Control Results
  • Mix Design

While the materials for HMA and pavement preservation treatments are the same (aggregates, liquid binder, emulsions), the equipment varies, and the material testing is different. In efforts to standardize the testing and material selection, the American Association of Highway and Transportation Officials (AASHTO) created an emulsion task force (ETF) in 2008. Material standards, design standards and construction guides have since been developed, and in a 2012 passage from the Moving Ahead for Progress in the 21st Century (MAP-21), state DOTs could begin to use federal funds for pavement preservation.

This high level of confidence was only one benefit to the on-going AASHTO standardization efforts. Other benefits include educating the next generation of DOT staff and preservation crews and offering a consistent way to select materials, test and design. Constant collaboration and education will only further enhance the quality of the pavement preservation techniques, ultimately extending the life of our pavements.

Best Practices for Asphalt Overlays and Thin Lifts

The team at Asphalt Testing Solutions & Engineering LLC, Jacksonville, Florida, prepared this back-to-basics article for the AsphaltPro and PreservationPro audience.

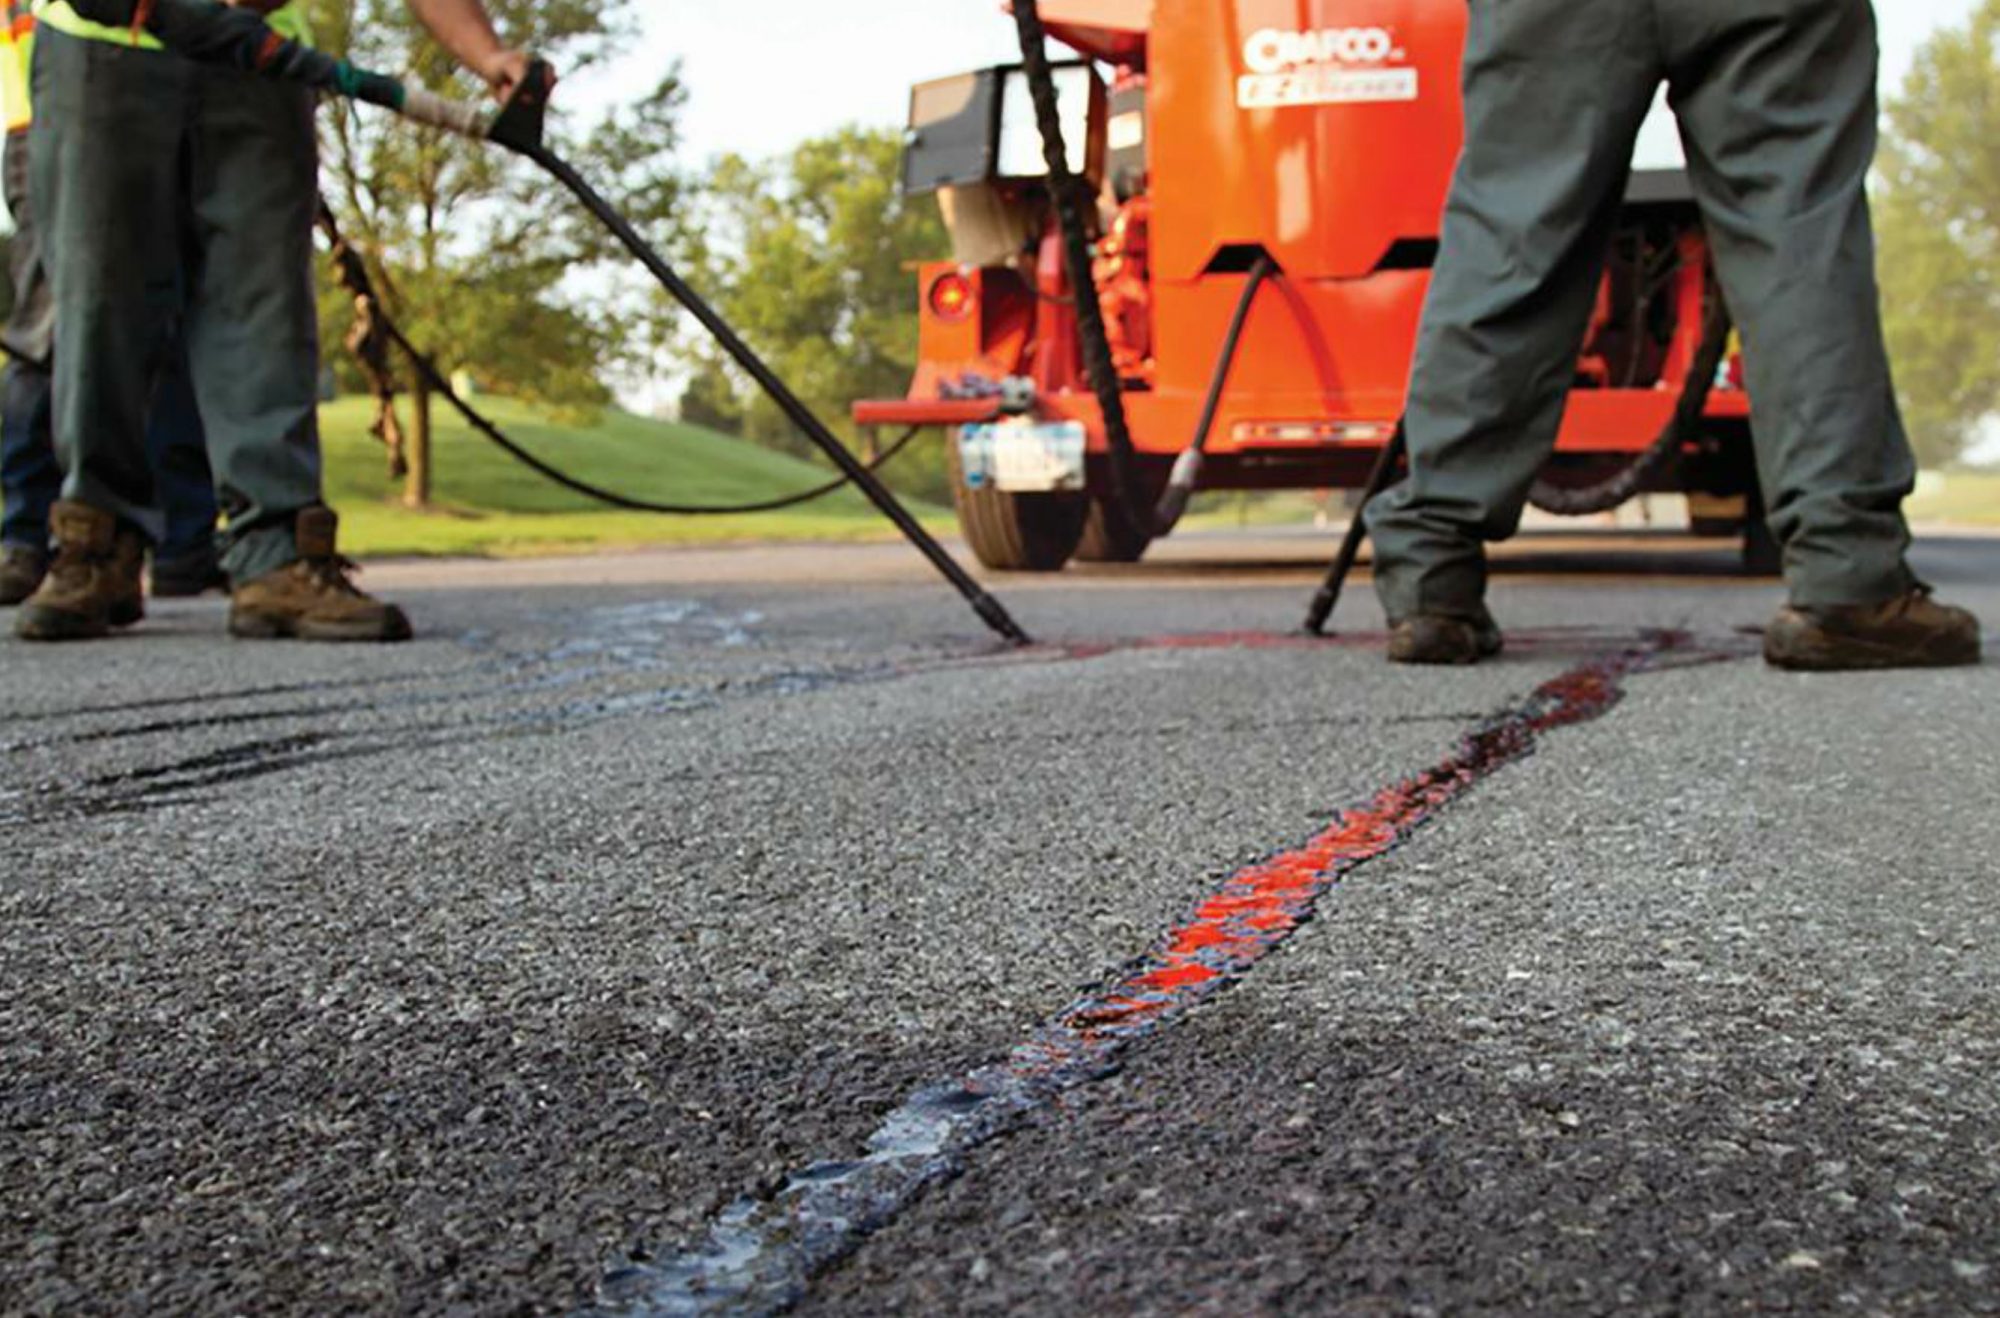
3D Asphalt Printer Repairs Cracks

Editor’s Note: The 2015 article, “Here’s How 3D Fabrication Enhances Asphalt Practices,” posited the asphalt paver was—and still is—the original 3D printer of roads. Now researchers at University College London have developed a drone-carried 3D printer to deliver asphalt to cracked pavements, “printing” a repair job in real time.

Researchers at University College London have developed a 3D printing system that allows the printing of asphalt. This technology steps into a new realm of possibilities for 3D printing, which has been used to manufacture everything from toys to tools. Even more fascinating is how researchers made asphalt printing possible and what it could mean for the future of construction and civil engineering.

Here’s How 3D Fabrication Enhances Asphalt Processes

One of the challenges that 3D printing technology has overcome is functionality with a variety of materials. Plastic worked great initially because it is easily malleable and widely available. Modern 3D printing technology can print with metals, carbon fiber and paper, among a host of other materials. Recently, asphalt joined the list.

The asphalt 3D printer the team at UCL developed had thrilling results. UCL’s project is part of a more extensive, five-year program including other universities around the U.K., called Self-Repairing Cities. The program focuses on developing drone and 3D printing technology that can autonomously repair and maintain pavements. The materials research at UCL could have a monumental impact on the materials industry at large.

Overcome Viscosity

The team at UCL published a paper titled “3D printing of asphalt and its effect on mechanical properties,” which goes into detail about their design process, the printer itself, and the findings of their research. The most significant practical problem the team faced was getting the asphalt to print reliably. Asphalt requires heat to flow, so it doesn’t naturally agree with 3D printers.

3D printing works best with materials that maintain a consistent viscosity so they can be pumped through the printer’s extruder without experiencing clogs or leaving gaps in the print.

The team at UCL found that asphalt in particular changes viscosity under pressure in a non-linear way, making it challenging to predict how viscosity will change during extrusion. To get around asphalt’s unpredictable viscosity, they molded cast asphalt into tiny, millimeter-scale pellets. These pellets are processed through a specially designed extruder (which was also 3D-printed). Inside the extruder, the pellets pass through a heat gradient that gradually softens and essentially “melts” them into a liquid form at the tip of the extruder. This way, the liquid asphalt comes out of the extruder consistently.

Bergkamp Launches SP5E Spray Injection Pothole Patcher

This design could be revolutionary for not only the Self-Repairing Cities project, but also for construction at large. While studying the 3D-printed asphalt, the UCL team discovered that it was nine times more ductile than cast asphalt (see Figure 6 in UCL’s original paper). This high ductility suggests that 3D-printed asphalt could be more durable than cast asphalt.

High ductility is helpful for the 3D printing process, but if 3D-printed asphalt is more malleable and resistant to fracturing, 3D-printed roads could experience less breakage. Ideally, the 3D-printed asphalt would flex under stress, rather than cracking. Instead of a crater-like pothole, it might bend into a shallow bowl. Additional surface treatments could be added to the road surface as well.

However, it is important to note that the UCL researchers found that 3D-printed asphalt has a similar fracture strength as cast asphalt, despite its higher ductility. Currently, 3D-printed asphalt can be stretched and shaped more, but cracks under the same amount of stress. As more research is conducted surrounding this technology, materials scientists are likely to focus on increasing that fracture strength alongside ductility.

https://youtu.be/mcK1xGfDWg0

Futuristic Pavement Maintenance

If a high-strength, high-ductility, 3D-printed asphalt could be developed and mass-produced, it could shape the future of civil engineering. For example, combine UCL’s 3D printing technology with a manufacturing robot being developed by a Harvard graduate. The Addibot is designed to repair scrapes in ice rinks, and inventor Robert Flitsch aims to develop the robot further so that it can repair asphalt.

In the future, we could see robots like Addibot equipped with UCL’s asphalt 3D printers roaming the roads to repair potholes and cracks. These autonomous road-repair bots could function around the clock, allowing them to catch pavement failures before they achieve a low pavement condition index (PCI) score. In the future, we may see road repair robots taking care of potholes in a fraction of the time a maintenance crew or even pothole patching machines require.

San Antonio Takes Pothole Patching to the Next Level

The developments underway in 3D printing asphalt technology are a glimpse into the future of construction and civil engineering. 3D-printable asphalt is a breakthrough in materials science and engineering, with applications that could lead to safer, more durable roads. The potential for autonomous road repair presents advantages to explore over conventional pavement maintenance. While it may be several years or more before this autonomous 3D printing technology matures to the mainstream, it could one day revolutionize construction.


Emily Newton is a construction writer with over five years of experience covering stories in the industrial sector.

The Best Practices of Crack Sealing

Cracks come in all shapes and sizes, and no pavement is immune to cracking. If left untreated, those cracks are only the start of more significant problems, from potholes all the way to sub-base failure.

According to the Pavement Preservation & Recycling Alliance’s roadresource.org, 75 percent of unsealed cracks develop into potholes within three years, while only 1 percent of sealed cracks develop into potholes in that same timeframe. Considering the benefits gained from reduced vehicle damage, increased driver safety and reduced road maintenance, it’s clear why crack sealing is important.

Crack sealing is the process of placing an adhesive sealant into cracks on the pavement surface, preventing the infiltration of moisture and non-compressible materials into the pavement. It is a cost-effective pavement preservation treatment that can slow pavement’s deterioration and extend pavement life by three to five years. A crack-sealed road can be opened to traffic almost immediately when a de-tacking agent is used.

When to Perform Crack Sealing

Crack sealing should be performed before a pavement becomes too distressed.

Crack sealing can be used for cracks wider than ⅛ of an inch, including block, edge, longitudinal, reflective, thermal or transverse cracking. Pavement experiencing alligator cracking may not be a candidate for crack sealing, as the alligator cracks indicate failures requiring repair beyond crack sealing, as originally reported in AsphaltPro’s 2016 article “How to Crack Seal Right, Step by Step”. Potholes and cracks wider than 1½ inches also should not be crack sealed.

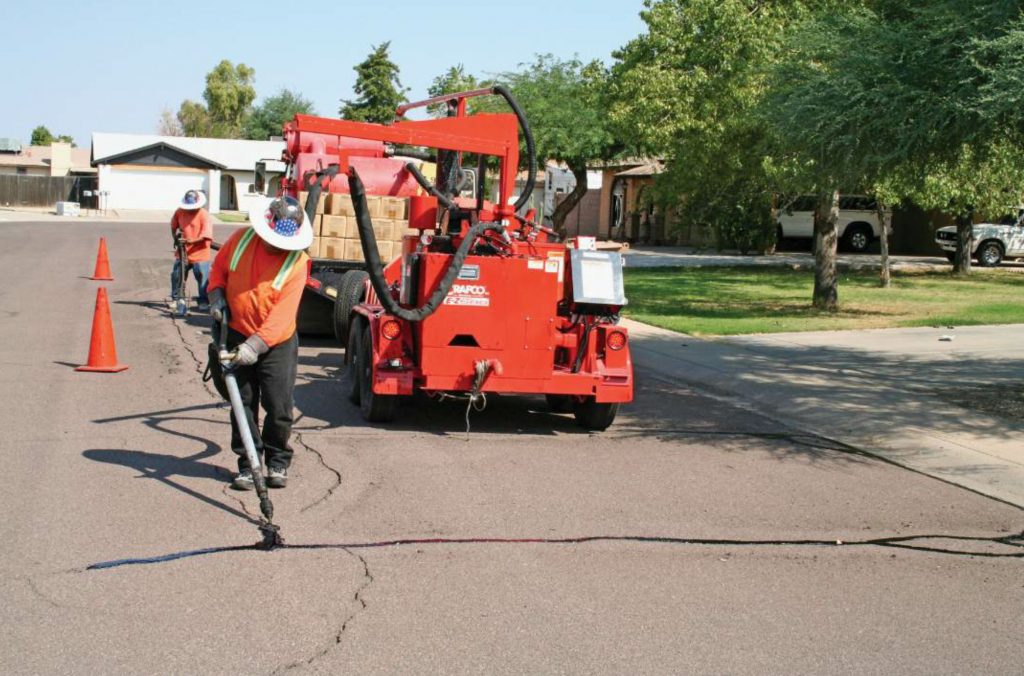
crack sealing application in action

Crack sealing is the process of placing an adhesive sealant into cracks on the pavement surface, preventing the infiltration of moisture and non-compressible materials into the pavement.

“Errantly applied sealant looks unprofessional and can cost road owners hundreds or even thousands of dollars a year,” said Jamie O’Driscoll of Crafco Inc., Chandler, Arizona. “It can also reduce skid resistance.”

If the pavement is a candidate for crack sealing, that treatment should be performed in the spring or fall when cracks are neither completely open (as they are in winter) nor closed (as they are in summer). Most manufacturers recommend a minimum pavement temperature of 40 degrees Fahrenheit. Performing crack sealing at lower temperatures results in reduced adhesion. A hot air lance may be required to warm the pavement if crack sealing must happen when the pavement temperature is below 40 degrees.

Crack sealing can be combined with other preservation treatments, including chip seals, HMA overlays, slurry seals or micro seals. However, the crack seal must cure for a minimum of two weeks before any treatment can be placed overtop. Overbanded crack seals require even longer cure times.

Prepare the Surface

Proper preparation of the surface is key to successful adhesion of the sealant. Some jobs may require cracks to be routed; others will not.

There are a number of factors determining whether or not cracks should be routed before they are sealed. Routing offers cleaner edges for better material adhesion and creates a defined reservoir that holds the appropriate amount of sealant to accommodate the anticipated annual thermal movement. When done before crack sealing, routing can improve the likelihood of proper sealant adherence and double its service life, said Brandi Julian, training director at Crafco Inc.

The first step is to calculate crack density, which is determined by assessing the linear footage of cracks per square feet of the pavement area. Julian recommends routing if the crack density is not greater than 20 percent. She said anticipated movement is also a factor.

“The more a crack moves, the more we encourage routing,” Julian said, “because more material in that crack means it can accommodate more movement.” Routing is also integral for particularly narrow cracks, to allow enough material to get down into the crack.

“We know that most people don’t route even though we know it improves sealant performance,” Julian said. She pointed to a survey completed with Texas DOT in which the majority of respondents stated they do not route because they find it is too expensive and requires an extra piece of equipment. “We see the longest sealant service life out of that seal and configuration, but what’s state of the art is not necessarily the state of the practice.”

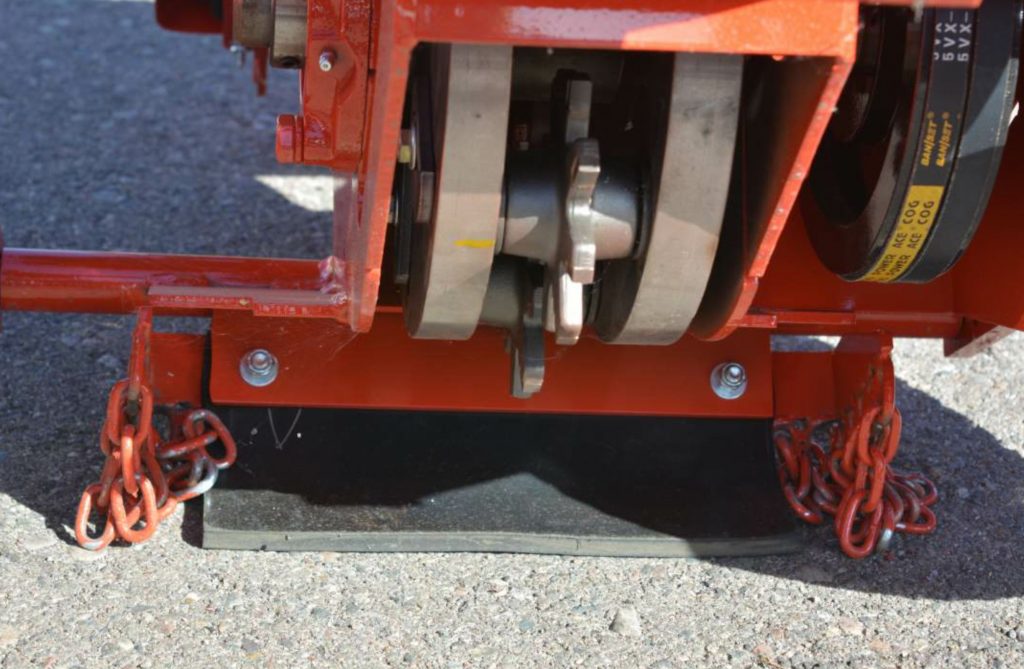
The length, hub and configuration of the cutters on the cutter head are determined by the reservoir dimension.

If pavement has a crack density greater than 20 percent or shows fatigue cracking or other severe distress, it may not be strong enough to sustain routing. “You could potentially do more harm than good,” Julian said.

When routing, a minimum of ⅛ of an inch of deteriorated pavement should be cut from each side of the crack and the rout should be no less than ⅜ of an inch deep. The exact width and depth of the reservoir will depend on the climate and other factors. Generally, colder climates may require wider reservoirs to allow for additional expansion/movement, but not greater than 1½ inches. The rout should be centered over the crack for uniform adhesion.

Cracks, routed or not, that are more than 1 ½ inches wide need to be filled with a sealing mastic, Julian said.

If spalling (the breaking of aggregate at the edge of the cut) occurs, ensure the cutters or pins are not worn. Check that you are using the right type of cutter for the reservoir. Julian recommends a carbide-tipped cutter over a steel cutter for prolonged life. The operator should also slow down his/her operation to see if that reduces spalling. If spalling continues, the pavement may be in too poor of a condition for routing.

The length, hub and configuration of the cutters on the cutter head are determined by the reservoir dimension.

Whether or not cracks must be routed, they should be cleaned. Any dirt, grass or other deleterious substances will reduce adhesion.

The most common cleaning method is the use of compressed air at a minimum of 90 psi. Direct the nozzle directly at the crack and no more than 2 inches from the pavement surface.

It’s important to ensure debris from one crack doesn’t get blown into cracks that have already been cleaned, and to time your operation so cleaning happens just before sealing to avoid debris blowing back into cleaned cracks. Sometimes, more than one pass is required to properly clean cracks, especially for wider cracks.

Before beginning, check that moisture or oil isn’t escaping from the compressor into the crack.

Moisture will also adversely affect adhesion. In fact, according to RoadResource.org, crack sealing on a dry road is often more integral to the success of the treatment than pavement or air temperature.

To ensure cracks are dry, use a hot air lance. The high-velocity, high-pressure heated air both cleans and dries the pavement. Sealant applied while the surface is still warm from the hot air lance can also adhere better.

However, you must take care not to burn the pavement. Overheating will cause excessive hardening of the asphalt, create early crack surface failures and reduce adhesion. Although slight darkening of the pavement is normal, excessive darkening, smoking or dislodgement of aggregates are signs of overheating.

Prep Material

Sealants should be selected based on pavement condition, climate, pavement movement, service life needed and sealant properties, as reported in our 2016 article.

“As you select sealant, make sure it falls within approved spec and that the sealant lot number is on hand in case there’s any issue,” O’Driscoll said. “That way a manufacturer can track and resolve it.”

Climate will also impact your sealant selection. For example, cooler climates require more flexible sealants than hotter climates. Typically, there is less movement of the pavement in hot climates, so there’s less of a need for a very flexible material. Additionally, using a softer sealant in a hot climate could cause tracking.

If you use a less flexible material in a cooler climate, where the pavement will be exposed to greater temperature swings and will have more thermal movement, then the sealant may crack prematurely.

Job type is also a factor in determining the type of sealant used. For example, stiffer sealant works better for parking lots, which see more turning vehicles and foot traffic, while a more flexible sealant would be better for roadways.

The condition of the pavement is another factor. For pavements with less than 20 percent crack density, use a more flexible sealant. For pavements with higher crack density, use a stiffer sealant.

For working cracks (cracks that move more than 3 millimeters), Julian recommends a sealant engineered to accommodate anticipated movement throughout the seasonal temperature changes. Regardless of the sealant used, follow the manufacturer’s recommendations.

Sealant, which is melted and applied using a piece of equipment called a melter, should only be heated within the manufacturer’s specified temperatures, usually between 380 and 410 degrees Fahrenheit.

Overheating the sealant degrades its properties, while under-heating it will negatively impact adhesion as it won’t flow down the depth of the crack appropriately. It’s important to note that some sealants can be reheated, while others cannot. Check the temperature of the material regularly.

The manufacturer’s instructions will also outline proper sealant agitation. Overworked sealant can break down, reducing adhesion and the life of your melter pot, O’Driscoll said. Agitation should be continuous, except when the melter lid is open to add more sealant blocks, to speed up melting and maintain sealant temperature and uniformity.

When you start heating material in the morning, Julian recommends loading the tank halfway full and maintaining that amount throughout the day. A half-filled tank will heat more quickly.

“Most sealants can be reheated only one time,” Julian said. “If it rains and you have to shut down, you’ll have space to add new, fresh material, which resets the pot life back to zero.” She also said not to heat material for more than 12 to 15 hours without introducing fresh material, as most sealants are not meant to withstand elevated temperatures for that length of time.

Add sealant blocks one at a time at the rate you are using it. “Adding too many will reduce the temperature of the heated material in your tank,” Julian said. “Too many blocks can also jam agitation paddles in certain melters.”

Julian also reminds us to empty the tank completely before adding a different sealant type for another job, because the chemistry of those sealants can be drastically different.

Crack Seal Application Best Practices

There are a number of crack seal placement configurations, including flush fill, overband, reservoir and combination. Regardless of the method used, take care to fill the crack from the bottom up to ensure a complete seal and use the right wand tip for the job.

For flush fill configurations, the material is placed in the crack so it is flush with the pavement. O’Driscoll said this configuration should be used if an overlay or other surface treatment is planned in the near future.

With an overband, the material is placed into and over the crack with a sealing disc. It is then either left unshaped (capped) or shaped using a squeegee to create a band that is no more than ⅛ of an inch thin and 2 to 4 inches wide. Squeegeeing can also push the sealant down into the crack to help with adhesion.

Overband covers and waterproofs the crack and is ideal for cracks with considerable deterioration along the edge because it will cover those sections in addition to filling the crack.

We covered the reservoir configuration in our section about routing. However, reservoirs can be flush or recessed. A recessed reservoir is placed lower than the pavement level when an overlay will be placed in the same season as the crack sealing occurs.

There are also combination configurations for jobs where routing throughout is not possible.

Check out NCHRP’s Report 784 on the best practices for crack treatments for asphalt pavements.

To combat sagging as sealant cools and shrinks, some material suppliers recommend filling the crack ¾ of the way and then allowing it to cool before filling completely. Other suppliers suggest filling the cracks to the proper height and returning to any cracks that are too low. If excessive sagging occurs, for sloped pavements, choose higher viscosity sealant to resist sagging/flow.

Throughout the job, avoid using too much sealant or leaving behind drips and puddles. Using a drip stopper on the tip can help to avoid drips and excess application. In the case of puddles of excess sealant, remove by heating a flat blade and cutting puddle excess without harming the treatment.

It is important not to turn the freshly crack-sealed surface over to traffic too soon. However, the exact cure time depends on many variables, including sealant, weather and volume of traffic on the road. If a light application of fine sand or a liquid de-tacking agent is applied to the surface, traffic can return to the pavement almost immediately.

How to Crack Seal Right, Step By Step

In part one of our three-part series, The Ultimate Paving Maintenance Guide, we cover how to crack seal right, step by step.

Cracks come in all shapes and sizes. Sealing them in a timely manner is one of the most effective ways to maintain the quality of your pavement.

One of the biggest mistakes is waiting too long to begin maintenance.

“By crack sealing your pavement when cracks first appear, you keep the water and non-compressible materials out of the cracks,” said Glenn Shapiro, general manager of GemSeal Pavement Products’ northeast region. “These non-compressible objects will not compress as the crack contracts in warm weather. The pavement actually expands, making the crack width smaller, cracking and breaking the asphalt along the edge of the joint. By keeping water out, this will eliminate sub-base erosion, reduce freeze-thaw damage and improve ride quality of the pavement to extend its service life.”

“The magnitude of thermal movement,” which causes cracking, “depends on a variety of factors, including but not limited to, the amount of temperature change and the spacing of the cracks,” said Brandi Julian, sales training manager at Crafco Inc. “Understanding that all cracks move is imperative when designing your crack treatment.”

Choosing the right material, equipment and application for the job is also essential, Shapiro said.


Select Your Sealant

Sealants should be selected based on pavement condition, climate, pavement movement, service life needed and sealant properties, according to Julian. Although project specs may consider the other factors, it’s important to pay attention to the type of sealant you use, with or without project specs to follow.

For example, cooler climates require more flexible sealants than hotter climates.

“Using a softer material in a hot climate could cause tracking of the sealant by vehicle or pedestrian traffic,” Shapiro said. “In hot climates, there is less movement of the pavement surface in general and, therefore, no need for a very flexible material. If you use a less flexible material in a cooler climate, where the pavement will be exposed to greater temperature swings and will have more thermal movement, then the sealant may crack prematurely. This defeats the purpose of why you’re repairing the cracks in the first place.”

Another major factor in determining which sealant to use is the job type. For example, you don’t need a roadway sealant in a parking lot or a pedestrian area. Shapiro recommends that contractors working in parking lots use a sealant designed for pedestrian foot traffic, turning vehicles and parked vehicles—usually a stiffer material that loses tackiness when cured. However, that type of sealant is less flexible than roadway solutions.

Shapiro also recommends using a more flexible sealant on pavements with less than 20 percent crack density, and a stiffer sealant on pavements with higher crack density.

“Crack density is measured by looking at a 10-foot-by-10-foot section of the road or parking lot that best represents the average condition of the entire pavement,” Shapiro said. “Then measure the linear feet of cracks within the 100-square-foot area. The number of linear feet divided by 100 is the crack density.”

He also stresses that alligatored pavement is not a candidate for crack sealing, as it indicates failure of the sub-base and requires repairs beyond crack sealing.


During the application process, it’s important to maintain your material at the temperature recommended by the manufacturer, usually between 380 and 410 degrees Fahrenheit. According to Julian, under-heated sealant will affect adhesion, and over-heated sealant will degrade the properties of the sealant. All photos courtesy of Crafco Inc.

During the application process, it’s important to maintain your material at the temperature recommended by the manufacturer, usually between 380 and 410 degrees Fahrenheit. According to Julian, under-heated sealant will affect adhesion, and over-heated sealant will degrade the properties of the sealant. All photos courtesy of Crafco Inc.

Prepare for the Job

Before starting the job, you’ll need to consider the weather you’ll be working with.

“During spring and fall, cracks are in an average position—not completely open and not completely closed,” Julian said.

That’s the best time to crack seal. Most sealant manufacturers and agencies require a pavement surface temperature of 40 degrees and rising. You should also avoid sealing if rain is expected.

Before heading to the job, you’ll also need to make sure all of your equipment is in working order, that shaping tools are clean, and that you have the right wand tips for the job.

Once you arrive on the job site, you must prepare your cracks. According to Julian, cleaning the crack and ensuring it is dry is one of the most important aspects of successful application and good material adhesion.

According to Shapiro, one of the first steps is to use a router or saw to widen and deepen existing cracks and create a clean, solid edge for sealant to adhere to. “This process should extend the life of the sealant by up to 50 percent.”

“If [sealant adheres to unclean and unsound asphalt,] and there’s movement, the unsound asphalt may be pulled off by the sealant, or secondary cracking may occur,” Julian said.

When deciding between routing and sawing, it’s important to determine the types of cracks you’re dealing with. Shapiro said routing can follow existing cracks in any direction, but sawing can only cut straight cracks.

When routing, produce a rout centered over the crack to provide a uniform bonding surface on both sides of the crack. “Routing on one side of the crack is more likely to result in loss of adhesion on the side that wasn’t cut,” Julian said. She also suggests routing at least 1/8 of an inch from each side of the crack, but that the reservoir should never be wider than 1.5 inches or less than 3/8 of an inch. You should also pay attention to excessive spalling, taking care to inspect the cutters or pins to determine if they need to be replaced and slowing down your routing operations.

Shapiro recommends routing on roads with less than 20 percent crack density. “When sealing cracks in pavement with greater than 20 percent crack density, simple cleaning and sealing of the cracks is recommended,” he said.

Next, you’ll need to ensure the surface is clean and dry. Shapiro recommends using a compressor with sufficient pressure and velocity that is also equipped with a water trap to remove particles that could prevent bonding in the cracks. Julian recommends air pressure no less than 90 PSI and to keep the nozzle no more than 2 inches from the pavement surface. She also recommends walking forward, not backward, for best results, and elevating and fanning the nozzle across the pavement on the last pass to remove debris from the crack area to avoid blowing contaminants back into the cracks.

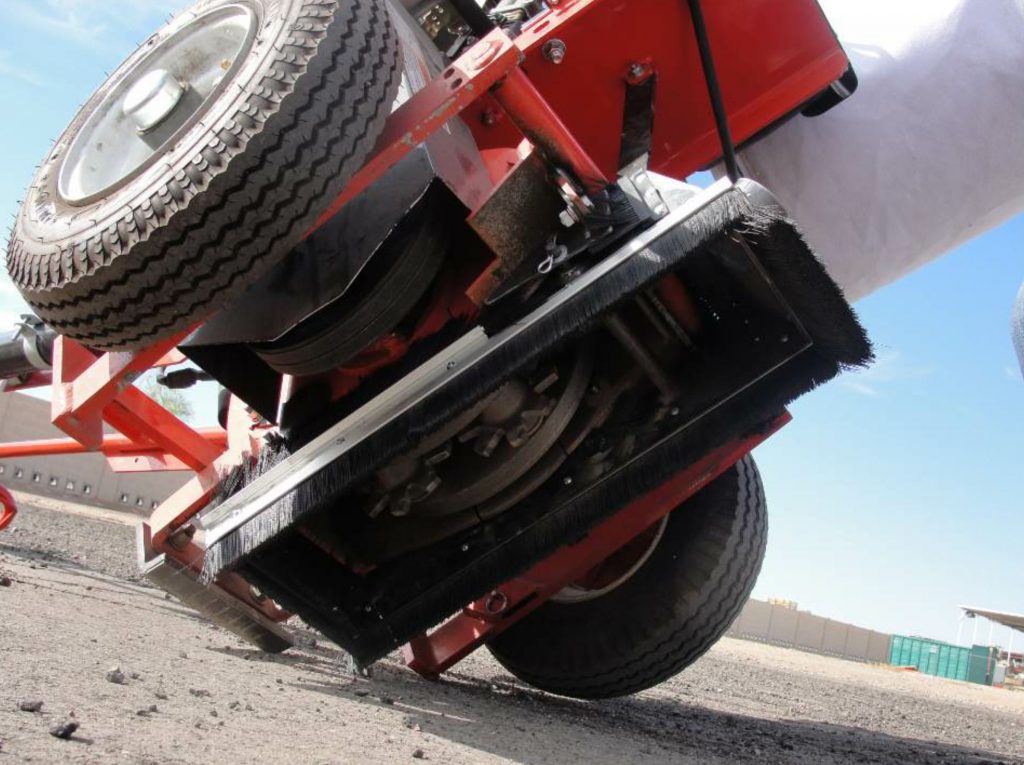
Julian adds that you can also clean with a vacuum or wire brush. Vacuum systems can be used in areas that are sensitive to air quality and do not permit compressed air blowing operations. Wire brushing involves a rotating, narrow, round wire brush that helps remove debris and is often used along with compressed air.

“Power brushing can be very effective at removing adhered surface coatings that compressed air cannot remove,” Julian said, adding that brushes do wear quickly and require frequent changing.

It’s important to ensure debris from one crack doesn’t get blown into cracks that have already been cleaned, and to time your operation so cleaning happens just before sealing to avoid debris blowing back into cleaned cracks.

Moisture, like dirt, can also be a barrier to adhesion. According to FHWA, using a hot air lance on the cracks will help minimize moisture.

Julian recommends using a hot air lance when crack sealing in moist climates, at night, and at temperatures below the dew point. “Hot air lancing cleans cracks by removing debris and burning vegetation, and dries cracks by removing moisture and warming the pavement,” she said. “It’s also useful for increasing pavement temperatures during cooler conditions or winter crack sealing.”

As the cracks can become moist quickly after hot air lancing, it’s important that your sealing operation happens shortly afterwards. However, you must take extreme care not to burn the pavement. Although slight darkening of the pavement is normal, excessive darkening, smoking or dislodgement of aggregates are signs of overheating.

“Any pavement that is saturated with water shouldn’t be sealed, even with a hot air lance,” Shapiro added. “Any dampness, discoloration due to moisture, as well as frost or dew should be avoided during crack sealing.”

According to Julian, while some bubbling in the installed sealant material is common, excessive bubbling can be caused by moisture in the crack, indicating that it should be dried to a greater degree before you continue sealing.


According to Julian, crack sealing is different from crack filling, both in the objective of the treatment and the material used.

According to Julian, crack sealing is different from crack filling, both in the objective of the treatment and the material used.

Apply the Sealant

During the application process, it’s important to maintain your material at the temperature recommended by the manufacturer, usually between 380 and 410 degrees Fahrenheit.

According to Julian, under-heated sealant will affect adhesion, and over-heated sealant will degrade the properties of the sealant. If sealant is under-heated, sealing operations should stop until the sealant is able to reach proper application temperature recommended by the manufacturer. Some over-heated material will be thick and stringy, while others will thin, depending on the sealant formula. Over-heated sealant must be disposed of.

You should check the temperature periodically throughout the job to ensure proper temperatures and keep the melter partially full—Julian suggests at least ¾ full—to help maintain temperature uniformity. She recommends adding sealant blocks one at a time at the installation rate, rather than all at once. Crack sealing operations do not need to stop as you add blocks, as long as you maintain the required temperature.

Although many melters self-regulate temperatures, it’s important to manually check as there may be areas of temperature variation within the melter kettle. If using unheated hoses and the temperature of the material exiting the hose doesn’t meet specified installation temperatures, circulate the product through the hose and back into the melter until the product reaches the appropriate temperature in the hose.

When filling the crack, it’s important to fill from the bottom up to assure a complete seal.

There are a variety of finishing techniques used in crack sealing. Overbanding acts as a “band-aid” over the crack, while reservoirs can improve adhesion and sealant life. Some projects call for a flush match of sealant and pavement, and some require a combination of techniques.

According to Julian, generally speaking, the longest lasting and most cost effective option is a routed reservoir with a band-aid to allow the pavement to move with changes in the pavement and protect the crack from damage.

In general, Shapiro said, cracks should be filled no higher than 1/8 of an inch above the pavement. “It’s necessary to keep the material tight to the pavement surface. This will keep it safe from tire imprint marks and snow plow damage,” he said.

To combat sagging as sealant cools and shrinks, some OEMs recommend filling the crack ¾ of the way and then allowing it to cool before filling completely. Other OEMs suggest filling the cracks to the proper height and returning to any cracks that are too low.

“You also want to keep drips and puddles to a minimum,” Julian said. Drips can be reduced by using a drip stopper on the tip. In the case of puddles of excess sealant, remove by heating a flat blade and cutting puddle excess without harming the treatment.

You should keep traffic off the crack sealed surface until the sealant has cured to avoid tracking. If you need to open the pavement to traffic quickly, blot the crack using either a detacking agent or limestone dust. Once blotted, the area can be opened to traffic immediately.


The Last Step is a Good Seal

Sealcoating is an important part of the pavement maintenance process. “Every year that goes by, the elements destroy some of the [asphalt cement] in the asphalt,” said Brent Loutzenhiser, owner of sealcoating tank manufacturer Seal-Rite.

Although he recommends that you always check with your sealcoat manufacturer for their recommendations, sealing new pavement within its first season could result in longer drying times for the sealant, but there comes a time when the customer needs to lock out the elements to protect his parking lot investment.

From then on, Loutzenhiser recommends sealing every 3 to 5 years, but it depends on the quality of the previous sealcoat, traffic, weather and other wear factors. For example, convenience store and fast food chain parking lots may need to be sealed annually.

When it comes to sealing well, Loutzenhiser sees some common mistakes. “The biggest mistake I see is when contractors don’t know how to mix the sealer, how to apply it, or even what kind of sealer it is,” he said. “So many people buy sealer from a middleman, and that’s fine, but you need to know who makes the sealer so you can find out how it’s supposed to be applied.

“Manufacturers have engineers that have spent a lot of time figuring out how to mix the sealer and the best way to apply it to make it last the longest,” Loutzenhiser continued. And it changes for every sealant from every manufacturer. “You need to follow each manufacturers’ instructions to make sure you’re doing it correctly.”

One of his personal pet peeves is neglecting to add sand, which adds needed friction, to the sealant. “Usually this is because they’ve had a machine that couldn’t handle it, or they didn’t know they needed to,” Loutzenhiser said. “If you have to go to court because someone slipped and got hurt on a lot you sealed, the manufacturer of that sealant will submit exactly how the sealant should have been applied. If you didn’t put sand in there when they said you needed to, you could be held liable.”