Best Practices for Asphalt Overlays and Thin Lifts
BY AsphaltPro Staff
When it comes to minor surface distress, sometimes the best option is to perform an overlay.
“Overlays have some distinct advantages compared to less costly surface maintenance treatments,” said Terry Humphrey, a training consultant at Caterpillar Paving Products, Peoria, Illinois. “In addition to sealing shallow fatigue cracks, overlays add strength to the existing structure and provide support for heavier loads with less chance of stress failures in the bottom layer of asphalt. Overlays can restore the proper transverse profile (slope) and improve longitudinal profile (smoothness).”
Overlays are an ideal tool to upgrade the existing pavement’s structure, as long as the increase in elevation doesn’t create a drainage or clearance issue, Humphrey said.
However, the pavement must be in suitable condition. According to Humphrey, overlays generally aren’t used if the pavement has full-depth cracks, block cracking, deep ruts in the wheel paths or underlying base problems, such as moisture or deformation.
“If the failure is from structural damage, the repair needs to be made before a new surface is placed,” said Al Cleeland, in business development at VT LeeBoy Inc., Lincolnton, North Carolina. “The top layer is only as good as the bottom base. If the base is weak, you may have to remove the old and add virgin or recycled base materials in its place before you start the final overlay.”
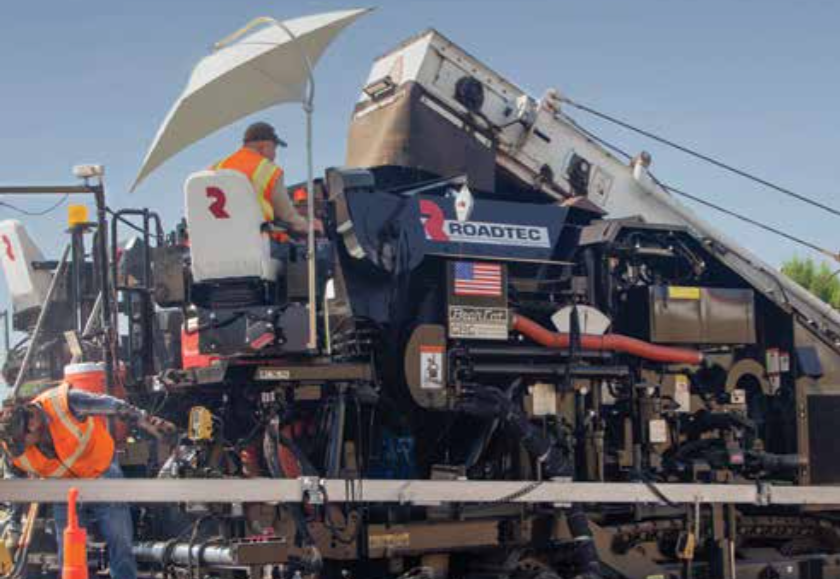
“To know the extent of the damage, you really need to cut a core—or several cores—of the project to find out what’s going on,” said Richard Kramer with Roadtec Inc., Chattanooga. “If the pavement is only showing surface distress, the thin overlay can work. If it’s major, you’ll have to go deeper.”
For agency jobs, Kramer said, the contractor is paving based on the bid specs. “But when it comes to commercial paving, it’s a whole other world,” he said. “Then it’s up to the contractor to decide whether it is minor environmental damage or failure of the asphalt that’s there.”
According to Mark Bolick, general manager of product support at LeeBoy, overlays are a suitable solution when:
- a pavement surface is oxidized with minor surface cracking;
- there is a loss of skid resistance;
- wheel paths need to be leveled; or
- there has been minor water intrusion.
A conventional overlay is at least 1.5 inches thick, while a thin overlay is less than 1.5 inches thick. In this section of the article, we’ll outline tips for—and best practices of—paving overlays and thin lifts.
“A thin lift improves the road surface from environmental wear, improves the skid resistance and has a minor leveling improvement,” Cleeland said.
When it comes to selecting the right solution, Kramer said it depends on the pavement.
“If you have a road that’s 15 years old and only showing some surface delamination and minor cracking that’s not letting water go through, a thin overlay will seal the road and keep water out, which is the number one problem,” Kramer said. “But you have to be preventative about it. You have to act before it’s too late.”
Best Practices for Paving Overlays
According to Kramer, the three most important things a contractor can do to ensure the best overlay results are to use proper planning, communication and an experienced crew.
Proper planning starts with determining the cause of the distress to figure out if an overlay will solve the problem.
For example, overlays can only solve surface cracking. “If the pavement is cracked all the way to the base, an overlay won’t cure it,” Kramer said. “That cracking will come back pretty soon.”
When it comes to performing overlays on pavement that includes rutting, Humphrey said the rutting must not be too deep. “If the depth of the rut is more than half an inch, the variation in overlay thickness will cause variable density and increase the likelihood that the ruts will re-appear quickly,” Humphrey said. “Depending on the layer thickness and the nominal maximum aggregate size, the screed may not float over these high spots. Instead, the screed will drag aggregates and the surface of the mat will be open. Moisture will penetrate in these areas and a pothole will soon develop.
“Consequently, thickness will be somewhat variable transversely across the width of the mat,” Humphrey continued. “Mat thickness should be at least twice as great as the largest aggregate in the mix over the high spots. This will help prevent dragging aggregates under the screed and will improve the likelihood of achieving acceptable density.”
To maximize the quality of your overlay, severe rutting—and any severe issues, for that matter—should be addressed prior to the installation of the overlay, Bolick said.
For example, in the case of severe rutting, Humphrey recommends removing a portion of the rutted surface to a depth twice that of the rut using a cold planer. “Or, a truing and leveling course should be placed to fill the ruts prior to overlay,” he added.
Then, you can start planning to perform your overlay, starting with cleaning all areas that need to be resurfaced and applying a tack coat—the best practices of which have been covered in previous articles from AsphaltPro.
“The most common mistakes on overlays are not doing the proper cleaning and prepping of the base,” Bolick said, “and laying too thin a layer of material for the road demands…Make sure the lift thickness being applied meets strength requirements for the traffic loading.”
After you’ve determined the depth of the mat, it’s important—as Kramer said—to plan ahead and keep your trucking on schedule to make sure you consistently have hot mix. Kramer suggests shorter hauls from the plant and making sure your haul trucks have tarps and insulated beds. “Schedule those trucks according to your paving speed.”
It’s also important to communicate best paving practices to your crew regularly.
“When you set down to pave, you have to go through Paving 101—make sure the screed is hot, make sure you have a proper lead time, that your flow gates and tow points are set right, etc.,” Kramer said. If you get those pieces in place, it’s all about making small corrections as you start paving. “You don’t want to Johnny Windmill that screw.” Small changes make a big difference on a thin lift.
Kramer said it’s also important to remind your screed operator to pay attention to what’s ahead, but also what’s behind them.
“The biggest mistake is not looking behind at the mat, or not being able to read it properly,” Kramer said. “If there’s pulling or tearing, something is out of adjustment. If you’re leaving a little bitty line, fix it. That flaw will be a failure in the future.”
Kramer also stressed the importance of properly sealed joints, which require the proper amount of overlap—a minimum of ½ an inch and a maximum of 1 inch.
“One of biggest mistakes is to lap over too much or not enough,” Kramer said. “If you’re trying to run that endgate dead on the joint, you’re going to starve it. If you’re 1.5 inches lapped over, it’s going to hold the screed up and you’re going to have poor compaction at the joint because the roller won’t compact all that extra material.”
The third key is running with an experienced crew. If experience is in short supply, that doesn’t mean training has to be. Kramer said there are many options to train your crew, from manufacturers’ training programs, to conferences and special consultants.
“It’s hard to hold your crew accountable for their mistakes if they haven’t been trained properly,” Kramer said. “I teach a lot of schools [for Roadtec], and I’m constantly telling people during those trainings that we’re artists. We’re painting this world black and we should do the best job we can on every job because it’s a reflection on you and on the asphalt industry.”
Best Practices for Paving Thin Lifts
As with any pavement repair, you have to start with a clean surface.
“The cleanliness of the pavement and performing a tack coat is critical,” Kramer said. “A lot of people don’t put much emphasis on a tack coat. It might not matter for thick lifts, but thin lifts? Absolutely.”
You also have to be sure to apply the right amount of tack. “If you put too much down, it’s going to bleed through that thin lift, and if you apply too little, the pavement will slide on the tack.”
Once the crew starts paving, one of the easiest mistakes to make on thin lifts is paving too fast, Humphrey said. To prevent this, he recommends choosing your speed based on the type of mix being laid and the effect of high speed paving on the grade control system. He also suggests selecting a speed that consumes the mix in an efficient manner and planning the compaction process to match the paving speed.
“One of the easiest mistakes to make when paving thin lifts is not getting the roller on the material fast enough when paving in cold weather,” Bolick said. Another mistake he sees is selecting a mix with the incorrect aggregate size.
“You need to be putting down material that has good stone-to-stone contact,” Cleeland added. He suggests consulting your state DOT standards, your state paving association or national associations when determining the right mix to use, depending on the pavement’s level and type of distress.
When it comes to mix selection, Humphrey said a mix with a modified binder, such as polymer or latex, will be stickier and stiffer, and might tear under the screed at high paving speeds.
“Hairline cracks appear in the surface of the mat,” he said. “Slow the paving speed until the cracks disappear.” He also suggests using screed vibration and adjusting the frequency so the vibration isn’t too excessive. Overall, he believes mix designs without modified binders are easier to apply as thin lifts.
You also need to consider the effect of high paving speed on the grade control system. “In general, any grade and slope control system begins to lose accuracy when the paving speed exceeds around 60 feet per minute,” he said. “In other words, the grade control system cannot measure deviations and react in a timely fashion.”
At speeds greater than 60 feet per minute, Humphrey said tow point movement can become erratic. To remedy this, he recommends limit paving speeds to 60 feet per minute or less, or pave manually to ensure smoothness.
It’s also important to calculate a paving speed that allows you to pave continuously without long stops waiting for trucks. “The speed calculation is based on tons per hour delivered to the job site, paving width and paving depth,” Humphrey said.
For example, he said, to lay down 200 tons per hour at 1.5 inches thick and 12 feet wide, the paving speed would be 35 feet per minute using a material transfer device, or 43 feet per minute with truck transfer to the paver. However, if the thickness in this scenario was changed to 1 inch, the speed could increase to 52 feet per minute and 64 feet per minute, respectively, to maintain the 200-TPH production rate.
“Obviously, higher production rates will drive even higher paving speeds,” Humphrey said.
Lastly, Humphrey said it’s vital to match the compaction process with the paver speed.
“The trickiest part of paving thin lifts is probably not the laydown process,” Humphrey said. “It is the compaction process. We have to achieve adequate density but we are limited as to the amount of force we can apply to a thin mat and we are limited in the time available.”
It’s important to apply only the amount of compaction force the mat can accept. “Too much force can fracture aggregates, create a washboard effect, and actually introduce air voids into the asphalt layer,” Humphrey said.
In addition to force limitations, you’re also working against the clock. “Time available for compaction is less when working on thin mats,” Humphrey said. “Thin mats lose heat quickly, especially when the ambient temperature is relatively low.”
Consider the following example:
Thickness: 1 ½ inches
Ambient temp: 45 degrees Fahrenheit
Wind speed: 10 mph
Sky: overcast
Base temp: 45 degrees Fahrenheit
Base type: milled asphalt
Mix design: dense
AC: PG58-34
Laydown temperature: 280 degrees Fahrenheit
Cessation temperature: 175 degrees Fahrenheit
“Under these conditions, there are 14 minutes available to complete the compaction process,” Humphrey said. “Knowing the time available for compaction will help you set up the compaction process before you begin to work. It can also help determine the plant output temperature that will aid the compaction process.”
If vibratory compaction is possible, Humphrey recommends a breakdown roller with high frequency (more than 3400 vpm) and low amplitude (drum movement between 0.01 and 0.019 inches).
To illustrate this point, imagine a breakdown roller with 67-inch drums and a frequency of 3800 vpm performing a seven-pass pattern. With those details in mind, that roller can keep up with a paver laying a 12-foot-wide mat at 35 feet per minute. However, when the mat thickness is less than 1 inch, the paver could be moving at 52 feet per minute. At that rate, you’ll need two breakdown rollers with 67-inch drums or a wider drum roller that can develop a five-pass pattern, Humphrey said.
If the drum starts to bounce, Humphrey suggests trying to keep one drum vibratory and one drum static. If vibration isn’t possible, he recommends choosing a roller with the highest static force, or pounds per linear inch.
He also recommends using caution when stopping the compactor to reverse direction. The best practice for rolling is to slow the roller to a gradual stop before reversing. This is especially true for thin-lift paving.
“Thin mats tear easily,” Humphrey said. “Do not make aggressive turns while stopping, especially when using compactors with drum widths of 79 or 84 inches. Continue to stop at an angle, just a smaller angle.” Split drum models can help minimize tearing on thin mats, he said.
As with any job, attention to detail is key.
“You have to observe what you’re doing to make sure you’re getting mat quality,” Kramer said. “If you see a mistake, fix it. Uniform thickness means uniform density and compaction. Laying the perfect mat will lead to perfect results.”