How to Place an Ultra Thin Lift Pavement Treatment
BY Sandy Lender
When you place a lift that’s only three quarters of an inch thick, you have no room for error. Any paving foreman worth his salt will tell you mistakes are almost impossible for the roller operator to correct. The thin mat cools quickly, giving the rolling team little time to press out the voids. Speed may feel like the name of the game, but let’s begin slowly. Let’s do some planning to get the ultra thin lift pavement treatment performed right.
An agency might request an ultra thin lift for a pavement that has a pavement condition index (PCI) of 70 or greater, according to the Pavement Preservation & Recycling Alliance (PPRA) website. This means pavements with minor friction loss or low-severity cracking are candidates for the preservation practice. Jon Young, the executive director of the Hawaii Asphalt Paving Industry (HAPI) pointed out in the association’s October newsletter that “agencies can extend the life of pavements that are in good to fair condition, decreasing life-cycle costs, improving ride, and decreasing roadway noise” with Thinlays. When the agency assigns this treatment, the contractor is working to protect a surface from oxidation, to maintain grade and slope, and/or to address minor distresses, among other things. There’s not a lot of room to play with.
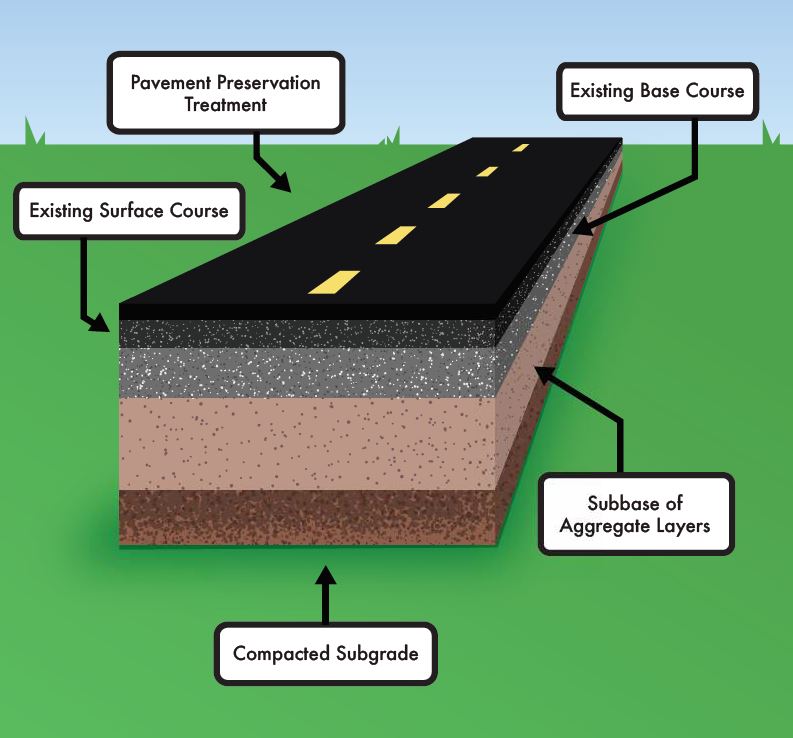
The treatment course for this pavement with a PCI of 70 or greater is the ultra thin lift of 0.5 inch of hot-mix asphalt, which does not add structural integrity, but provides a layer of protection from the elements.
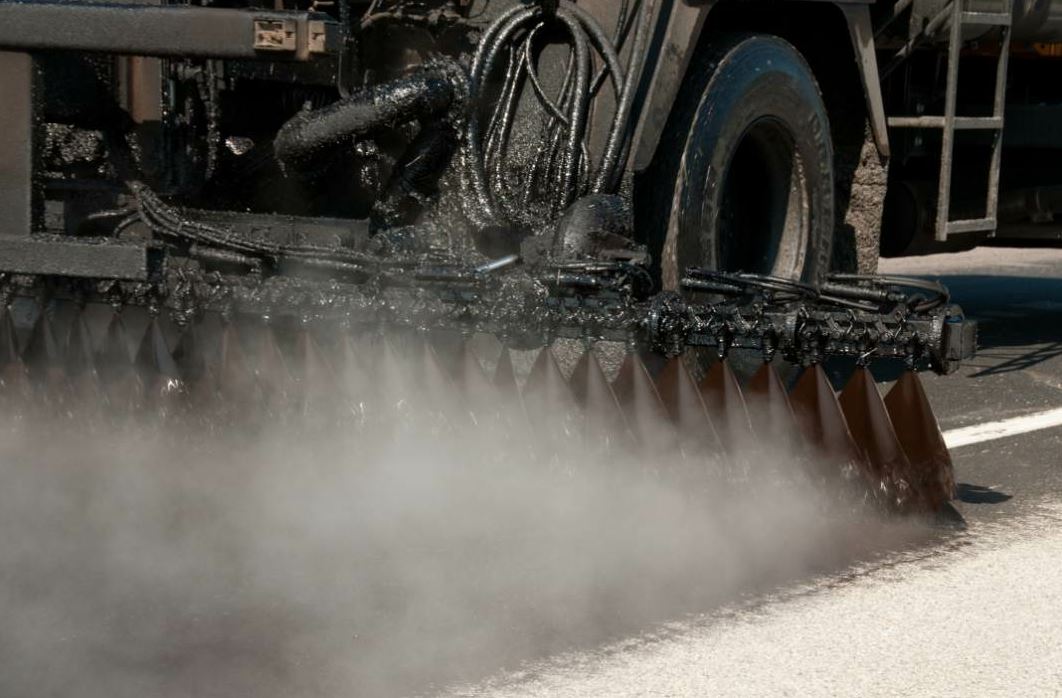
Begin with cleaning. If the surface you plan to overlay is coated with dirt, dust, leaves, rocky material or other detritus, tack or asphalt mix will stick to the undesirable particles. When those particles are swept away by brooms, snow plows, vehicle tires or whathaveyou, the desirable material—your pricy product—goes with them. This is nothing new to paving contractors. Be sure the cleaning of the surface is included in your bid and your work.
The next step is tacking for a good bond. The PPRA folks stated it succinctly: “Because the overlay is thin, the interface between the old and new pavement is in close proximity to the shear forces created by vehicles during braking and turning movements. As a result, the tack coat is extremely important to the long term success of ultra thin lift asphalt. The tack coat creates a bond between the new surface and the old pavement.” AsphaltPro has included best practices for applying tack coats in the past.
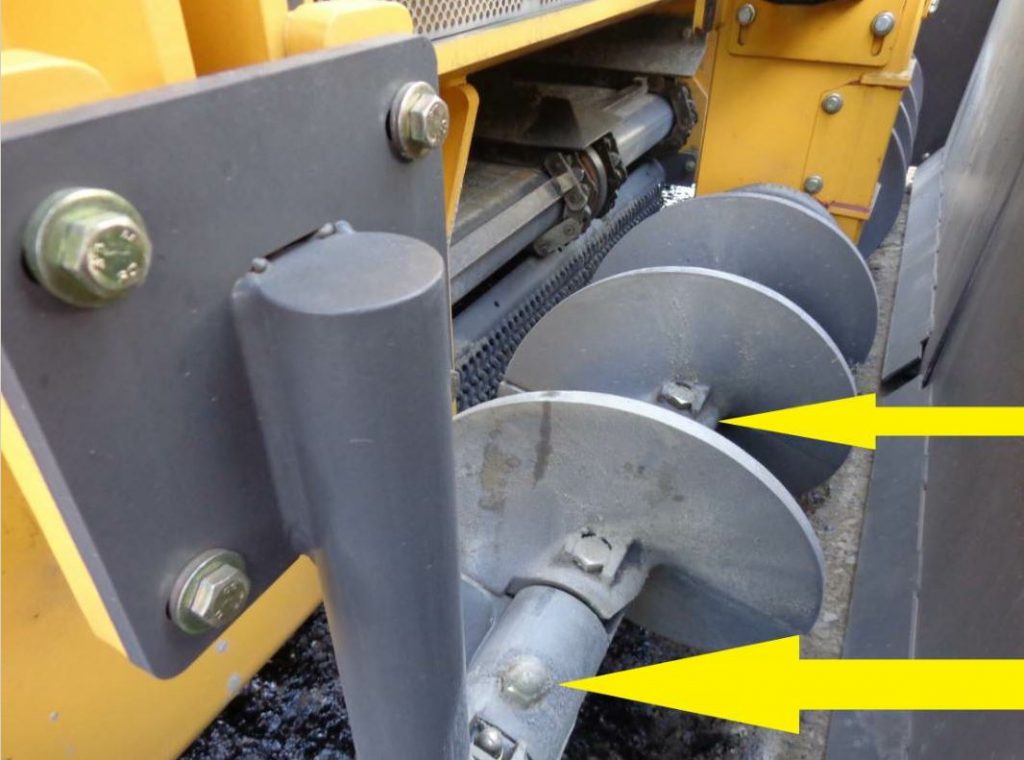
You want to set the augers low enough that you can control the head of material during paving. Keep it at the midpoint of the augers and keep it consistent across the length of the augers. Photo courtesy John Ball of Top Quality Paving & Training
Your next step is to pave. Consider carefully how you’ll deliver asphalt mix to the hopper. Using a spray paver might be your best bet because you can spray the tack immediately prior to the mix going down with no chance for tracking or pickup from any equipment. If you don’t have a spray paver on hand, consider your project parameters and internal traffic control to allow the haul truck to travel adjacent to the paving lane. If you’re able to offset a material transfer vehicle, you can avoid tracking and pickup of tack while giving your crew some best material delivery practices.
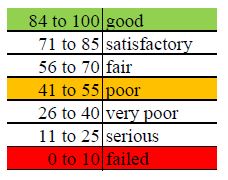
Standard Pavement Condition Index™ Rating Scale. Source information courtesy International Slurry Surfacing Association
With material traveling nicely from truck to hopper to flow gates, you’ll want to know that your head of material is optimally designed. Paver OEMs and industry consultants suggest setting the augers at a specific height and distance from the back of the paver to set your crew up for success in this area. The auger chamber needs to confine the material while rotating it under the screed. You don’t want to push and shove the material, causing larger stones to separate from the pile and segregate off to the side. Instead, Consultant John Ball of Top Quality Paving & Training, Manchester, New Hampshire, reminded readers to set the augers so the head of material rises to the midpoint of the augers consistently across the width of the auger chamber. The screed or paver operator will kneel down and measure the augers before paving. You want the bottom of the auger blade curl to be 2 inches greater than the lift you’ll pave. Check out the Training department from the
December issue, titled “How to Set the Augers” here for a primer on how to set the auger height and speed.
Now let’s do some quick math. If you were paving a 2-inch lift, you would set the augers so that the bottom curve of the blade is 4 inches from the ground. To pave a thin lift of 0.5 inch, this means the auger should be set so that the curve of the blade is 2.5 inches from the ground. If the auger physically cannot be lowered to that height from the ground, this isn’t the end of the world. You’ll watch the head of material carefully while you pave, according to the team from Roadtec Inc., Chattanooga.
“Get it down as close as possible…within an inch or two. They will carry a slightly higher head of material but head of material will just have to be managed more accurately. It requires a slightly different tow point setting but all of this is within range. You get as close as you can. You will carry more material than is ideal, but as long as the head of material is uniform height and consistently moving under the screed, it will be okay.”
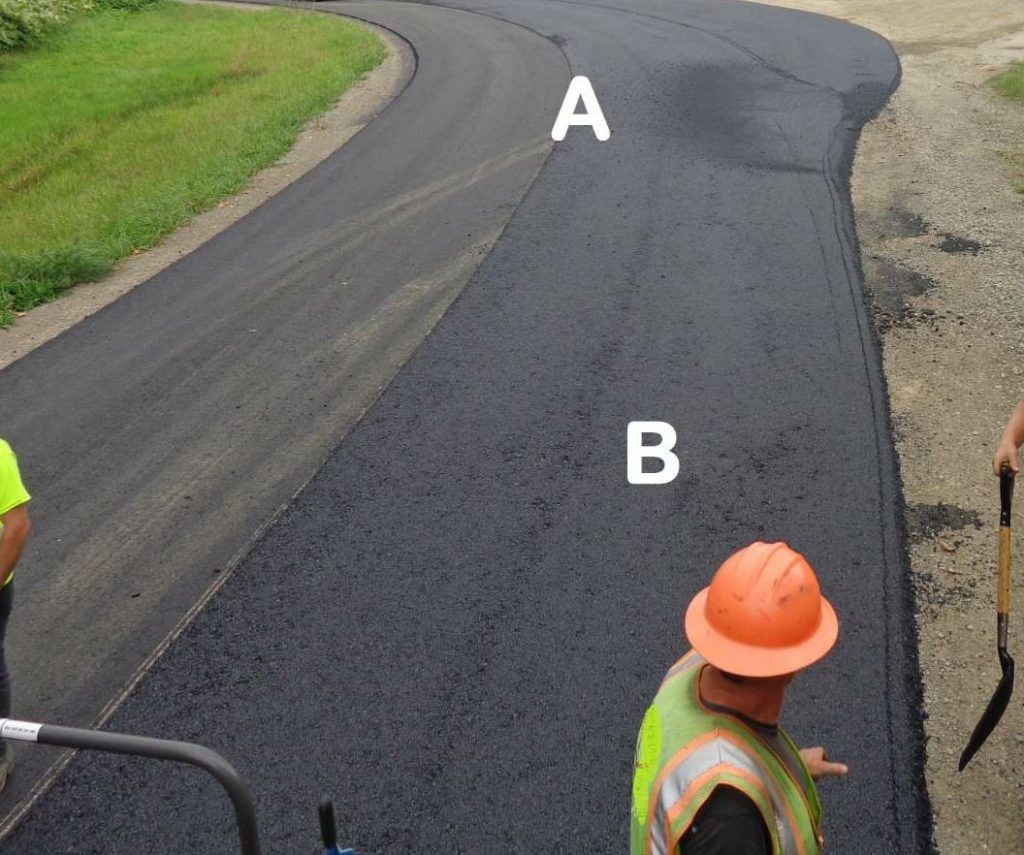
When placing HMA with a brand new paver in excellent condition, this crew had some best practices to work out. You’ll see the transition in the background—by letter A—cost them a smooth mat because they had to fill in with handwork, casting material over the mat. You’ll see end of load segregation—at letter B—and centerline segregation from inconsistent head of material. Luckily, this was the binder course, which meant they could cover the mistakes with the next lift. This crew knows how to pave and how to work around a bad few feet of mix, but this kind of poor section couldn’t get rolled out or covered up if they only had one lift of 0.5 inch to work with. This would have to be removed and replaced to be right. Photo courtesy withheld by request
A slightly different tow point setting should offer the screed excellent control, according to Ball. “You will move the tow point cylinder down from center to maybe 2, to give the screed a little more down-pressure,” Ball suggested. You’ll just run it a little tighter, he advised.
When it’s time to roll the mat, you have another change to consider. Ball reminded readers, you’re not really “compacting” when you’ve got a lift that’s ¾-inch or less; you’re sealing. If you set the steel wheel breakdown roller at 3,000 vibrations per minute and start pounding away, you’ll break rocks and ruin the project. Instead, Ball advises you roll the ultra thin lift in static mode. Follow that with the steel wheel roller in static mode to remove the lines and get final density. Make sure your roller operators are watching temperature closely. The ultra thin lift will lose temperature more quickly than a conventional mat of 1.5 or 2 inches. That makes a difference in time to get compaction.
Best Tack Practices
The Pavement Preservation & Recycling Alliance offers a host of good ideas from member companies at its recently launched website. A few of the pages are devoted to proper tack—or bond—coats to ensure monolithic structures are built to perfection. For example:
- For long-term storage, store emulsion in vertical tanks.
- Store at a temperature between 50 and 180 degrees Fahrenheit.
- Don’t allow the emulsion to freeze or to exceed a temperature of 212 degrees Fahrenheit. Don’t load elevated-temperature material.
- Protect pump, valves and lines from freezing.
- Don’t allow emulsion to free-fall into a vessel when loading; bottom-loading is preferred.
- Circulate material every two weeks while heating.
- Don’t mix anionic and cationic emulsions.
- When diluting, add warm water to the emulsion; check with the manufacturer for guidance.
- Always wear proper PPE to safely handle the emulsion, even though asphalt emulsions are nonhazardous materials and do not require placards.
When it’s time to spray tack:
Step 1. Clean the pavement.
Step 2. Maintain the emulsion at proper temperature.
Step 3. Determine the residual asphalt content required for the project.
Step 4. Calculate the application rate.
Step 5. Set the spray bar height to achieve the triple overlap of spray.
Step 6. Ensure all nozzles are the correct, same size.
Step 7. Set all spray nozzles at the same angle.
Step 8. Ensure all nozzles are clean and functioning properly.
Step 9. Ensure the tack wagon is calibrated.
Step 10. Double-check that you get a uniform application of the tack coat.
Step 11. Prevent tracking and pickup of the emulsion.
Other resources:
Tack Coat Best Practices NAPA QIP-128
Tack Coats: How and what to apply from Colorado Asphalt Pavement Association
FHWA Technical Bulletin on Tack Coat Best Practices
Source: www.roadresource.org
Mike Heitzman and Ray Brown at the National Center for Asphalt Technology (NCAT) and John Hickey at the Asphalt Pavement Association of Oregon, authored a guide, Thinlays for Pavement Preservation (Information Series 141), that provides comprehensive guidance on the proper use of Thinlays, how they fit within pavement management systems, when and how they should be used based on existing pavement condition, how the mixes should be developed and specified, and best practices for construction. It’s available at the National Asphalt Pavement Association’s online store (click here).