Age the Binder Properly for Testing
BY Pamela Turner
NCAT offers pressure aging vessel tips and tricks for your new lab tech to get the process right.
The Pressure Aging Vessel (PAV) procedure described in AASHTO R28 /ASTM D6521 is used to long-term age liquid asphalt binders in the Superpave Performance Graded (PG) asphalt binder grading system. Depending on such factors as environment, binder chemistry, and which researcher you’re talking to, PAV aging is generally considered to be equivalent to 7 to 10 years of pavement life. Asphalt binder that has been aged in the PAV is used for the intermediate temperature Dynamic Shear Rheometer (DSR) and Bending Beam Rheometer (BBR), both of which measure the asphalt binder’s resistance to cracking.
The PAV procedure itself is relatively simple: pour some asphalt binder into flat, round pans, and then cook for 20 hours in what’s essentially a large pressure cooker. Twenty hours. That’s overnight for most folks in a lab setting. Add in about two to three hours of preparation time and you can start to see why it’s important to get the procedure right on the first try. Telling your supervisor that you need to redo a set of PAV samples can lead to a very stressful morning. Here are a few tricks and pitfalls that any asphalt lab tech should be aware of when using the PAV.
Your PAV will vary in appearance depending on its age, model and manufacturer, but it should consist of the same basic parts: aging chamber with locking lid, temperature controller, pressure controller, timer, warning lights, and bottled air. If you haven’t done so already, familiarize yourself with the equipment and know what each part does. Read the manual. Find out who your service representative is, and don’t be afraid to call and ask questions. They get paid to answer.
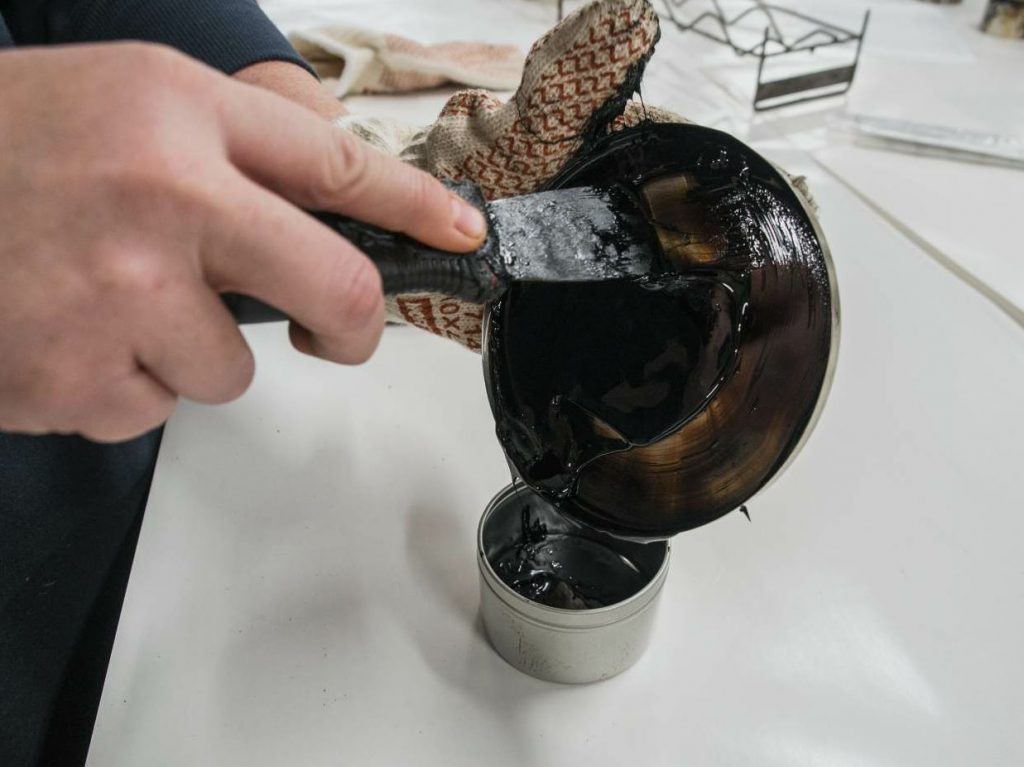
After the aging procedure is finished, most asphalt binders will be too stiff to pour easily out of the pans, but you will need to get them out of the pan and into a more suitable storage container, as shown here.
If your PAV doesn’t already have one, get a battery backup for it. Many PAV samples have been lost due to storms, power surges, squirrels on power lines, etc. Both AASHTO and ASTM have limits on how long the temperature inside the oven can be outside of the allowed tolerance and require that the samples be discarded if the limit is exceeded. Having a backup power source will prevent the oven from cooling down if the power goes off.
Don’t be afraid of the oven. Veteran lab folks love to tell the new guys that the PAV will explode and send the lid through the roof. It won’t. We just like to watch you jump every time it makes a noise. Almost all of the PAVs in use these days have lids that lock with bolts, and the chances of every bolt failing at once are pretty slim. If your oven has an O-ring, make sure to check it every day to make sure it isn’t damaged. If an O-ring breaks while the oven is pressurized, it is loud and may damage your samples. It will sound like the oven has exploded, but it’s really just the air releasing through the break. If this happens, close your air tank and hit the emergency stop on your oven.
Safety Note: Always wait until the oven has completely depressurized before trying to open it.
PAV ovens use tanks of compressed air to pressurize the aging vessel. Because these are finite sources of air, always check to make sure there is enough air in the tank to complete the procedure before hitting “start” on the oven.
As with any piece of equipment in your lab, keep your PAV oven calibrated (temperature, pressure and pressure-release rate) and perform any required maintenance in a timely fashion. This will go a long way toward preventing mishaps and lost samples, and will keep your supervisor’s blood pressure down.
Prepare PAV Samples
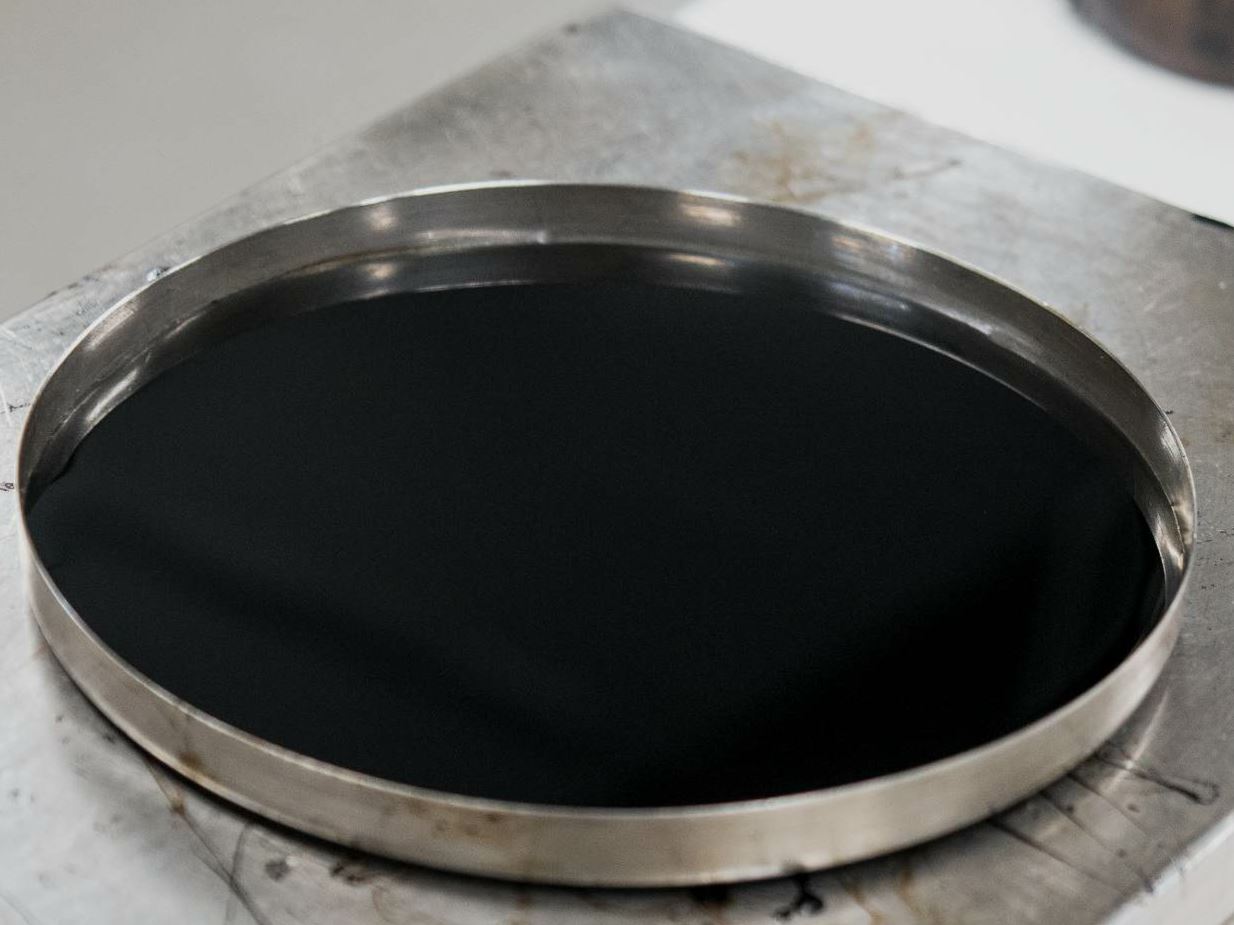
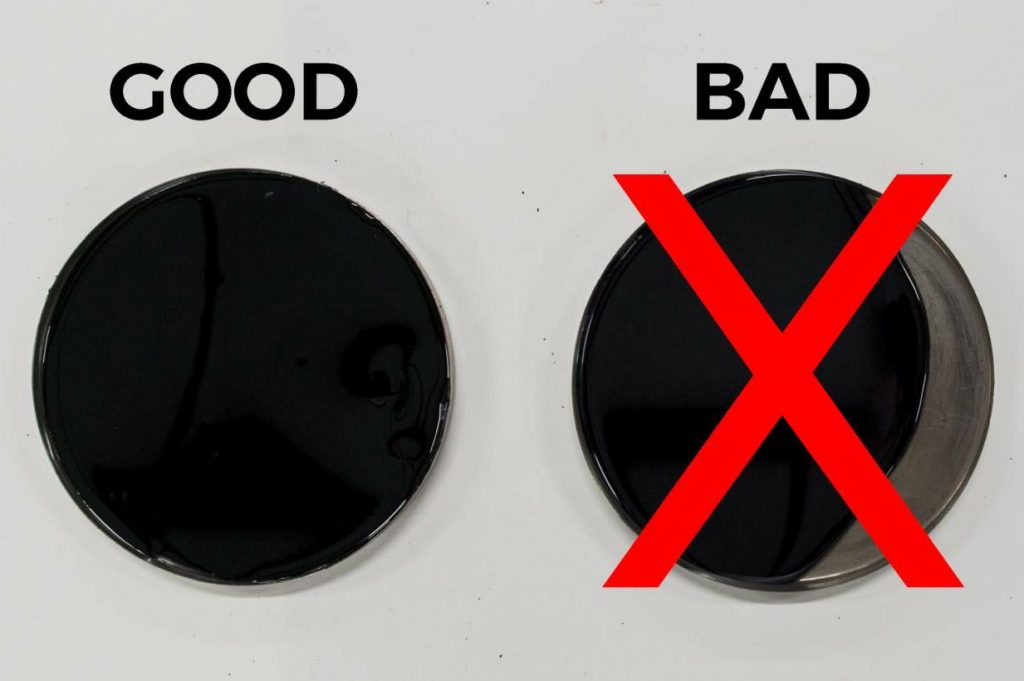
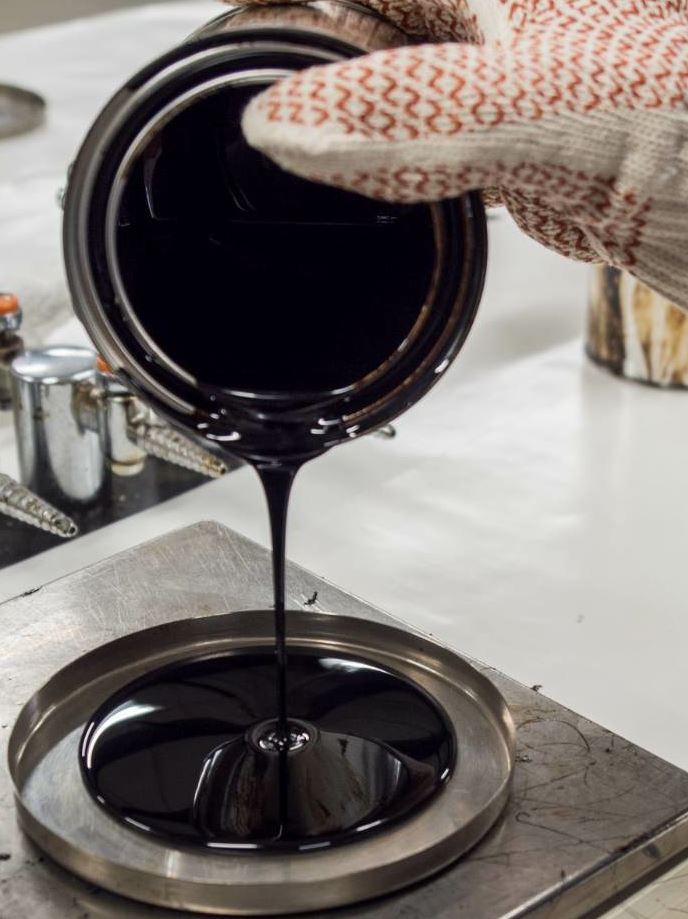
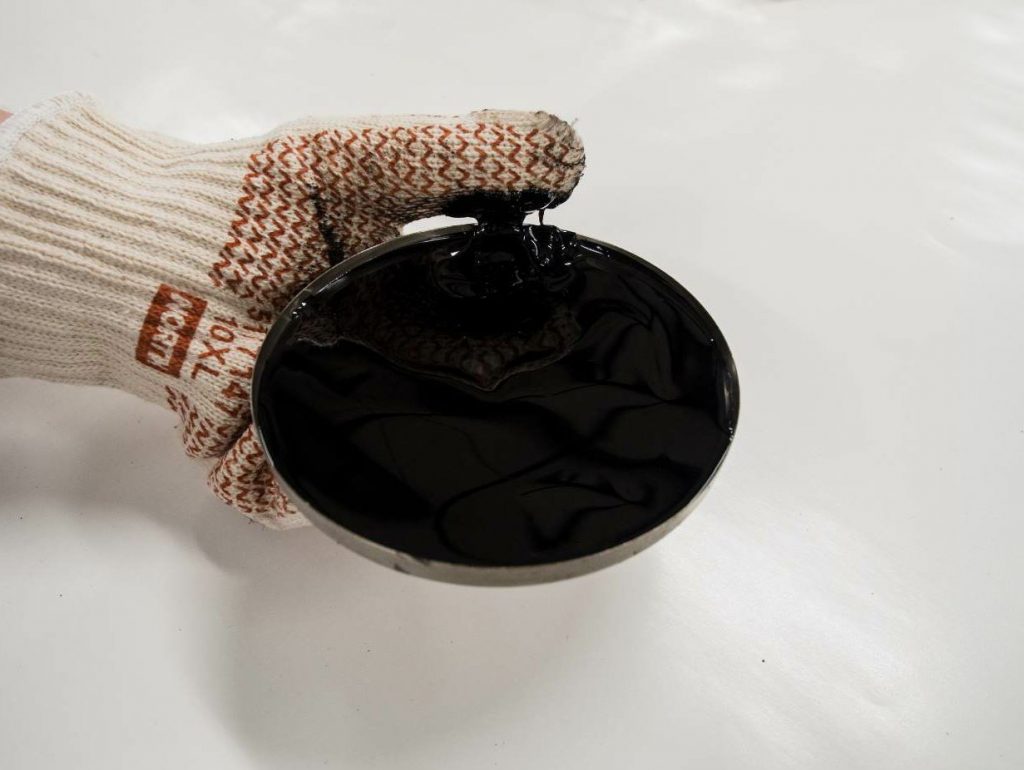
A PAV sample consists of 50 ± 0.5 grams of rolling thin film oven (RTFO, AASHTO T240) aged asphalt binder in a flat, stainless steel pan. Periodically check the pans to make sure they aren’t warped by placing them on a flat surface and visually inspecting them. Warped pans will lead to uneven sample thickness and uneven aging of the asphalt binder. If you have some old aluminum pans hanging around your lab in a drawer or storage cabinet, go ahead and throw them away. They are not rigid enough, will warp due to the heat of the sample, and are not allowed in either the ASTM or AASHTO methods.
A properly poured PAV sample will have an even thickness across the entire pan. If the asphalt binder cools down during pouring and doesn’t reach the edges, you may place the filled pan back into the oven for a very brief time. Preheating the PAV pans prior to pouring can also help with this step.
Be aware of where your thumbs are when handling PAV pans. Many pairs of gloves have been destroyed by a careless finger getting stuck in a PAV sample. More importantly, this contaminates your sample and will affect the weight of the sample in the pan. Carry hot PAV pans flat on the palm of your hand or use a pair of tongs.
Run the Procedure
Read AASHTO R28 or ASTM D6521 (or both, depending on what your laboratory runs) and familiarize yourself with the time limits, temperature tolerances, pressure requirements, and steps for loading and unloading the PAV. If you write a checklist or summary sheet to help you remember these, keep in mind that all test methods are updated periodically. Don’t rely on a checklist or any other abbreviated description of the procedure that is several years old. It may not match the current requirements for the test method. Review test methods frequently to keep up with changes.
Make sure you’re using the correct aging temperature for the asphalt binder that you are aging. While most asphalt binders are aged at 100°C, there are two other options. Soft asphalt binders used in cold climates (PG 52 or lower high PG grade) will be aged at 90°C unless otherwise specified. PG 70 and above asphalt binders, which are used in a desert climate, have the option of being aged at 110°C if the specifying agency requests it.
PAV pan holders can hold up to nine PAV pans. Unlike the RTFO procedure, the PAV does not require that all pans must have the same material. This allows multiple asphalt binders to be aged at the same time. If you are aging multiple samples, label your PAV pans clearly and make sure any labels from previous samples have been removed.
After placing the pan holder inside the PAV, make sure it’s level. Checking the level of the holder outside of the PAV is fine, and checking the level of the PAV oven itself is also good, but neither of these will tell you if the actual test specimens are level. Checking the level of the pan holder in the actual PAV chamber is required and should be done as part of your calibration/verification routine.
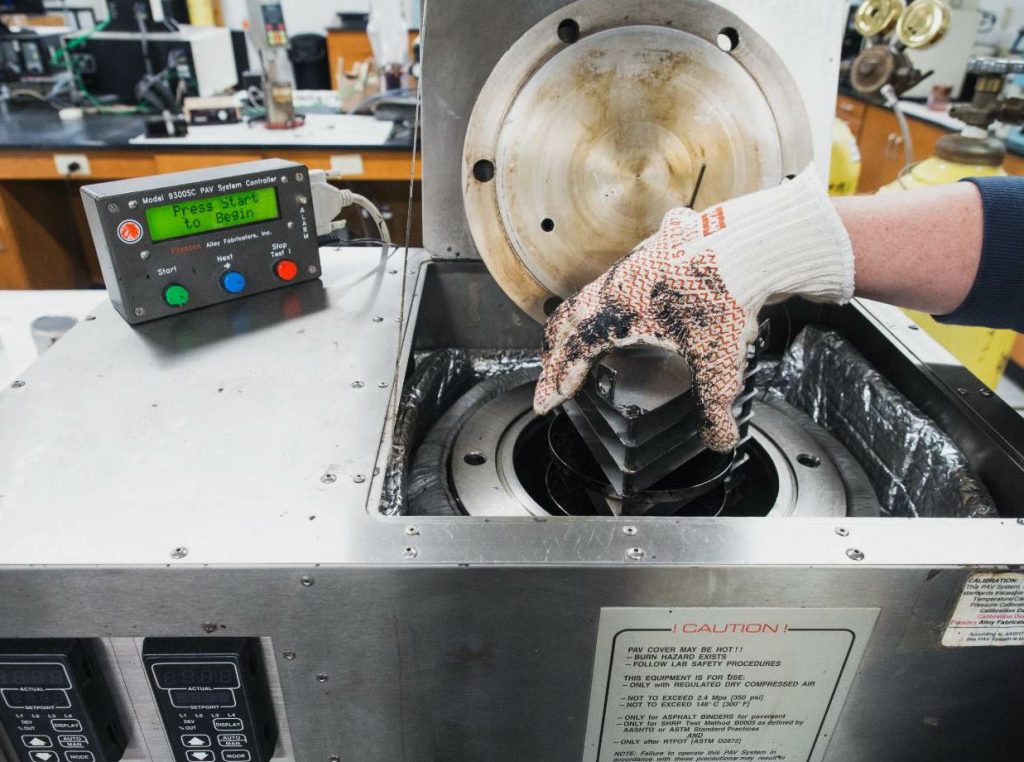
This may sound simple, but when placing the pan holder into the oven, be careful not to tilt it. Tilting will let the pans fall out.
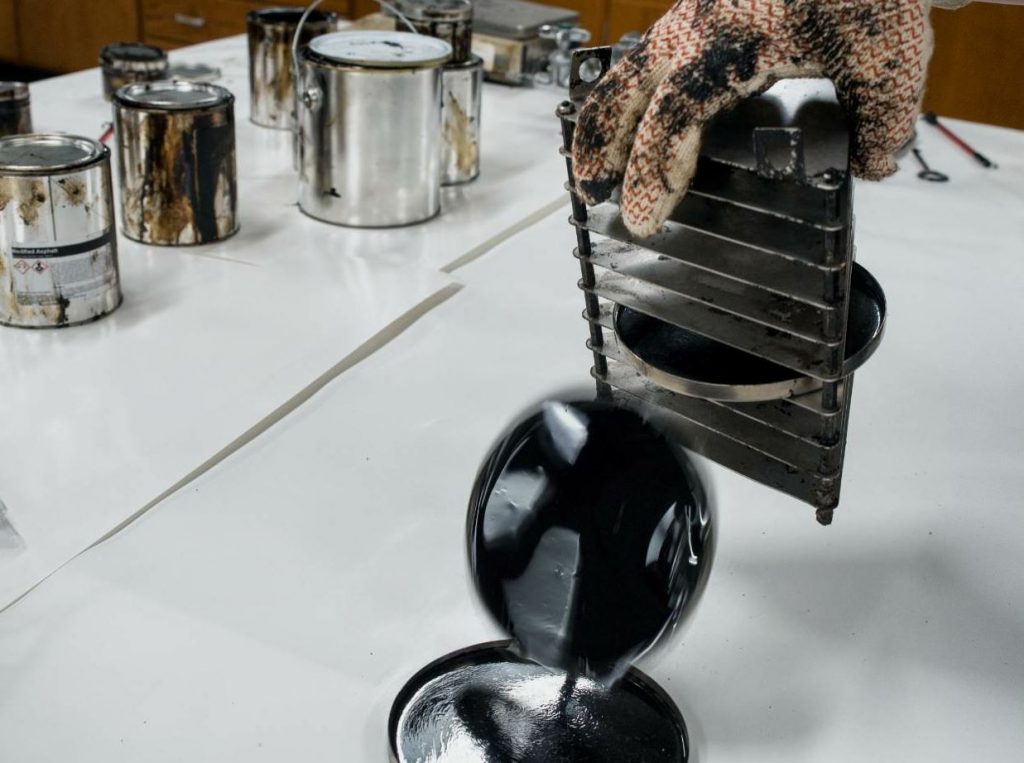
After the aging procedure is finished, you will need to get the asphalt binder out of the pan and into a more suitable storage container. Most asphalt binders will be too stiff to pour out of the pans easily at typical PAV aging temperatures. Fifteen minutes in an oven at 163°C is usually sufficient to make the transfer process easier. If you need to use temperatures hotter than 175°C, make sure to write this in your testing notes.
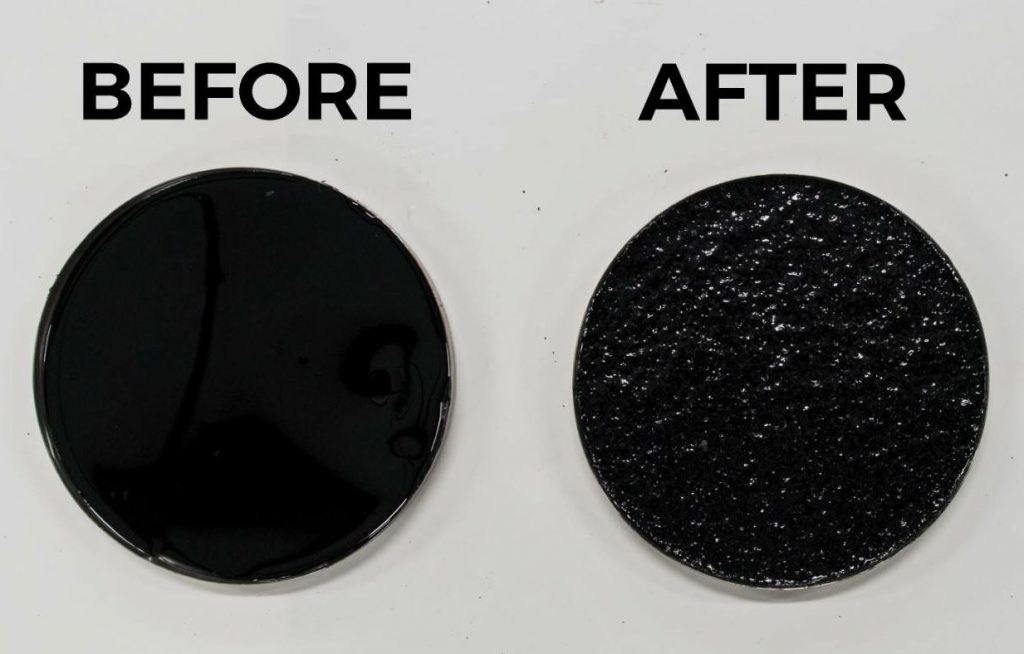
Your PAV aged asphalt binder will most likely have a significant amount of air bubbles trapped inside, which need to be removed prior to testing. The size and quantity of the air bubbles depend on the asphalt binder chemistry and stiffness. Vacuum degassing of the samples is no longer a required practice, but if your lab has a vacuum oven, this is the quickest and easiest way to remove air from your samples. If you do not use a vacuum oven, place the samples in an oven at 163°C (or whatever temperature is necessary) and gently stir periodically until the air is removed.
In summary, the PAV aging procedure isn’t complicated (or dangerous). As with all tests conducted in your lab, making sure that you understand how the equipment works, keeping the equipment calibrated and maintained, and reviewing the published test methods frequently are the most important steps that you can take. Don’t be afraid to ask questions of your supervisor, co-workers or equipment manufacturers.
Step 1. Get comfortable with the PAV itself. Learn it.
Step 2. Calibrate and maintain the equipment properly.
Step 3. Review published test methods. Make sure you’re using the most current, required steps.
Step 4. When in doubt, ask for help.