Top Tips to Nail Your Paver Start‑Off Every Time
Asphalt paving contractor and consultant shares tips and techniques to set up each pull successfully
Do you ever get frustrated after setting up the paver and pulling off a start joint only to realize you are too low or too high after just the first 13 to 16 feet (4 to 5 meters) or so? We all take pride in delivering the best outcomes we can and need to do so repeatedly for our good reputation and good pay. Let me share a few “go to” tips for achieving consistently great results that avoid re-work, stopping the paver, or having to fix low spots because the screed took a dive immediately after coming off the starting reference.
Low or high spots created by an improper takeoff cause handwork that affects the quality of your lift. Typically, it takes the crew at least 10 to 15 minutes to correct a poor start-off defect. And no matter how good your guys are (and I’m blessed to have several incredibly talented team members who possess excellent handwork skills), handwork always shows up as a different mat texture. It usually doesn’t look as nice or as “ironed” as a well compacted, homogenous lift placed by a paver that’s been set up properly and operated correctly.
Let’s talk about how to start off correctly.
Typically, it takes the crew at least 10 to 15 minutes to correct a poor start-off defect. And no matter how good your guys are, handwork always shows up as a different mat texture.
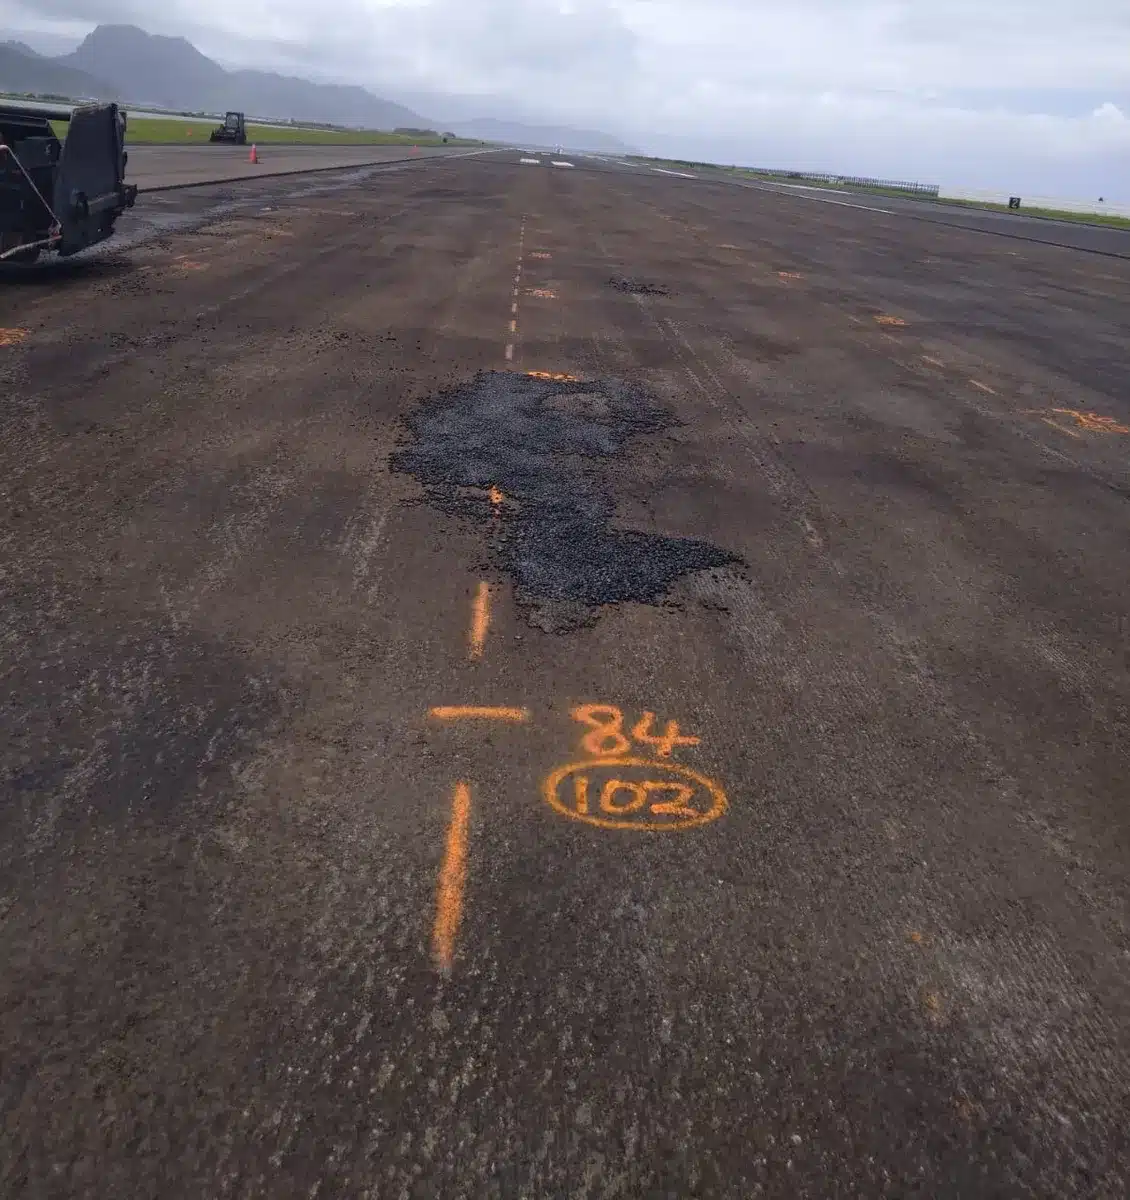
Irregular areas must be filled by hand prior to paving. You want to pre-compact these areas with a plate compactor or tamper, so you get the entire patch compacted. If you attempt to roll these areas with a steel drum roller, you may bridge the internal area and fail to achieve proper compaction.
Standing on the Shoulders of Giants
First, I would like to reference some excellent steps from Caterpillar with their “Paving by the Numbers” step-by-step process. This is an effective and good method to follow. Most paver manufacturers such as Blaw-Knox, Bomag, Vogele and Roadtec/Astec have their own similar but unique guidelines that are well worth carefully studying and adopting.
In addition, John Ball of Top Quality Paving & Training, Manchester, New Hampshire, has excellent best practices and on-site training. I have attended many of his classes at industry events and can recommend them.
Complex Warehouse Lot Provides Training Opportunity for Commercial Paving Crews
Just so you know, even after 39 years in the asphalt industry, I still attend at least three refresher or new education sessions at events like World of Asphalt (WOA) and CONEXPO-CON/AGG and attend Todd Mansell and Caterpillar’s excellent courses annually. It’s important to stay sharp, up to date and on point with new industry lessons, new techniques and new material types. Plus, one can never have enough good old-fashioned refresher courses. Let’s face it, we don’t always remember every single thing, especially if you don’t do much of a particular technique.
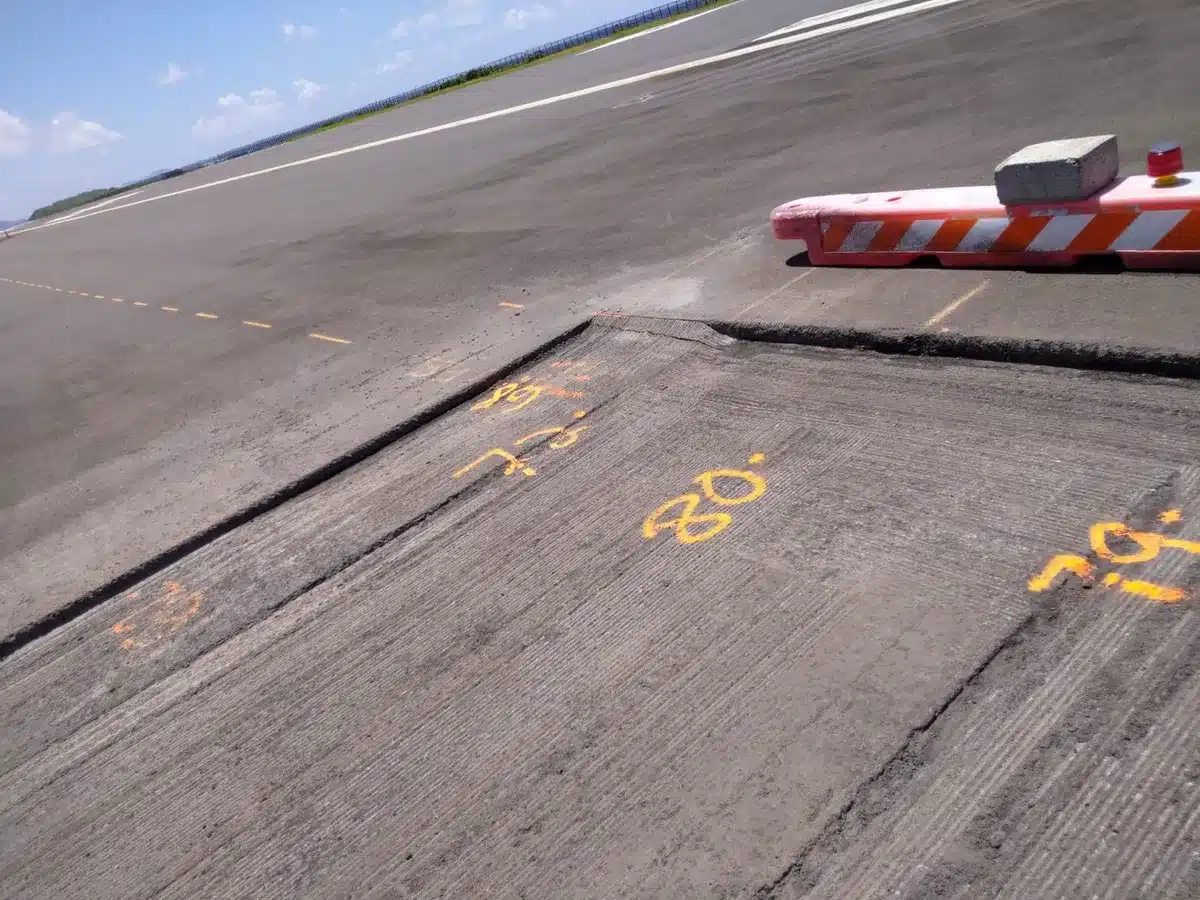
High areas that won’t allow proper depth of paving need to be leveled with the mill. You might think it’s acceptable to leave these “high” areas alone and let the screed scrape across the top of them, saving yourself the cost of material, but these will be areas of low quality in the mat where the compaction train will encounter problems.
Mandatory Start-Up Steps
We want to apply the new practices to our quality paving while remembering the important basics to start off every job right. My go-to start-up steps that I use every single time, no matter what type of job I’m doing, include those discussed here.
I would rather take an extra five to seven minutes at the set-up stage of each pass to be sure these small but critical details are right, than cutting corners and getting caught with a bad start.
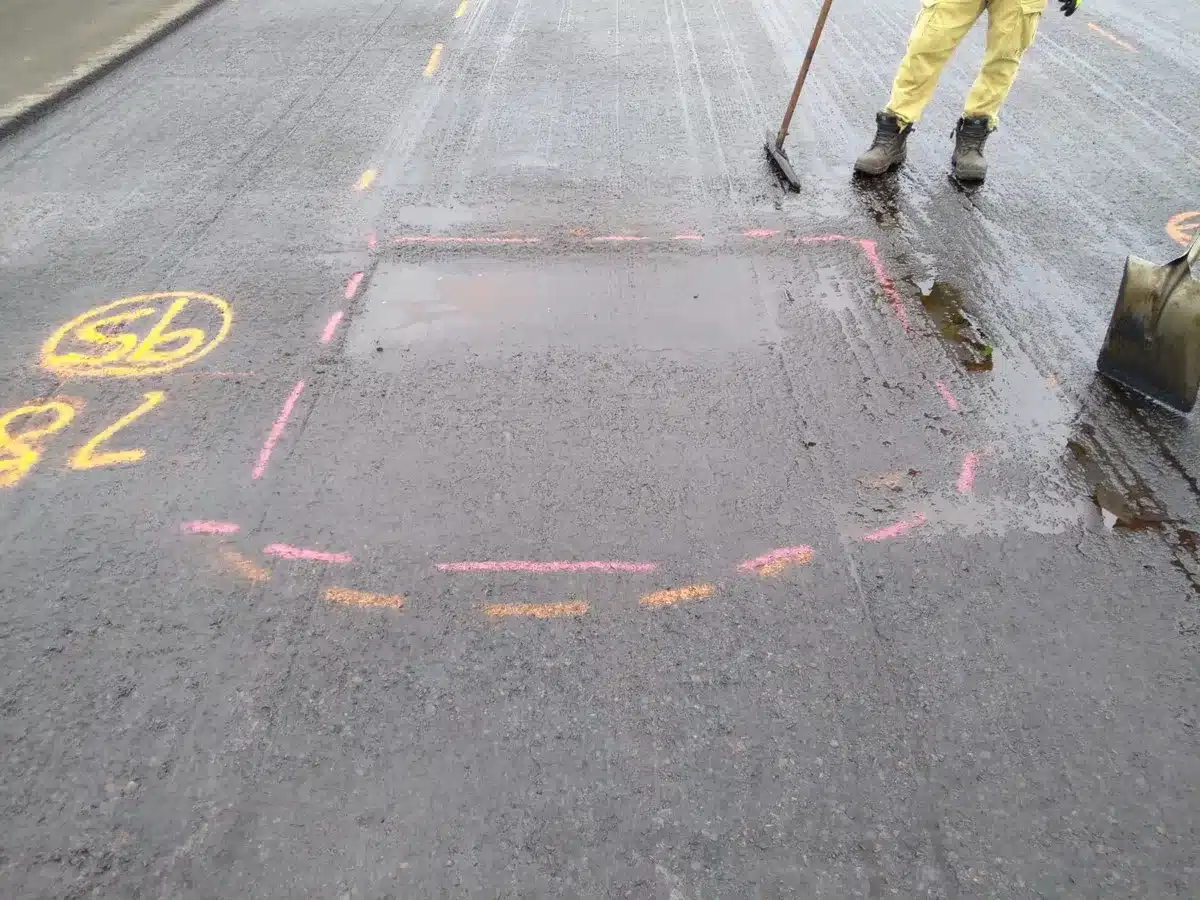
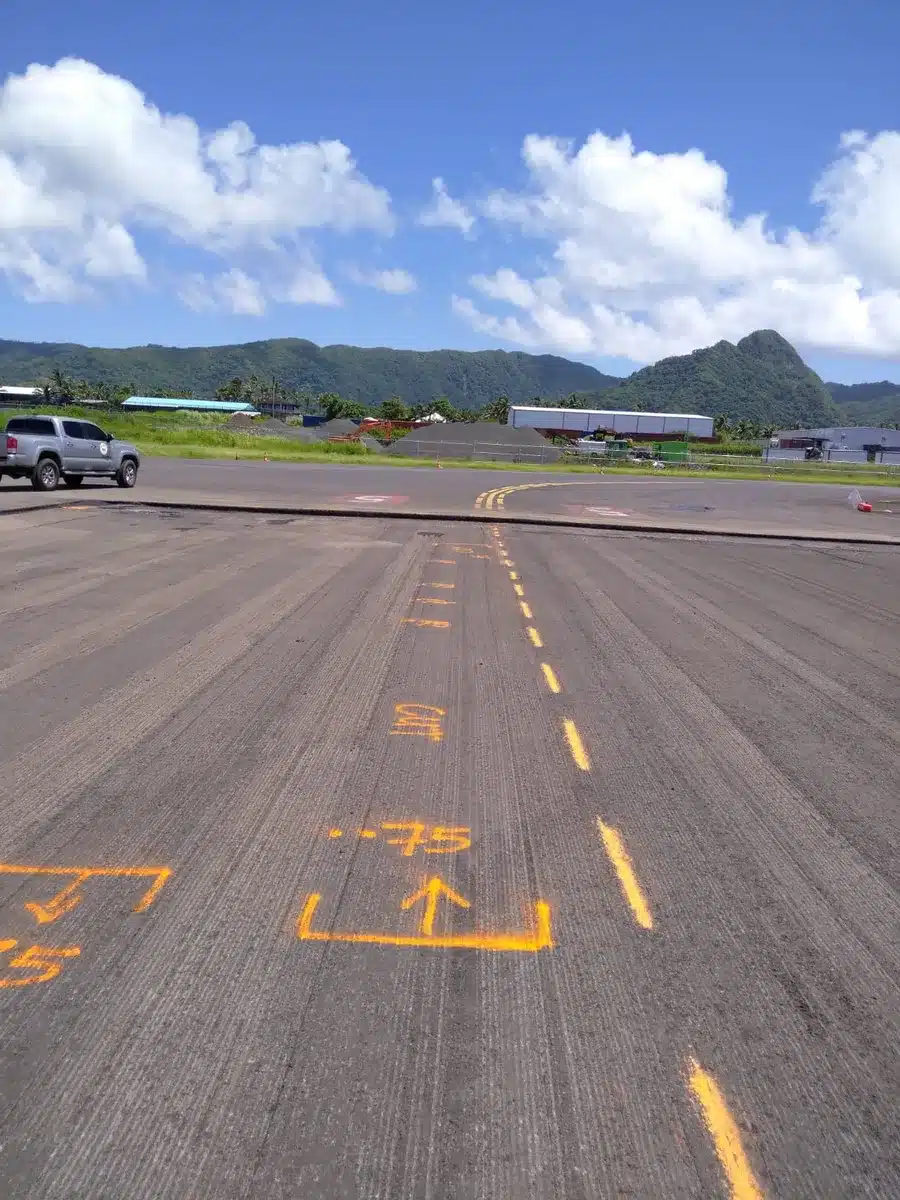
Mark low spots, outlining the area with a color that indicates the repair to be made. On large enough projects, you may wish to write out the tonnage required for repairs.
1. Check the screed and paver.
Ensure the screed plates are not warped or out of shape from being overheated or being hung up coming off a lowboy that didn’t have long enough ramps for a paver. This is surprisingly common.
You cannot expect to deliver quality outcomes with a damaged screed or paver that isn’t within tolerance. A screed is a precision tool that must be treated as such. It needs to be operated professionally by competent people and maintained and repaired as required.
Think of it this way: a professional musician wouldn’t mistreat or neglect their prized guitar or piano, nor would a sportsperson wreck or damage their tennis racket or golf clubs. I’ve never seen a first-class fitter turner or skilled tradesman treat their lathe or other essential tools of trade in a bad manner. We are professional craftsmen; a screed needs to be treated the same way. Respect it and operate it like a pro.
Get underneath it every morning and have a look at it. Don’t just assume it’s okay; verify it! Don’t allow it to be slammed into obstructions trying to avoid the tiniest bit of handwork. Professionals don’t do that.
* Remember: safety first. Be sure to engage the screed locks, apply the parking brake, chock the wheels/tracks etc. before inspecting the equipment.

If you put down a starting tarp, you can avoid having excess material to clean off the existing surface, and you can provide a clean, well-defined starting transverse joint. This allows the breakdown roller to get onto the mat quickly and efficiently. Place your take-off boards (which need to be about 40 inches long) in the correct position on top of the tarp. One of the single most important determiners of nailing a professional take-off joint is sizing the thickness of the take-off boards correctly.
2. Inspect the screed more closely.
Assuming your screed and paver are in acceptable condition to place a great mat, if it’s the first time you’re using this machine (maybe it came from another crew), you need to physically check the screed for the following:
- Check for correct flatness front and rear of the main and extender plates. Use either an aluminum straightedge or a stringline and 3 X equal size nuts to verify the leading edge and trailing edge are essentially flat transversely and if required, a slight positive lead crown. (Check with manufacturers recommendations regarding lead crown; don’t automatically assume it is required.)
- Examine the strike-off plate condition. These often get bent or damaged on ironwork on mill-and-fill jobs, or caught on a lowboy when loading/unloading.
- Check the strike-off plate vertical height. You’ll refer to your screed manufacturer’s recommendations; often it’s ½- to 1-inch (12.5- to 25-mm) above the bottom of the screed plate, but this depends on your material thickness, nominal maximum aggregate size (NMAS) and viscosity of the binder, etc., as these all affect the screed’s ability to float on the mat and one size doesn’t fit all. You have to experiment on different jobs to find the sweet spot for that screed, on that material and thickness that allows the screed to float properly at the right angle of attack.
- Check the extender slope stops are correct, and the scales or gauges for crown, slope and match height are calibrated correctly. Most manufacturers have a step-by-step screed adjustment and set-up process that guides you through these critical checks. You wouldn’t believe the number of times I’ve come across pavers and screeds with bent or missing delta plates, warped or bent screed plates, and screed frames in a poor state of repair.
You cannot achieve precision asphalt paving with a screed that isn’t fit for purpose or in a proper condition for the intended use. Get these basics right first, before even thinking about placing a mat. It’s best to perform this screed check the day before in a workshop with a clean, flat concrete floor and with the assistance of a competent mechanic or fitter. Follow the OEM steps methodically.

Here’s a quick tip! Be sure you lay the tarp down neat, square and straight just back from the edge of the take-off joint, leaving the joint exposed ¾ to 1 inch (19 to 25 mm). This is to allow just enough overlap of material onto the existing grade to form a proper, tight and dense transverse joint, but not so much you then have to go back and start bumping the joint or tempting well-meaning laborers to try to push the edge back. We need to avoid that.
3. Assess the grade.
After you have ensured the tractor and screed are both calibrated and in proper, serviceable condition, you may think you’re ready to go lay some mix. But wait! Have you checked the grade?
A number one mistake we often fall victim to is assuming that the surface we are going to place mix on is flat, smooth and free from high areas and low spots. That’s the exception in my experience; it’s hardly ever within spec. If it’s a commercial car park with grader placed or skid steer placed granular base like stone or base coarse, invariably that will require careful inspection. You may have to check with a straightedge and correct by hand to fill low areas.
Remember: asphalt generally compacts approximately 22 to 25% after the full compaction process. Therefore, if you are placing a 2-inch (50-mm) compacted mat, this means you need to pave it about 2.5 inches (62 mm) loose from the paver to allow enough compaction. When you find those random low spots that are about 1/2- to 1-inch (12.5- to 25-mm) or more, which I guarantee most jobs have, mark them out with spray paint, fill them by hand and compact them before you even think about using the paver.
Prepare Tomorrow’s Transverse Joint for a Fast Start in the Morning
As an example, on a recent FAA resurfacing project my team and I were on, the pre-leveling generally took between 20 and 60 minutes to complete before paving began. This was on an area of around 3,109 square yards (2,600 square meters) per day. We had to comply with less than a 1/4-inch (6.4-mm) finished level tolerance, and as we were only placing a single layer of asphalt, it was essential to ensure the grade we placed it on was level.
You want to plan for a similar 20- to 60-minutes depending on the extent of the areas to be filled. High areas need to be cut off with a milling machine on milled surfaces and cut down by the motor grader on granular base and reprepared and recompacted.
This should be evaluated and identified by the paving supervisor or other competent individual well prior to the crew, paver and gear arriving on site. Inspect each site one to two days prior and preferably rectify these problems before you turn up to pave it.
Get the client to attend the site walkover or pre-handover visit with you so there is no doubting what the situation on the ground is. Preferably get a surveyor to take levels to validate the low areas. Then ensure the client or client’s representative agrees with you on the additional make-up material and time and labor for the fix. You need to get this in writing, or it’s going to be on you after you have paved the project to try and recover the extra costs later. This is such a fundamentally important step in the process for a quality outcome and a happy client.
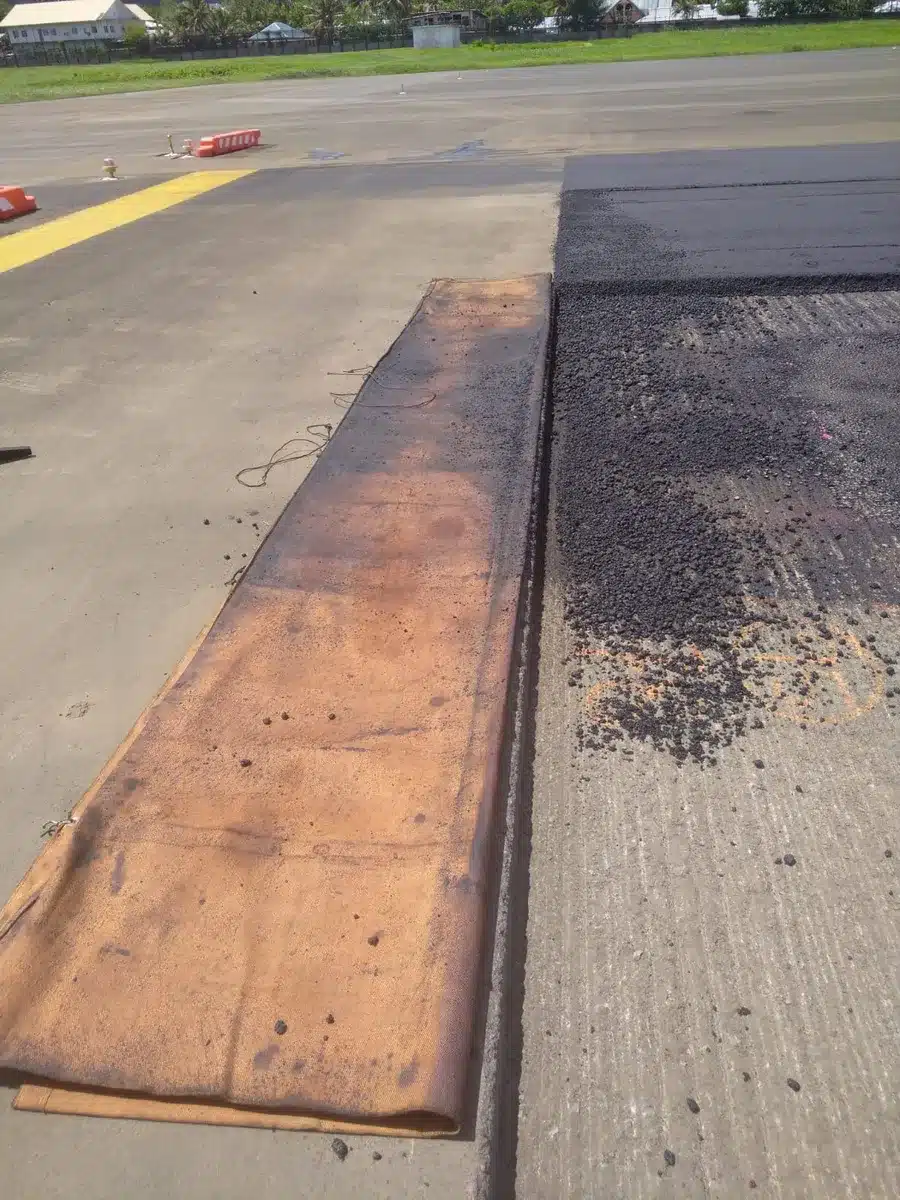
Avoid having to touch the start joint by hand by using a length of truck tarpaulin—or similar tarp material—at the start-off point. You want to place it about 1 inch from the joint and have it extend about 1 to 2 feet wider on each side of the lane.
4. Plan to minimize handwork.
You’ve ensured the paver and screed are in good condition and you’ve ensured the project area is ready for the paving crew to do its best work. Now let’s eliminate handwork at the takeoff joint. Place a tarpaulin at the start point.
It’s all about working smarter, not harder.
A procedure I like to use on any job, whether it be a commercial parking lot, city street or an airport, is to try to avoid having to touch the start joint by hand. I want to avoid having to “fix it up” after the paver’s pulled off the joint. No matter how good your best laborers are, the moment you touch material by hand, some degree of segregation is going to occur, and it will stand out.
Not only that, but handwork also compacts differently than paver placed material due to not having the weight of the screed imparting a degree of pre-compaction on the material. The paver placed mat always has a nice, ironed appearance to it and is always going to be more homogeneous in appearance than handwork if it’s being set up and operated properly and the feed system operating in a consistent, steady manner.
Try to minimize the amount of handwork you need to do, by paying more attention to the set-up steps for the screed, which I’ll share next month.
The tip I’m sharing right now is to use a length of truck tarpaulin—or similar tarp material—at the start-off point. It needs to be at least 1 to 2 feet (305 to 610 mm) wider on each side than the width of the lane. It also should be at least 40 inches (1 m) deep (front to back) to allow enough coverage to avoid material having to be picked up by hand. Just before you are ready to set the paver down to place each pass, lay this tarpaulin down on the grade at the take-off joint.
Place your starting or take-off boards (which need to be about 40 inches or 1 m long) in the correct position on top of the tarpaulin. One of the single most important determiners of nailing a professional take-off joint is sizing the thickness of the take-off boards correctly. If the milling crew didn’t cut that transverse take-off joint quite deep enough, you need to reduce the thickness of your starting reference accordingly. Otherwise, you’re going to be too high and losing time rushing back to fix it by hand.
I would rather take an extra five to seven minutes at the set-up stage of each pass to be sure these small but critical details are right, than cutting corners and getting caught with a bad start. The bad start could take 10 to 15 minutes to sort out and will never look as nice as a joint that was completely placed by the paver.
With these basic start-off tips in mind, you’re set for a successful beginning to each pull. What’s next? See you next month for the sequel to “Start Paving Off Right.”
Benjamin Everett is the owner of About Asphalt Ltd., and has worked in the asphalt industry for nearly four decades. For more information, contact him at bjeverett@aboutasphalt.co.