Paving Speed Changes Quality
BY Sandy Lender
One of the many stressful sights for a paver operator is a line of haul trucks parked ahead of the paving train. Each truck holds at least 18 tons of cooling hot-mix asphalt (HMA) and it’s his job to get that material under the screed. Now. Time is money. Adrenaline tells him to speed up.
Good training tells him to keep a steady pace.
To set an adequate paving speed, the foreman on the job and the paver operator need to have confidence in a host of factors, including:
- the production at the plant;
- the communication skills of the plant operator;
- the trucking foreman;
- the haul truck drivers following directions;
- the weather forecast;
- the paving and compaction train equipment and its uptime; and
- the equipment operators’ training/skill levels.
For the first part of this article, let’s pretend you have the ideal paving scenario. We’ll assume each person on the job knows what he’s responsible for and when.
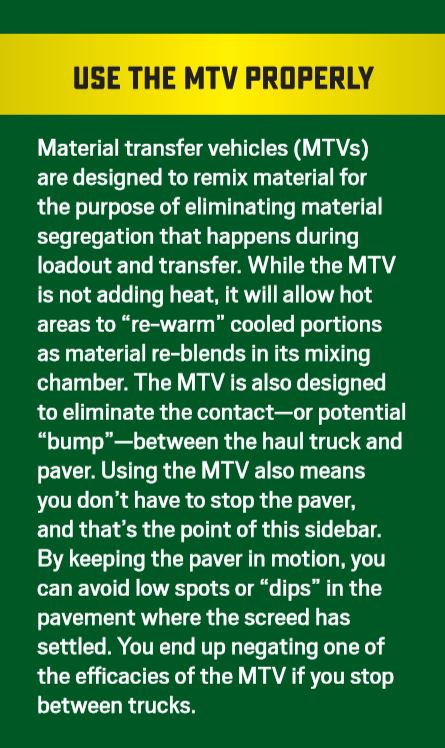
The plant has an excellent uptime and maintenance track record, and the plant operator is staying in touch with the foreman to let him know everything is running smoothly. The trucks are arriving in a perfect round-robin interval (see sidebar on below, “Use the MTV Properly”). The dump man is communicating clearly with each truck driver. The compaction train has planned a stellar rolling pattern and has finely-tuned equipment for getting compaction at the speed you select.
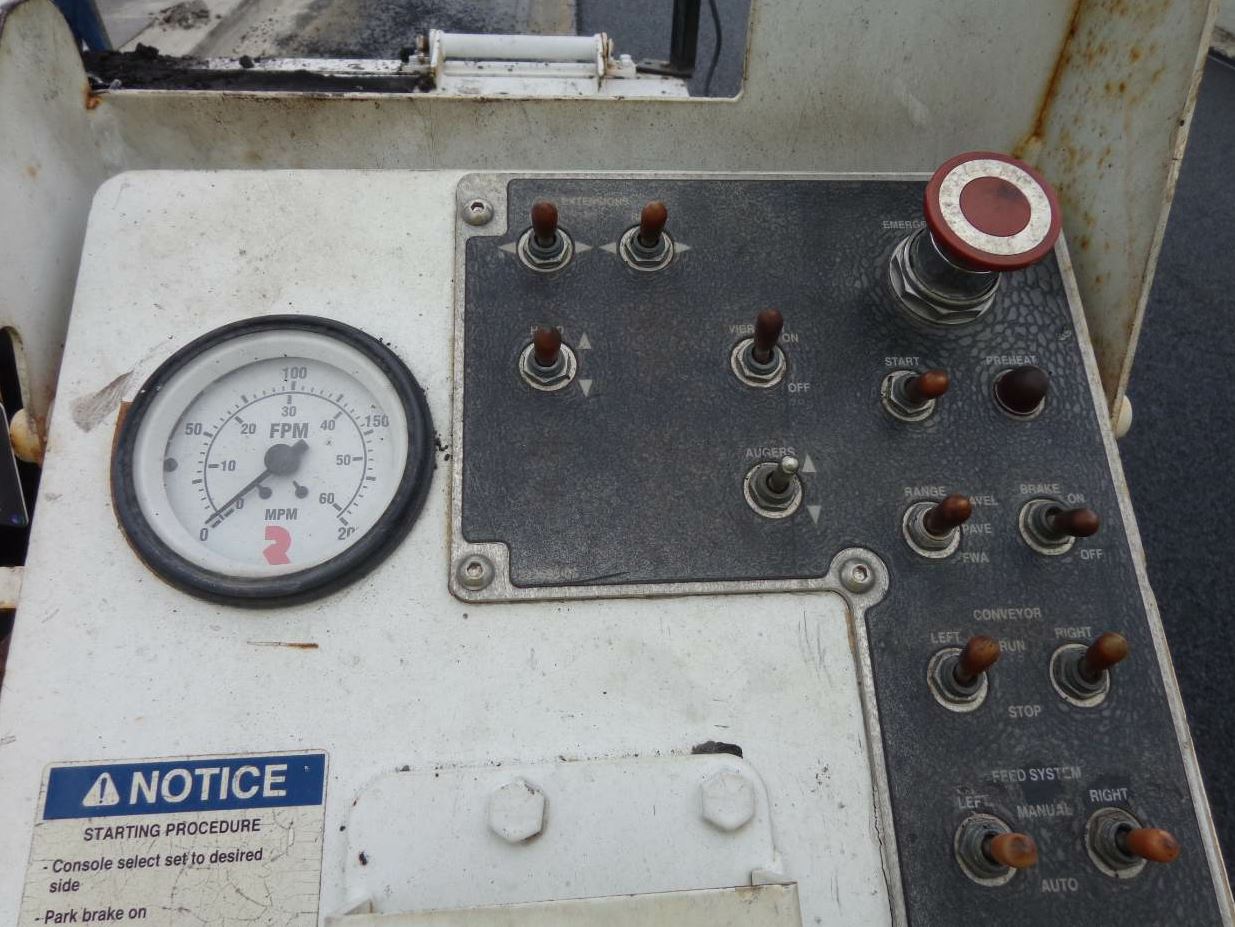
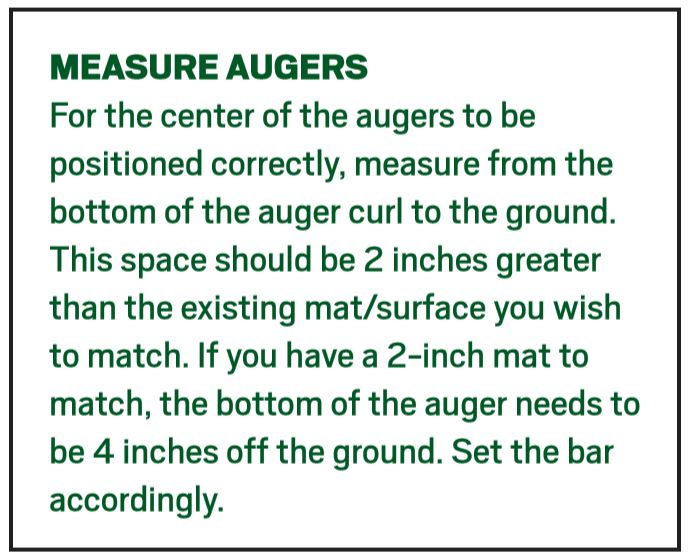
With all these factors going smoothly, the paver operator can watch the flow of material from the hopper to the screed. He will watch so that the level of mix at the auger (the head of material) will remain consistent across the width of the augers. To keep the height of material consistent, he will have to maintain a consistent speed. He will set the paver speed and auger rotation so the height of the mix reaches the center of the augers. He won’t radically speed up or suddenly slow down.
The screed operator will be able to help maintain a consistent head of material by watching for any changes from the feed sensors. These will be set for the height and speed of the job, and they need to be monitored for change. Typically, you’ll affix the feed sensor to the endgate; direct the sensor’s eye toward the mound at a 45 degree angle so it monitors the churning material correctly.
You don’t want to set the sensor directly above the mound and point it straight down. Keep track of how high material builds up when extending or retracting the endgate so you don’t accidentally cover the sensor. Once it gets sticky material on its eye, you’ve got to clean it to keep it working right. The beam it sends to measure distance to the pile won’t get through a film of gunk.
There’s an App for That
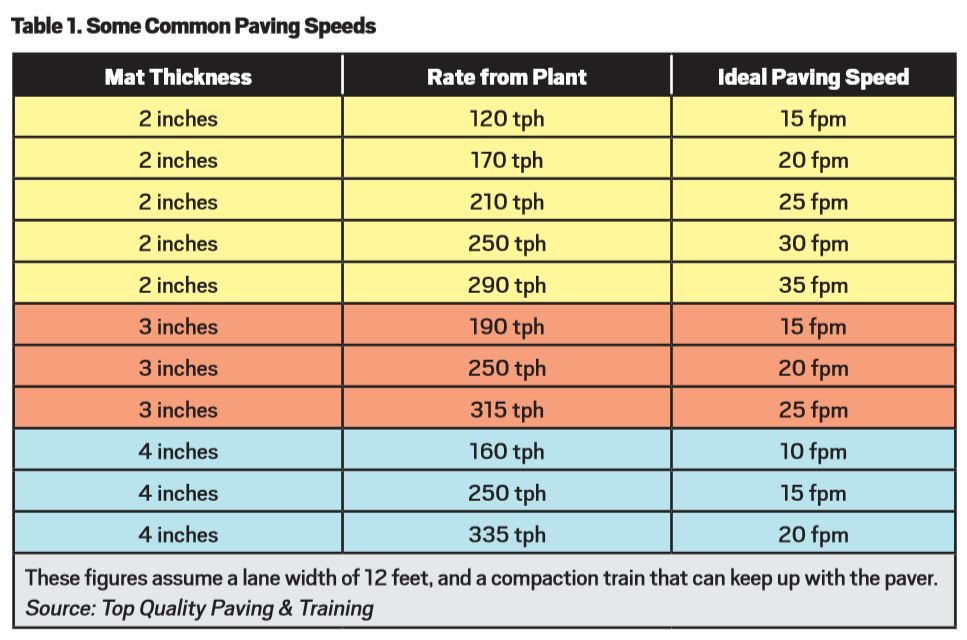
To set paving speed, the operator has all kinds of tools available to him. Paving experts have created charts and tables over the years to help you select a speed based on depth and width and factoring in some mix design elements. Use them.
The team at Roadtec, Chattanooga, Tennessee, has one here. You’ll also find download links for the calculator from Caterpillar here. Depending on the level of confidence you have in your truck delivery, you can plan to pave a couple feet per minute more slowly than the chart tells you to pave, or a couple feet per minute more quickly.
Depending on the wind/ambient conditions you anticipate for the day, you may wish to put in a call to the plant to ask for faster loadout, and then plan for faster paving speed.
With all these variables factored in, you can set a reasonable speed that you can reasonably expect to maintain. The point is, once the paver operator establishes the paving speed for the day, he will want to stick to it. Don’t speed up to get through a line of trucks so you can take a break.
The “spot” where you stop to relax will end up being an area that the state inspector finds fault with. If the plant operator has more trucks loaded and sent to your project than you anticipated, this is a problem for the foreman to work on with the trucking foreman. Changing paver speed changes the angle of attack, which changes the quality of compaction the screed offers.
During the Wirtgen Technology Days event held at the Center for Technology and Training in Antioch, Tennessee, March 29, Laikram “Nars” Narsingh, manager, commercial support and development – Vögele, shared with the audience that the forces acting on the free-floating screed are then acting on the mat. Let’s look at those forces real quickly.
- The tow arm offers pulling force.
- The weight of the screed offers a downward force.
- The material under the screed offers a reaction force.
- The material coming out the back of the screed offers a friction (or shear) force between the material and the screed.
- The head of material offers a pushing force against the screed.
When all of these forces are at equilibrium, or balanced, Nars explained, you get the constant mat depth. When one of the forces experiences a change, it causes the screed to either rise or fall.
By speeding up or slowing down, the paver operator disrupts the equilibrium of forces and changes the resistance of the screed against the head of material. This will result in a change in the mat thickness, a change in the performance of the screed’s compactive effort, and lower quality paving.
Of course, not all projects have perfect conditions all day long. If you must slow down because the foreman got a call from the plant and learned that there’s an interruption in delivery, adjust the paving speed slowly. Paving Consultant John Ball reminds operators they can’t suddenly drop from paving 35 feet per minute to 15 feet per minute without suffering the consequences.
Radical changes in speed cause the angle of attack to change, which creates a change in the mat. The pulling force changes too quickly. In the case of a sudden slow-down, you’ll have a short wave, or even a bump, in the mat. Waves cannot be rolled out. Let automation, feed sensors and best practices help you keep a consistent head of material feeding under the screed.
Time the Trucks
Let’s say it takes 3 to 4 minutes to load the haul truck with the preferred three-drop method. The tarp is automated to slide or lower into place while the driver gets the ticket, taking another 2 minutes. Time waiting to dump should be minimal, but let’s say that’s 10 to 15 minutes on the jobsite.
The truck is engaged with the hopper for 5 minutes. The driver pulls away and has 5 minutes for cleanup in the designated area. All you need to know is the actual travel time (with traffic delays) from the plant to the work zone, and return time, to estimate the time needed for each truck to complete a cycle.