How to Repair a Utility Trench

After a utility repair has been performed, it’s time to get the pavement put back in place. To execute this properly to ensure no water intrusion or raveling at the joints, a key step is preparing the walls of the trench, no matter their height. Getting clean surfaces that tack will adhere to is vital.

For the project in the pictures on this page, the crew not only placed two 5-inch lifts of hot-mix asphalt, but also placed 2 inches of aggregate over the electrical cable in the deep trench. Whatever your project’s requirements, make sure you follow this basic template for best end results.

How to Pave on a Moving Surface

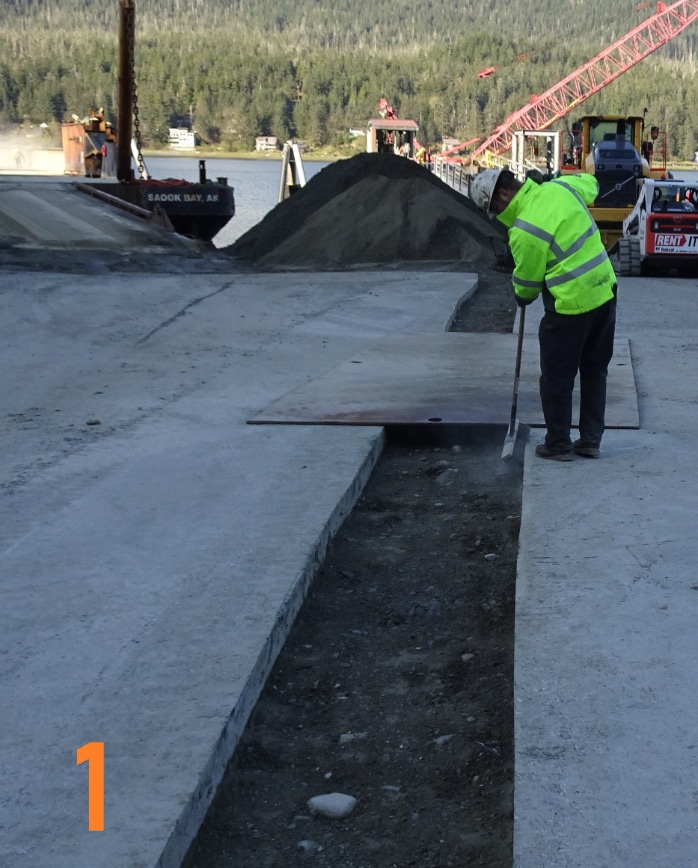
Step 1. Hand-sweep the “walls” and edges. Clean off dirt and dust with a leaf blower to ensure the sides of the trench are clean.

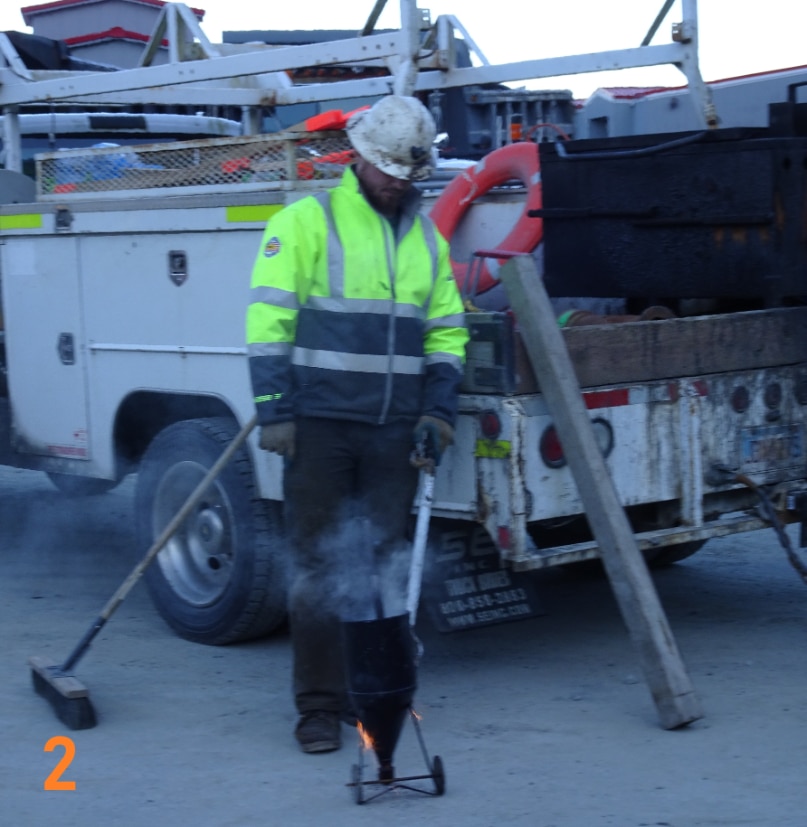
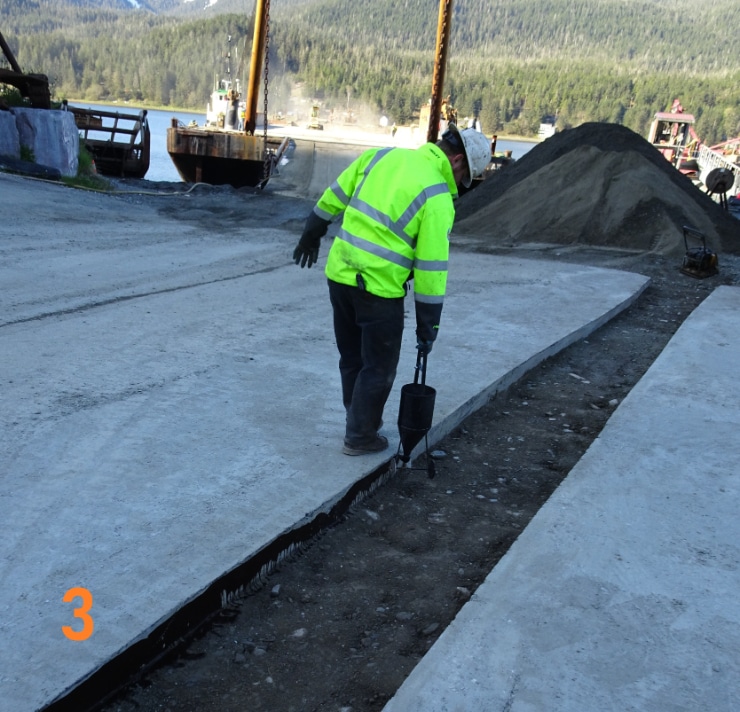
Step 2. If you don’t have a spray wand on your distributor truck, heat up the tack in a kettle and get the sides tacked efficiently. Make sure your team members know safe practices for working with 180-degree material and wear the appropriate PPE.

Step 3. Use a skid steer, sidewalk paver, or good old-fashioned shovels and elbow grease to fill the trench with HMA.

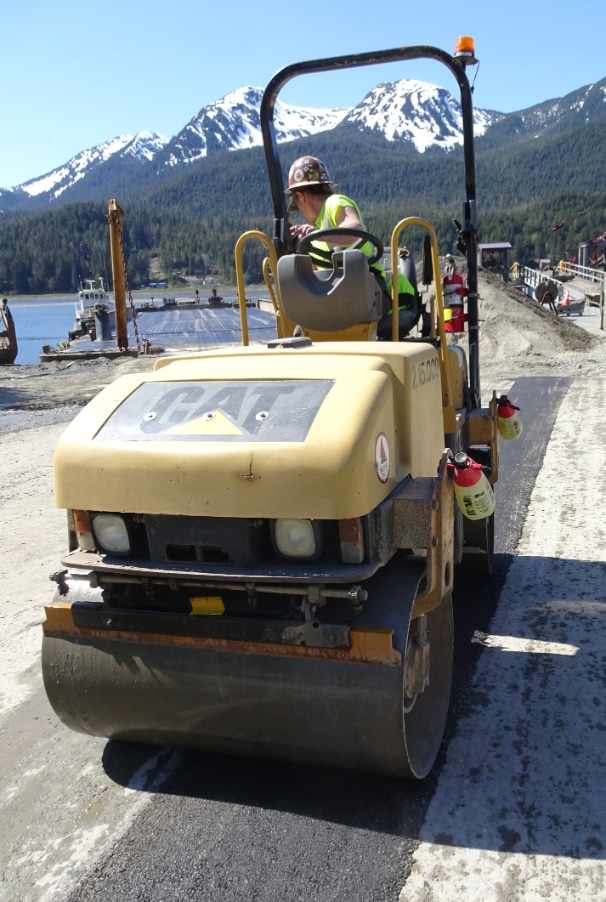
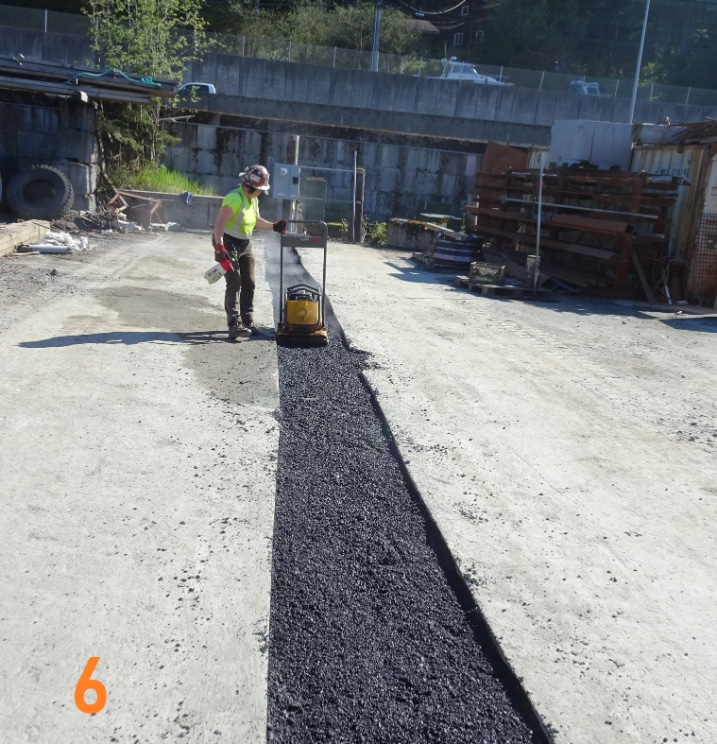
Step 4. Pinch both sides of the trench with a plate compactor to seal it against the existing pavement before compacting right down the center. You may have a large enough trench that you need a tandem roller for this step.

Before filling in the trench, the crew will sweep the sides, clean it with a leaf-blower, and tack the sides. For the project pictured here, the tack was heated to 160 degrees F.

Before filling in the trench, the crew will sweep the sides, clean it with a leaf-blower, and tack the sides. For the project pictured here, the tack was heated to 160 degrees F.

Before filling in the trench, the crew will sweep the sides, clean it with a leaf-blower, and tack the sides. For the project pictured here, the tack was heated to 160 degrees F.

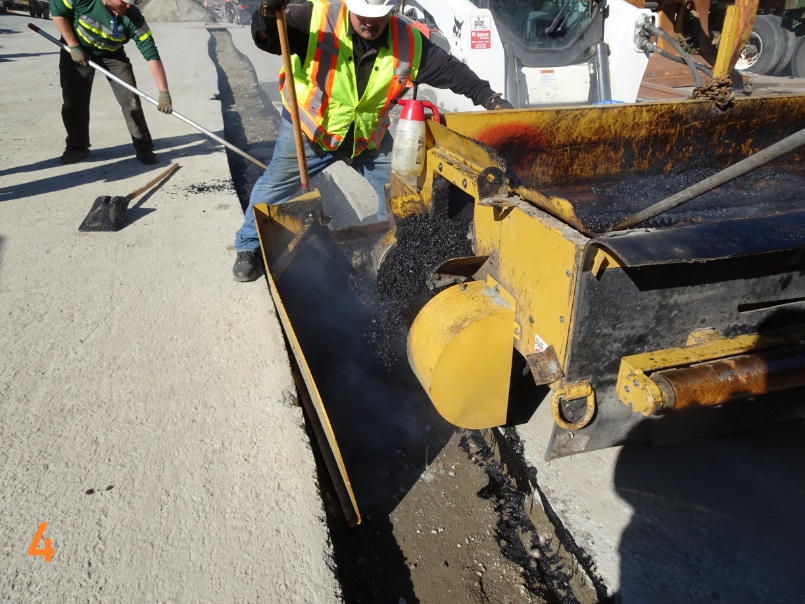
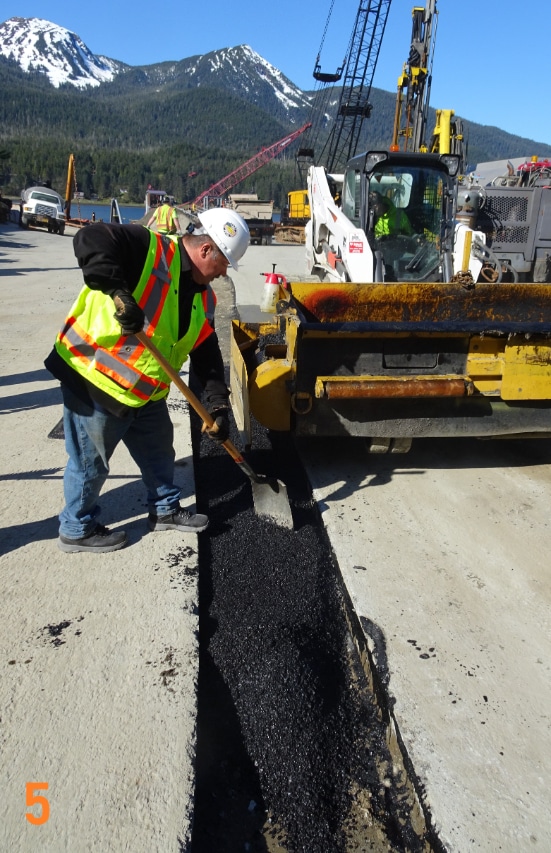
This crew used a Road Widener attachment with conveyor belt in its hopper, affixed to the front of a skid steer, to put two 5-inch lifts of HMA on top of a 2-inch lift of gravel to fill in an electrical cable trench. Your crew may have a different way to throw mix into the prepped and tacked trench.

This crew used a Road Widener attachment with conveyor belt in its hopper, affixed to the front of a skid steer, to put two 5-inch lifts of HMA on top of a 2-inch lift of gravel to fill in an electrical cable trench. Your crew may have a different way to throw mix into the prepped and tacked trench.

Here the laborer uses a plate compactor to get the first lift compacted in the 3-foot-wide trench.

Road Dryer’s RD-1200XT

From rainy weather to controlling silica dust with water, the asphalt paving crew may have to dry a pavement surface with equipment before work can commence. That’s why Road Dryer LLC, Greenville, South Carolina, has developed its RD-1200XT road dryer: to minimize delays from wet conditions and make it easier for contractors and agencies to meet timetables. Here’s how it works.

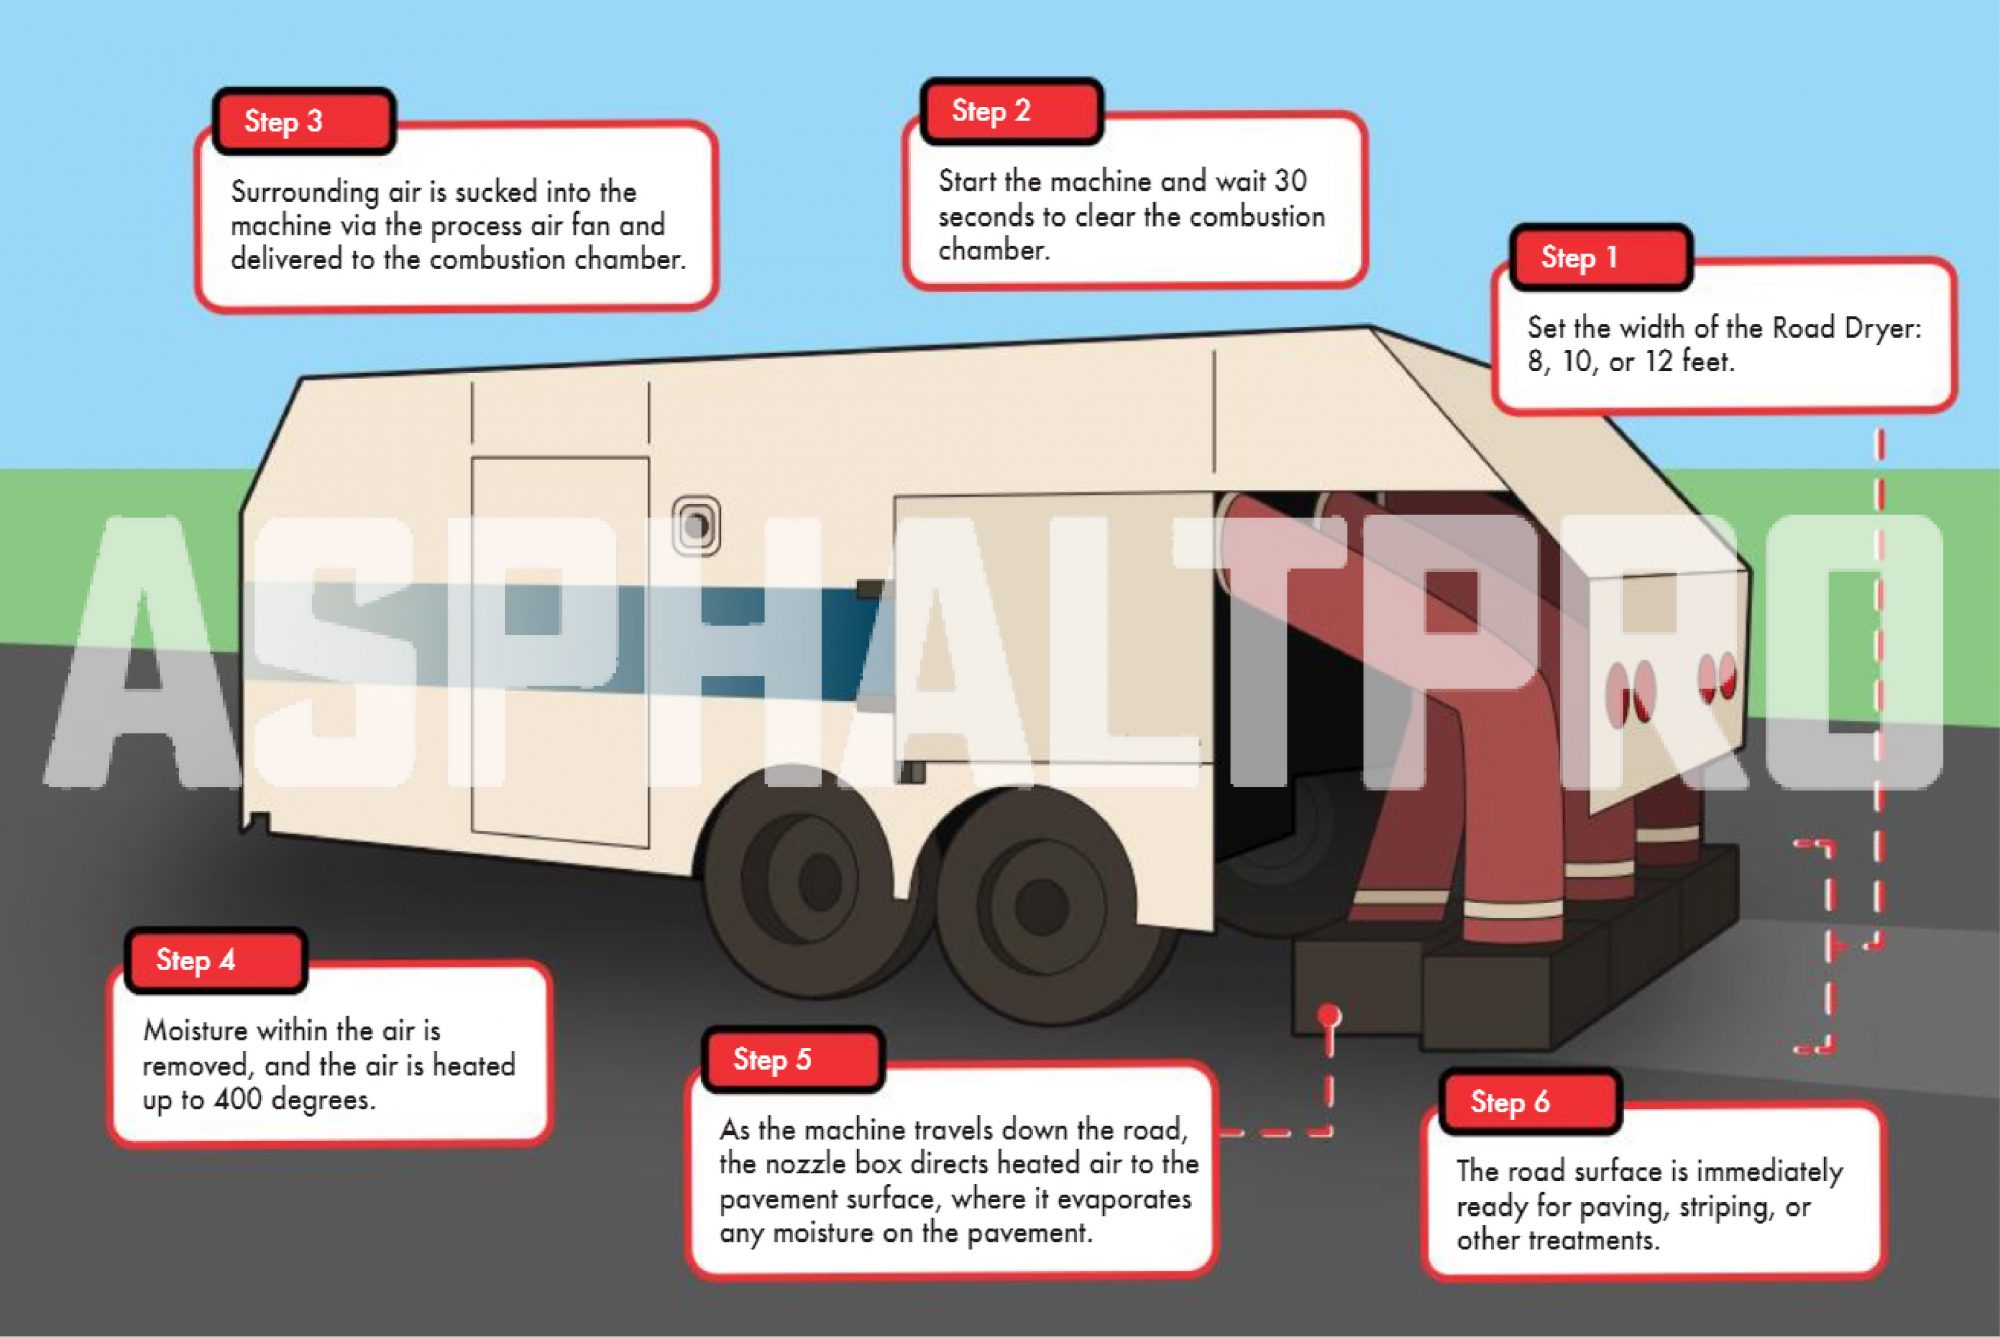
Upon arrival to the job site, the tractor trailer- or truck-mounted RD-1200XT will first need to be adjusted for the project’s parameters. The operator will open the side nozzle door, release the safety, and lower the nozzles into place. The standard width is 8 feet, but the operator can fold out two separate nozzle wings to dry widths of 10 and 12 feet.

From the control panel on the side of the machine nearest the trailer or truck, the operator will start the machine. Prior to igniting the burner, a short 30-second purge will clear the combustion chamber of any possible unburnt gases. Surrounding air is sucked into the air heater via the air inlet to the process air fan, driven by the diesel engine. Air is then blown into the combustion chamber, where it is heated up to 400 degrees and the moisture is removed. The heating process takes approximately three minutes from the time the burner is lit.

The machine is then ready to be pulled down the road at speeds between 25 and 50 feet per minute, directly behind the milling machine or hydro-blaster, or directly ahead of the paver. As the RD-1200XT travels down the road, the nozzle box on the back of the machine rides above the surface of the roadway on a set of wheels. The six nozzles contained in the box direct the heated air ahead of, behind, and to the sides of the machine to allow for longer surface exposure. The design of the nozzle box controls the air flow to the roadway to allow for usage in construction lanes next to live traffic.

The dry, heated air immediately evaporates the moisture on the pavement, leaving the road surface ready for paving, striping or other treatments. When the required surface has been dried, the operator will fold in the nozzle wings, raise the nozzles until the safety latch locks, and close the nozzle doors before driving the RD-1200XT to the next job.


For more information, contact Road Dryer at (864) 272-2988 or info@roaddryer.com.

How to Maintain and Use Sweeper Right

For the 10-Year Anniversary of AsphaltPro magazine, we will help asphalt companies teach new workers some back-to-basics techniques for best success in the field, at the plant and in the lab. Even veteran employees will be reminded of best practices with these refreshers throughout the year, but the goal is to help readers who are bringing in new employees who may or may not be well-versed in the industry yet. On-the-job training takes time and energy, and we’re here to help with the Asphalt Paving 101 online training course and these free articles every month.


Many commercial paving crews don’t have one designated broom operator, but will assign the task to the laborer who is closest to the machine when an area needs to be cleaned or when the mill has completed a pass. No matter what size the job or who will be at the controls for the day, the broom cleaning the pavement can save you time and money if an operator is responsible for keeping it in good repair. John Ball, the proprietor of Top Quality Paving and Training, Manchester, New Hampshire, explained that is because a well-maintained broom with a full broom head will need fewer passes to do its job than a broom with worn bristles or a damaged water system, etc. The well-maintained broom is also a safer piece of equipment for the operator and less likely to break down during operation. Now that the Occupational Safety and Health Administration (OSHA) has stipulated requirements for minimizing workers’ exposure to respirable crystalline silica dust, water system operation on brooms will be a vital inspection point.

Inspect

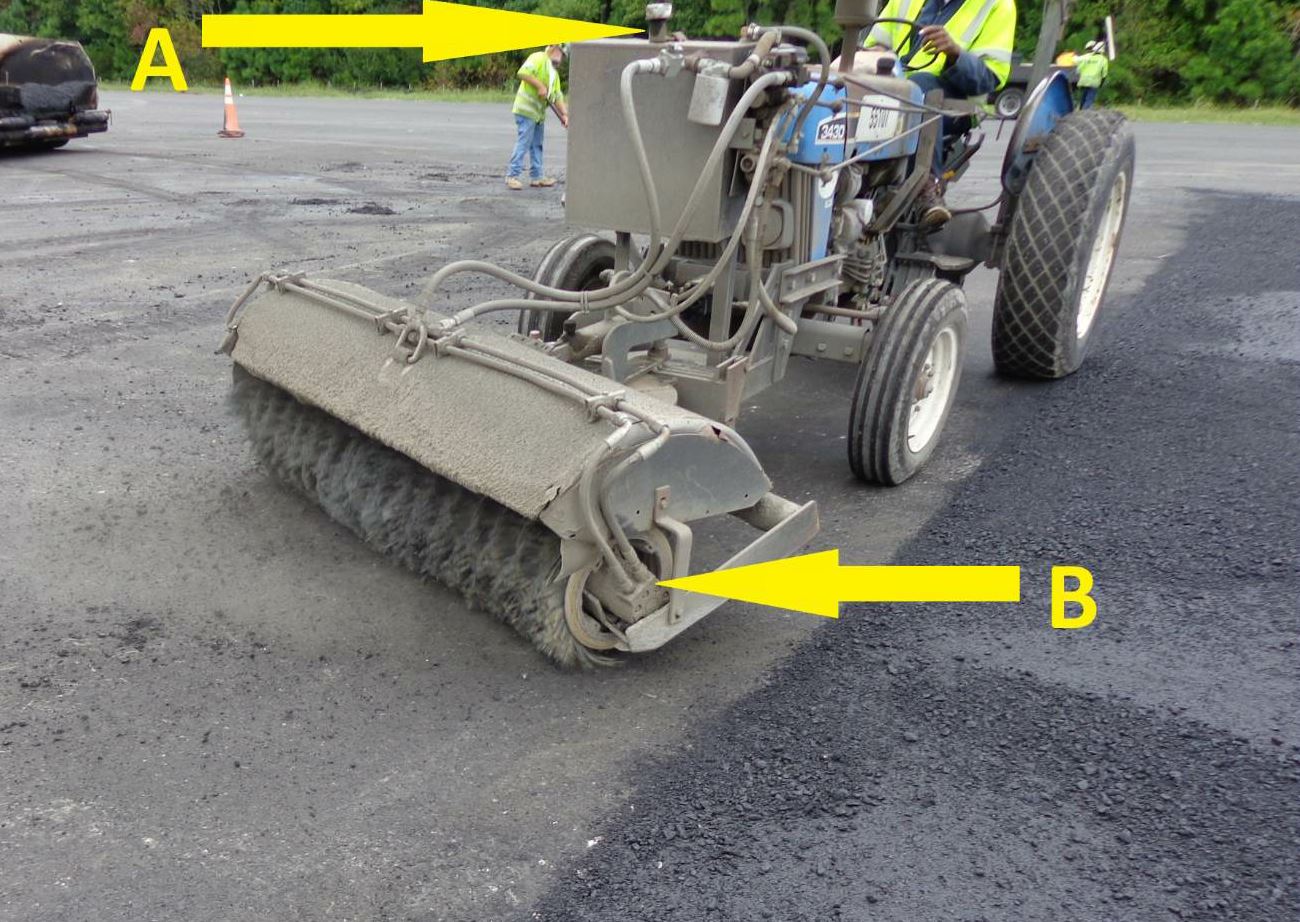
Letter A indicates the need to maintain the lights on the broom. When you’re sweeping, you have the potential to kick up dust. When on a roadway or even working around new employees in a commercial lot, drivers may not realize “what” they are driving up on as they near something dusty. Strobe lights, four-way flashers and other construction vehicle lights alert the general public, haul truck drivers, subcontractors and others to your presence, no matter the level of dustiness. Letter B indicates the hydraulic lines that deliver the “power” that turns the drum. Check this area before the shift begins to make sure there’s no build-up of dirt or pollution that will interfere with the machine’s operation. Notice that the broom is set at a 33 degree angle to clean the surface prior to its next treatment. All photos courtesy John Ball of Top Quality Paving and Training, Manchester, New Hampshire.

Letter A indicates the need to maintain the lights on the broom. When you’re sweeping, you have the potential to kick up dust. When on a roadway or even working around new employees in a commercial lot, drivers may not realize “what” they are driving up on as they near something dusty. Strobe lights, four-way flashers and other construction vehicle lights alert the general public, haul truck drivers, subcontractors and others to your presence, no matter the level of dustiness. Letter B indicates the hydraulic lines that deliver the “power” that turns the drum. Check this area before the shift begins to make sure there’s no build-up of dirt or pollution that will interfere with the machine’s operation. Notice that the broom is set at a 33 degree angle to clean the surface prior to its next treatment. All photos courtesy John Ball of Top Quality Paving and Training, Manchester, New Hampshire.

Ball reminded workers to start routine maintenance with the pre-shift walk-around. The person assigned to run the broom needs to walk around the machine to do the following:

  • Check the oil
  • Check the fuel
  • Check the tires for proper air pressure (probably should be 32 pounds)
  • Check the lights—make sure all lights are functioning, including 4-way flashers and a strobe
  • Check the windows and clean them
  • Check the mirrors and clean them
  • Check the fire extinguisher
  • Clean out the cab—get trash out of the cab so it’s not underfoot
  • Grease the grease fittings for the articulation

Give special attention to the water system:

  • Check the spray system’s water tips and the filters in the water tanks to ensure they are clean
  • Check the lines for wear or cracks
  • Check the reservoir to ensure its filter is clean to allow a clear flow of water to the lines and nozzles
  • Make sure you have a water cap on the tank—if you have lost this, order a new one
  • Remember, your crew can get fined for making too much dust during the sweeping stage of your project, and your health is dependent on reduced dust, so you must have a functioning water system.

Before the shift begins, the operator should look at the thickness of the bristles and broom core. This is a visual inspection, not something you will measure with a ruler. (Another way you’ll know if the core has started to wear is when it “hops” during sweeping or fails to rotate in a consistent manner.)

Let the mechanic know four or five days in advance of when you think the core will need to be replaced so he has time to order the new parts. If you don’t have a fulltime mechanic, then you—the operator—should take the responsibility of getting the part ordered.

Bristles come in both plastic and metal core; these days the core that alternates plastic and metal are preferred because they don’t wear out as quickly as the plastic-only cores. It only takes about an hour and a half to change out a core, according to Ball. And the process is self-explanatory. The core is circular. When you remove it, you’ll see the keyseat—like a cog in the yoke—where the core will slide in and lock.

Notice in these pictures that the core/broom head on the piece of equipment moves down the lane at an angle. The articulation that allows this angle has grease fittings that you’ll want to check everyday and grease before operating the machine. Not only can those fittings get dusty and dirty, if you forget to grease them, they will seize up. If the machine breaks so that it’s in one fixed position, the core won’t articulate left and right, and you won’t be able to do your job efficiently.

Also notice the hydraulic pump. On the other end is a bearing that you’ll want to grease before operation. Both ends of the drum need to be checked before operation as well. They both need to be free and clear of debris—debris is more than dust and millings. Keep in mind this machine can grab stringline, plastic bags and all manner of trash that blows around a commercial parking lot, residential area or state road. Those items will damage the ends and cause the broom to seize.

When checking the watering system, make sure to clean the nozzles—and their filters—so they are clear and free of dirt and dust. The filter is 10,000 microns and that level of mesh gives you the correct pressure. You want a fine mist to cover the broom during operation, not squirts and spurts of water that cause dirt to cake up on the bristles or leak onto a pavement your team needs to then tack or seal.

By taking the time to maintain the broom properly, you save time during the pavement cleaning process.

Sweep

The broom will also be called on to clean transverse joints prior to tacking. If you’ve had the water system engaged, make sure you take a hot air lance to the joint afterward to dry it for best tack adhesion.

The broom will also be called on to clean transverse joints prior to tacking. If you’ve had the water system engaged, make sure you take a hot air lance to the joint afterward to dry it for best tack adhesion.

When you’re ready to begin sweeping for a pavement maintenance project, you will obviously get started ahead of the tack wagon, crack-filling workers or sealer machine. You want to get all the dirt and leaves off the surface before any other equipment begins. You will line up the machine at the edge of the project or area to be cleaned, taking care to keep the broom’s bristles from catching dirt or grass from landscaping or features at the edge of the property. You don’t want to pull detritus onto the project. It’s best to set the broom 2 to 5 inches from the edge when working along a pavement that has no raised curb to enclose the work space.

For a parking lot or roadway with minimal dirt and debris, you will want to adjust the broom height so that the bristles just barely brush the surface. The spinning motion will pull leaves and litter off the surface; you don’t want to dig at them with too much down-pressure. Set the broom at a 33-degree angle for the first pass and drive at a moderate speed; Ball recommends a reasonable walking pace.

When you’re ready to begin sweeping a surface behind the milling machine, you will use more down-pressure to get particles out of the crevices. The goal is to prepare a clean, dust-free pavement for the distributor truck to place tack on. You will want to adjust the broom height so that the bristles have more down-pressure. You don’t want to hinder the rotation of the broom, but you want to dig out the particles—thus it’s a judgment call that comes with practice and experience. Ball reminded new broom operators: if you put too much down-pressure on it, the broom will start to “plow” instead of sweep, damaging the bristles and possibly the core.

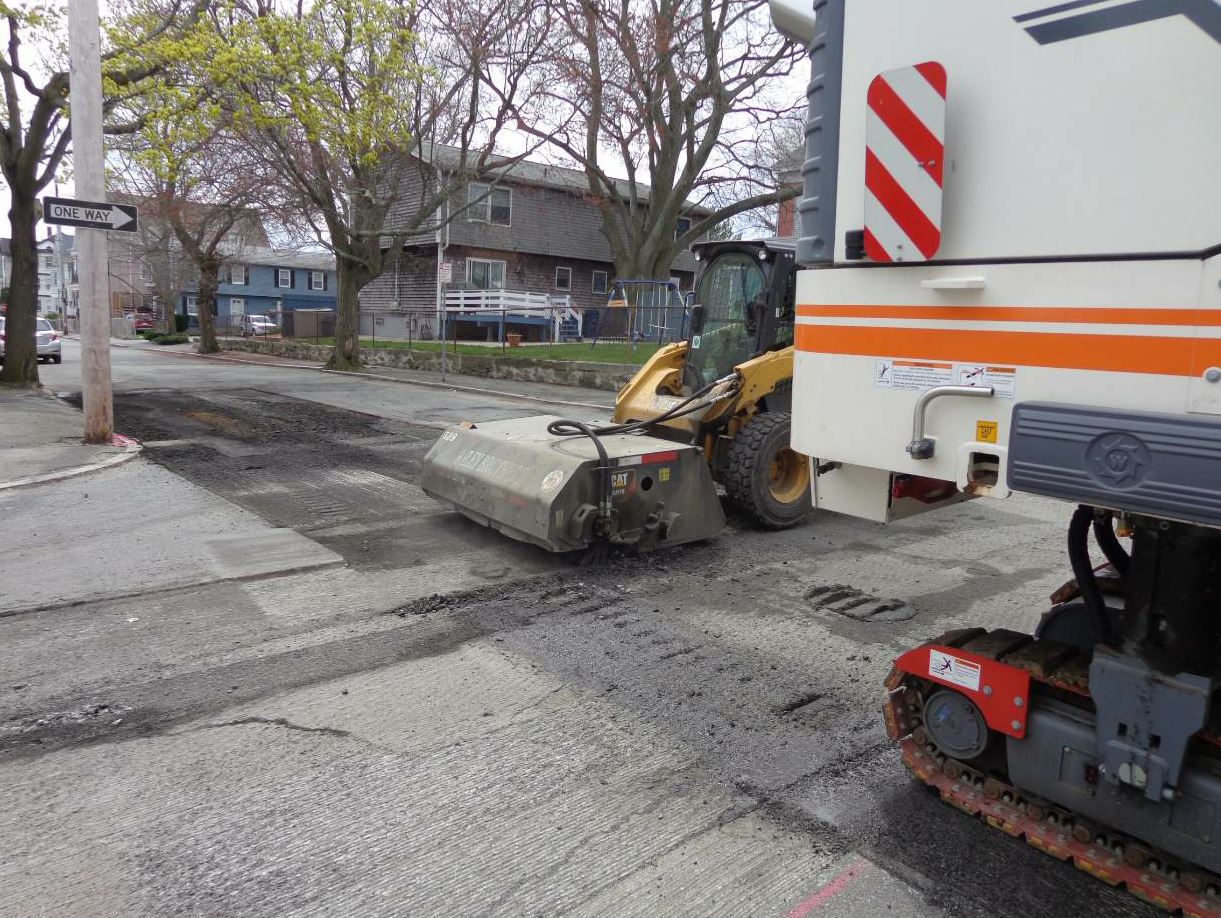
Once again, set the broom at a 33-degree angle and drive at a speed that’s acceptable for this operation. You can start with 35 to 50 feet per minute and adjust from there. For this type of operation, the skid steer operator will come alongside and scoop up the pile/trough of material, and the broom may be required to make a second pass if a second broom isn’t on the job following behind.

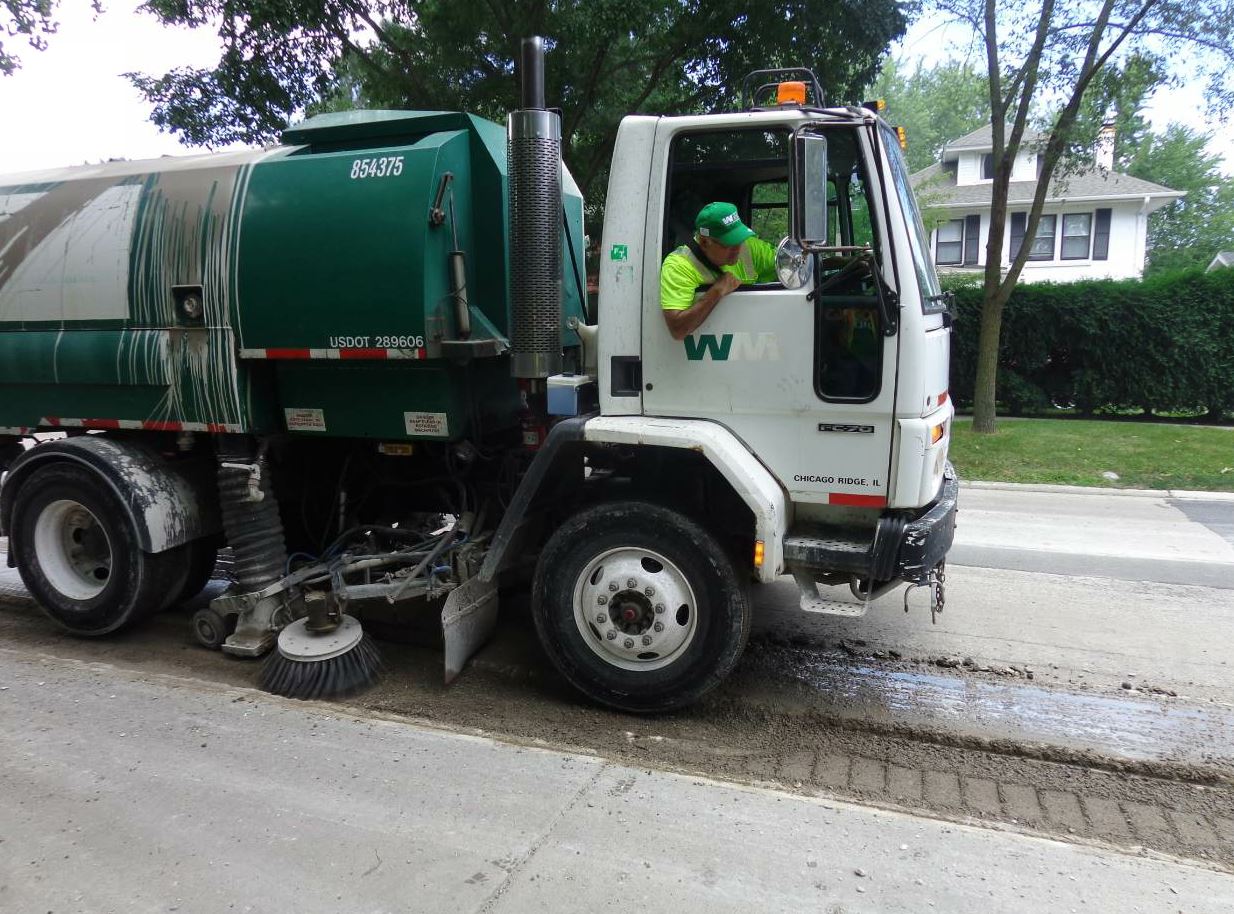
The vac broom will use side broom heads to help direct material toward the vacuum. This operator will routinely empty the sludge in an approved vehicle on the project site.

The vac broom will use side broom heads to help direct material toward the vacuum. This operator will routinely empty the sludge in an approved vehicle on the project site.

For sweeping during construction, pay attention to water use and drying. Excess water will dilute your tack and weaken its bond to the surface. You may need a machine that can sweep and vacuum. The broom operator should be aware of the paving plan; make sure you know what the foreman needs from you before you get started.

Vacuum Pores

Let’s say you’re going to work on a porous pavement. There are sweeping subcontractors who don’t recommend using a broom-only when cleaning a porous pavement. If you feel that the bristles of your broom will lodge fine particles—instead of dislodging them—in a gap-graded surface course, you’ll want to employ a vacuum as well to suck fines and material up.

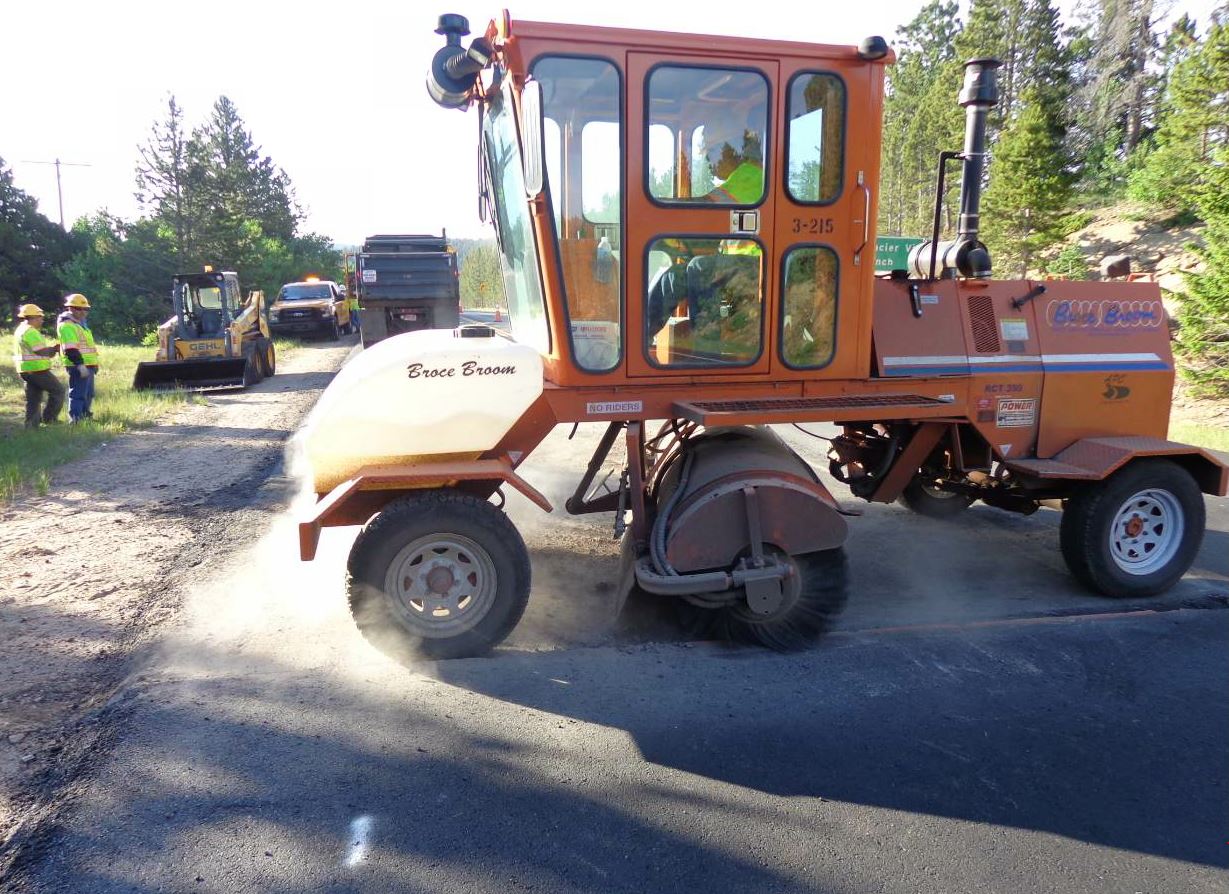
The vac broom has three broom attachments to help you—on the sides and center. The side brooms dislodge material from the surface and funnel it toward the center for the vacuum to pull it up.


Employers Can Get Silica Help

If you’re a contractor in need of answers, you can ask questions without fear of penalty. The Occupational Safety and Health Administration (OSHA) has on-site consultation services that are separate from enforcement. From the OSHA silica-crystalline website: “Small business employers may contact OSHA’s free and confidential On-Site Consultation program to help determine whether there are hazards at their worksites and work with OSHA on correcting any identified hazards. Consultants in this program from state agencies or universities work with employers to identify workplace hazards, provide advice on compliance with OSHA standards, and assist in establishing injury and illness prevention programs. On-Site Consultation services are separate from enforcement activities and do not result in penalties or citations.”

To contact the service, visit here or call (800) 321-6742, option 4.


Meet Silica Requirement

As of June 2017, employers are required to take steps to protect employees from the hazards associated with exposure to respirable crystalline silica. In the Occupational Safety and Health Administration’s (OSHA) Respirable Crystalline Silica standard for Construction, the administration compiled a table that listed standards for different pieces of equipment that expose a worker to different levels of this dust. The broom is one such piece of equipment.

If your broom has an enclosed cab, the employer must ensure that the enclosed cab or booth is:

  • Maintained as free as practicable from settled dust;
  • Has door seals and closing mechanisms that work properly;
  • Has gaskets and seals that are in good condition and work properly;
  • Is under positive pressure maintained through continuous delivery of filtered air;
  • Has intake air that is filtered through a pre-filter that is 95 percent efficient in the 0.3-10.0 microgram range; and
  • Has heating and cooling capabilities.

The controls for enclosed cabs lower the potential for dust to be re-suspended inside the cab or enter the enclosed cab or booth. They also ensure that the filtered air provided to the employee does not contain silica particles and that the working conditions in the cab are comfortable so that employees are less likely to open windows and be exposed. The procedures for maintaining and cleaning the cab or booth, and for frequent and regular inspections of the cabs and booths, must be addressed through the employer’s Written Exposure Control Plan and Competent Person requirements.

How to Perform Winter Maintenance on a Porous Pavement

Contractors performing winter pavement maintenance should be clamoring for the jobs that service porous asphalt pavements. It would be irresponsible to say merely “you get to leave it alone,” but the fact is porous asphalt pavements require fewer deicing chemicals and less work than do impervious pavements. Here’s why.

First, the Federal Highway Administration (FHWA) technical brief Porous Asphalt Pavements with Stone Reservoirs points out “Porous asphalt pavements have been successfully used for more than 35 years in a variety of climates around the United States. They provide a pavement surface that is also part of the stormwater management system, reducing stormwater runoff and pollutants and replenishing groundwater. A number of porous asphalt parking lots have lasted more than 20 years with no maintenance other than cleaning.”

Regular cleaning is something FHWA recommends, suggesting pavement owners include vacuuming two to four times a year to keep dirt and debris from clogging the voids that are meant to allow stormwater to pass through the pavement and stone layers.
In the technical brief, FHWA warns that pavement owners should never sealcoat or crack seal the porous asphalt pavement—for the obvious reason that these strategies close the system. The FHWA technical brief states: “If patching is necessary, conventional mixes may be used if less than 10 percent of the pavement area is affected.” Companies that have been contracted to maintain commercial or residential properties should verify the pavement structure before performing maintenance treatments to ensure they aren’t negating the owner’s stormwater management, etc.

One concern agencies in northern climates have mentioned when it comes to the use of porous asphalt pavements is that of winter maintenance, specifically icing conditions and how to handle them.

In her December 2016 Master of Science thesis “Winter Deicing Methods for Porous Asphalt,” Heidi Whitney Lemay of the University of New Hampshire, addressed the concern, stating, “porous asphalt has created challenges in colder climates with respect to deicing operations. It has been found that the traditional deicing method of applying rock salt is not as compelling on porous surfaces because much of the salt remains days after a storm event. This study presents the findings of deicing an active porous asphalt parking lot using liquid reduced chloride or non-chloride deicers under winter storm conditions.”

The National Asphalt Pavement Association (NAPA) Information Series 131 (IS-131) document titled Porous Asphalt Pavements for Stormwater Management includes specific information about snow removal on an asphalt parking lot at the University of New Hampshire. One hour after plowing, the porous asphalt area of the parking lot showed significantly more snow melt and cleanliness of the pavement. But that’s just the visual cue that the porous pavement is doing its job. NAPA authors point out that the two areas were evaluated for the degree of snow and ice cover and for the friction factor of the surface using ASTM E303-93. The measurements showed a 75 percent reduction in salt application was possible for the porous pavement area in relation to the conventional dense-mix area. IS-131 states: “For the friction factor, a 100 percent reduction was determined (porous asphalt, even with no salt, has higher frictional resistance than dense-mix asphalt with 100 percent of the normal salt application). Therefore, a sizable reduction in salt application rate is possible for porous asphalt without compromising braking distance or increasing the chance of slipping and falling.”

Deicer types include, but are not limited to, in alphabetical order: acetates, chlorides, formates, glycols, succinates. Be aware that a host of researchers have found some acetate-based deicers can emulsify the asphalt binder in an asphalt pavement and can cause an alkali-silica reaction on some aggregates in concrete pavements. In other words, you might not be asked to use an excessive amount of Potassium acetate (KAc) deicer. The parameters of this article don’t include a deep discussion of chemical reactions; we’re not diving into the pros and cons of various deicers. Instead, we want to emphasize the reduction in use of chemicals to maintain the porous asphalt pavement through winter weather. Lemay’s study tested three liquid deicers specifically: Potassium acetate (a non-chloride), beet and brine (a reduced-chloride), and beet and water (a non-chloride). “The three liquid deicers were found to be effective during this study, producing results similar to that of rock salt used on impermeable asphalt,” Lemay stated in her paper.

Don Watson, P.E., of the National Center for Asphalt Technology (NCAT), shared that “A mineralized de-icer that has an operating range lower than normal sodium chloride may be used, and is applied with the truck sanders just like the sand-salt mixtures. Anti-icing chemical application is probably the most preferred and uses a 20 to 30 percent solution of magnesium chloride mixed with water to form a brine.”
Watson offered real-world use of the mix. “The product is applied at 20 to 40 gallons per lane mile in advance of a predicted winter storm. The actual rate may be varied due to existing pavement condition, severity of predicted storm, and whether any residual remains from previous applications…Anti-icing chemicals are effective to about -30 degrees F.”

Lemay’s study concluded, in addition to the positive results of liquid deicing agents on porous asphalt pavements, “based on the results of this study, reduced chloride or non-chloride deicers applied on porous asphalt may be used to effectively control snow and ice from porous asphalt surfaces in the manner expected of rock salt on traditional impervious surfaces.”

With minimal use of chemicals, the contractor performs plowing as he would for any other storm event.


Here’s How it Was Built

The porous asphalt pavement follows a simple structure, which maintenance contractors will want to understand. Even if you aren’t called upon to pave any of the layers of the system in the future, you’ll want to be aware of what you’re working with.

For example, Rons Construction Corporation, Honolulu, built a porous asphalt pavement for Vineyard Investment Realty LLC in Wahiawa, Hawaii, in 2017. The private driveway is 300 feet long, 20 feet wide and the first use of a porous asphalt pavement for a road or parking lot in the state.

According to Engineering Dynamics Corp. (EDC), the engineer for the project, the new development would create an increase in stormwater runoff from the site. The city required any increase in stormwater runoff from development be retained onsite instead of flowing into the city’s drainage system. EDC determined that the most cost-effective solution was to retain additional runoff onsite with the use of porous asphalt. The Hawaii Asphalt

Paving Industry (HAPI) developed a specification for the porous asphalt mix. HAPI member Grace Pacific LLC produced it, and HAPI member Rons Construction Corp. placed it.

The system is built like this: Above the uncompacted subgrade is a geotextile fabric, which prevents the migration of fines from the subgrade into the stone recharge bed while still allowing for water to pass through. The next layer is a stone reservoir consisting of uniformly graded, clean crushed stone with 40 percent voids serving as a structural layer and to temporarily store water as it infiltrates into the soil below. Then, to stabilize the surface for paving, a thin (about 1-inch) layer of clean, smaller, single-size crushed stones is often placed on top; this is called the stabilizing course or choker course.

The last layer consists of one or more layers of open-graded asphalt mixes with interconnected voids, allowing water to flow through the pavement into the stone reservoir. These open-graded asphalt layers consist of asphalt binder, stone aggregates and other additives.

By excluding fines, the open-graded mix allows for more air voids (typically between 16 and 22 percent voids.
Notice: there is no tack coat or bond layer. You don’t want the tack material filling the voids, which are supposed to allow water through.

Source: Hawaii Asphalt Paving Industry


Skid Steers Vs. Compact Track Loaders for Snow Removal

By Brad Stemper and George Mac Intyre

The equipment industry is still moving from traditional, rubber-tired skid steers to rubber-tracked compact track loaders (CTLs). CTLs offer lower ground pressure, greater lifting capacities in a comparable footprint, smoother operation over varied terrain, but there are still some applications where skid steers hold an advantage. Dedicated snow removal is one of them.
It’s important to note: if snow removal is a secondary/seasonal job for you, and you’re using CTLs that you deploy for dirt work in the summer for snow work, they’re going to work just fine. But it’s the one thing that makes these machines different that gives skid steers the advantage: where the rubber meets the road. Literally.

Wear: Skid steers with traditional rubber tires provide a lower initial investment than CTLs—the rubber tracks and undercarriage of the CTL add cost, and ultimately cost more to replace/maintain over the service life. While snow and ice does provide a slight buffer between the rubber tracks and the asphalt, rubber tracks are still subject to abrasion and wear from operation on improved surfaces such as asphalt. Rubber tires on a skid steer are subject to the same abrasion, but those tires can last longer and cost less to replace than the rubber tracks of the CTL.

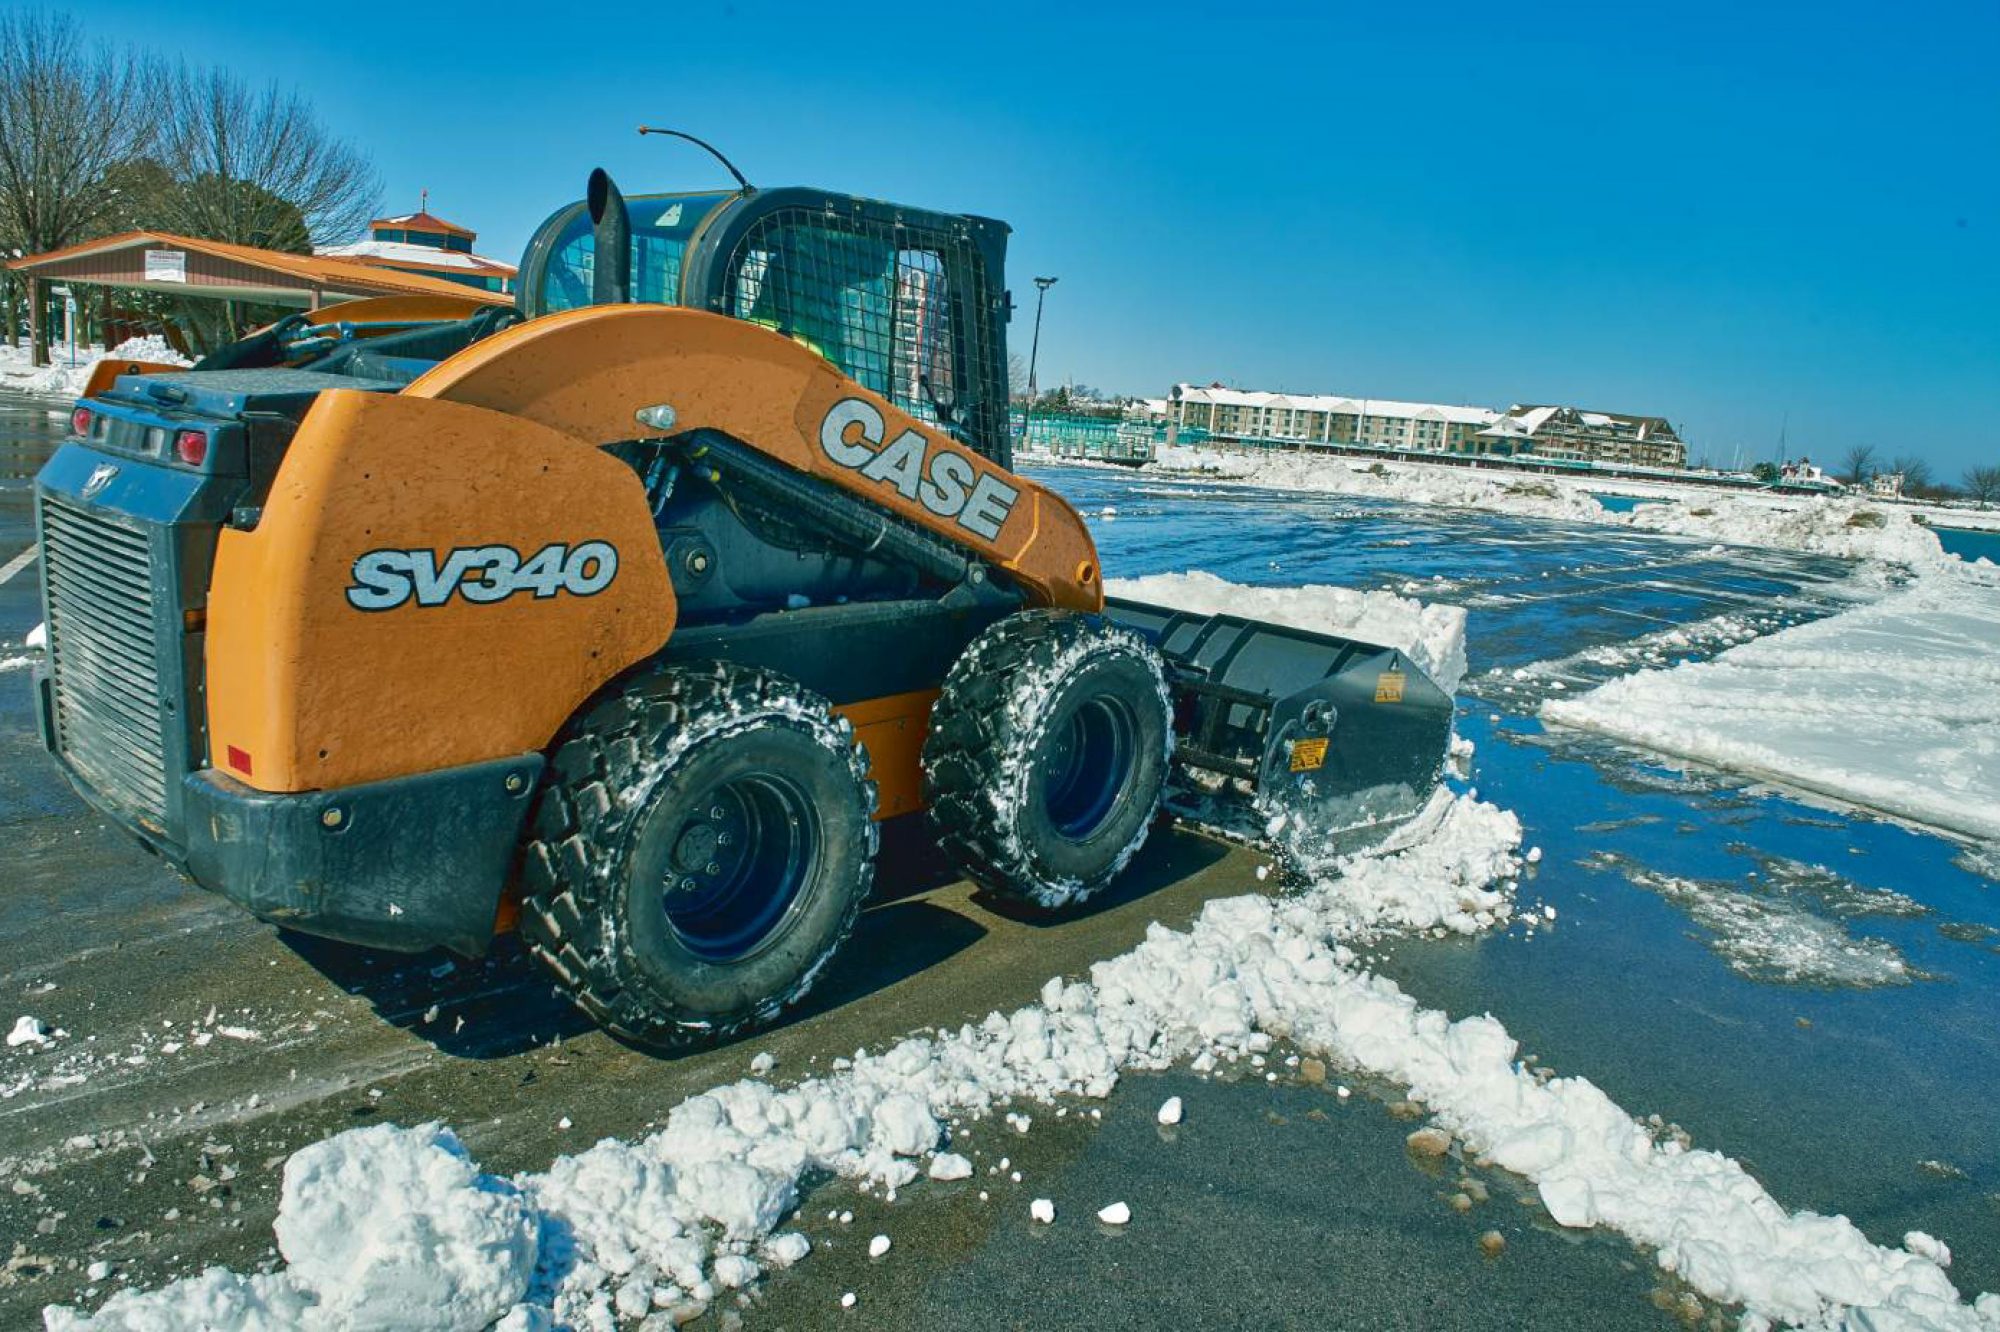
Speed: Speed isn’t everything, especially in parking lots of retail centers, etc. where safety is paramount, but skid steers provide faster ground speed than CTLs. As an example: The 90-horsepower SV340 skid steer offers a top ground speed four miles per hour (MPH) faster than a comparable CTL. Skid steers offer a significant advantage in speed when working in wide-open spaces and commercial parking lots, allowing operators to work and reposition more quickly.

Downward Pressure: The hallmark advantage of a CTL is its low ground pressure. This actually provides a disadvantage when working in snow removal applications. A skid steer, with its four tires and less per-square-inch contact with the surface below, can exert more downward pressure on the bucket, plow or pusher than a CTL. This provides better scraping action along the surface and helps remove more snow and ice on the first pass.

Where do CTLs provide an advantage? Landscapers and other contractors who work in the dirt during the other three seasons of the year will be able to leverage the low ground pressure advantages of CTLs in their other work. And snow contractors who buy/lease machines and flip those units at the end of a season or two will find a stronger aftermarket demand for CTLs, making it easier to unload those units.

Truth is: Both machines will get you there. The nuance of which machine will offer a lower total cost of ownership/operation will come down to how you use that machine when it’s not snowing. Skid steers offer distinct advantages if the machine is only used in snow work and for operation on improved surfaces. CTLs provide greater operator comfort and a smoother ride, especially when working in off-road applications, and contractors have proven willing to pay extra in terms of the initial price and long-term undercarriage costs.

Brad Stemper is the product manager, and George Mac Intyre is the global product portfolio manager, light equipment, CASE Construction Equipment. CASE wishes to thank Robert Velazquez of Semper Fi Land Services and Nate Kohn of Nate’s Landscape for their input.