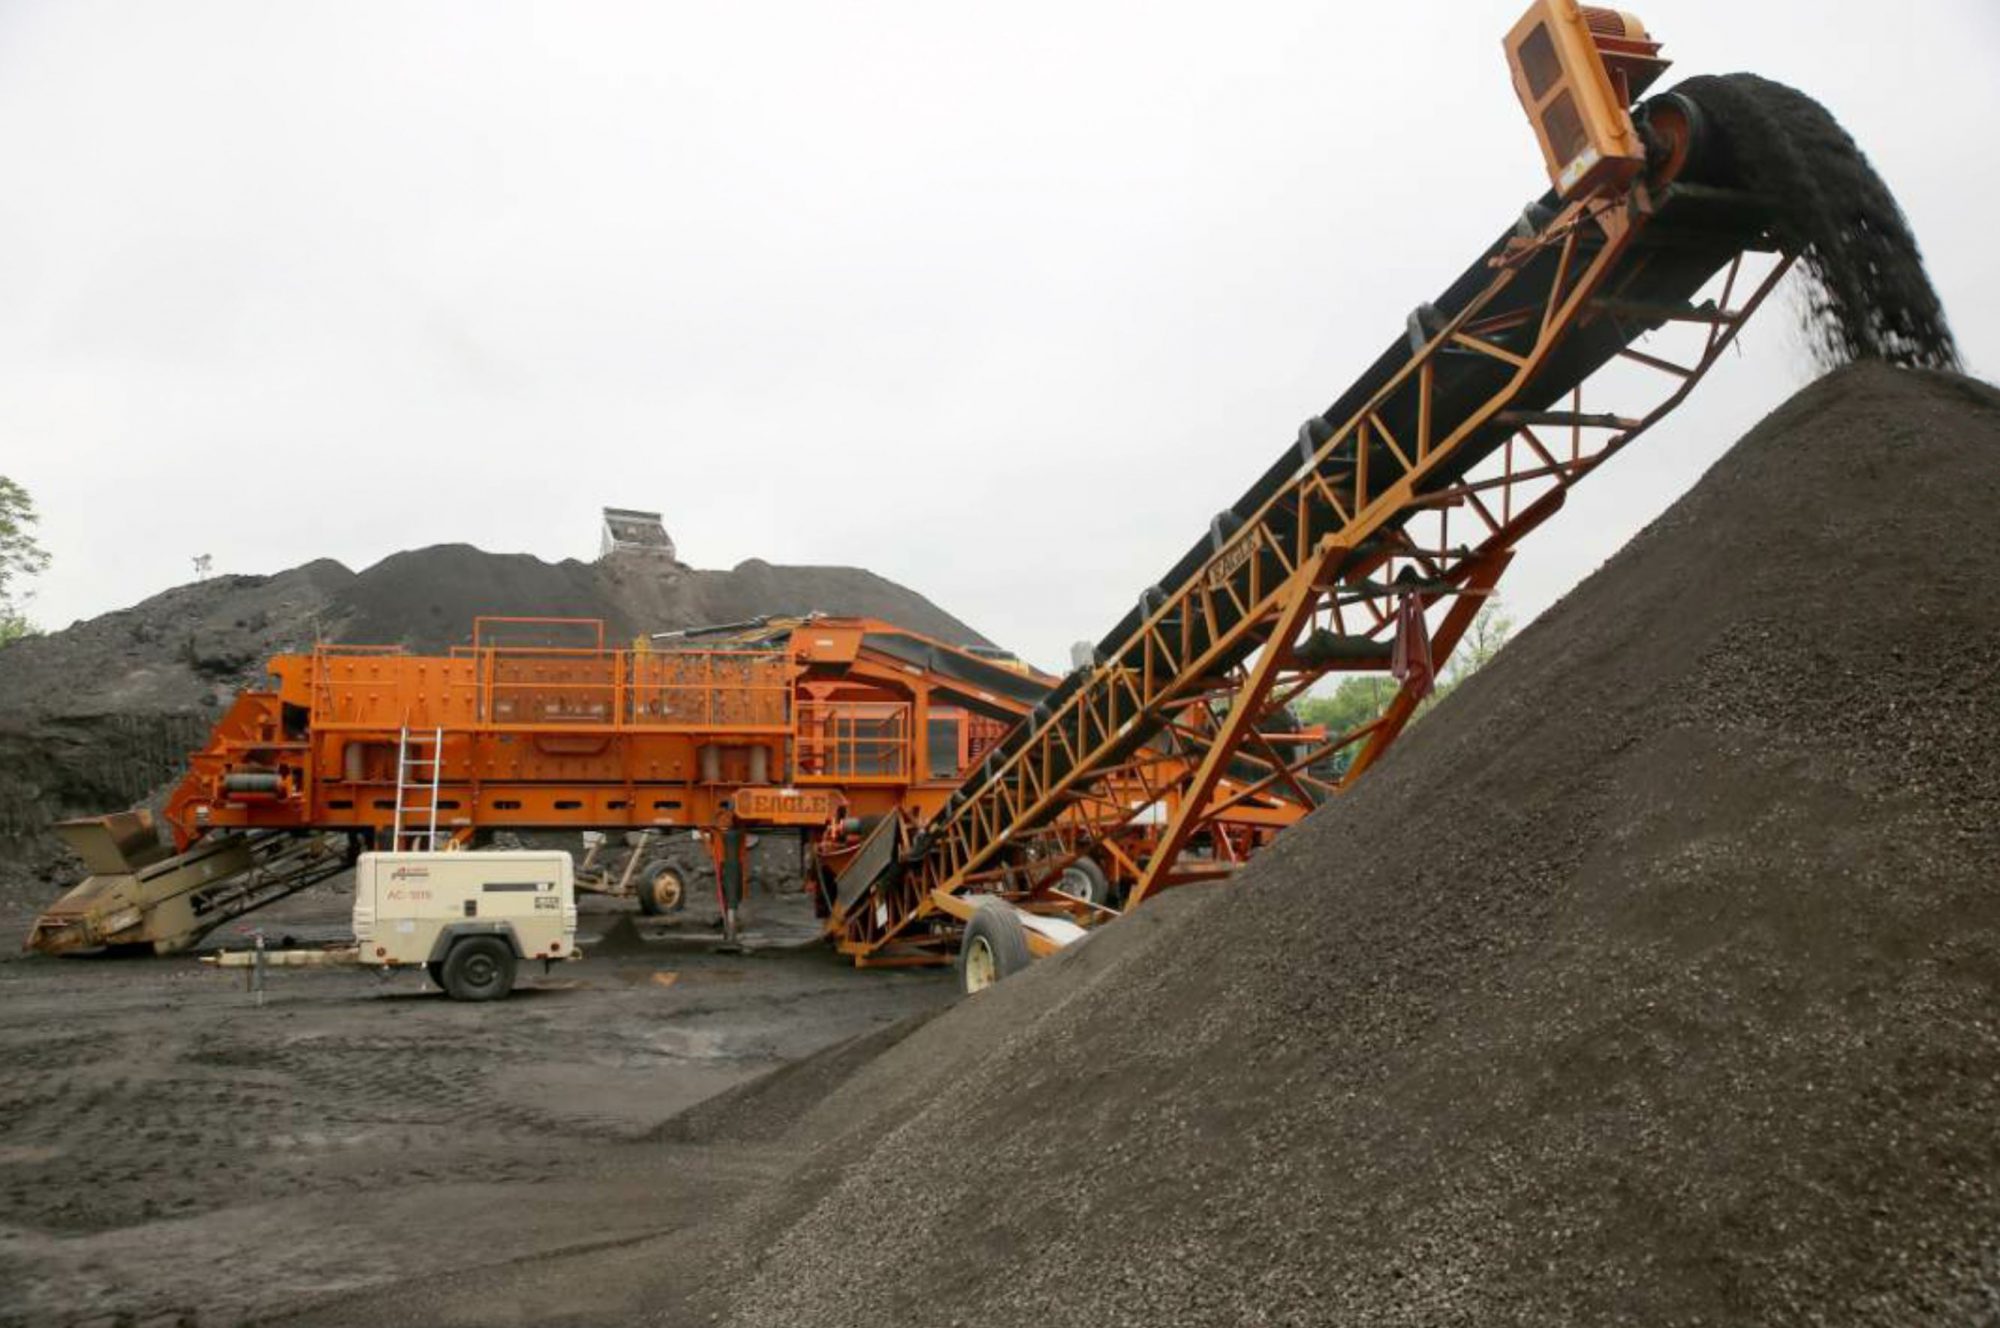
Harding Group Invests in the Future

Evolution is the life blood of every organization. This concept is a core principal of Harding Group, an asphalt and concrete company based in Indianapolis, Indiana. Harding Group has been a part of the Indianapolis roadbuilding community since the 1960s. In 2018, the company went through an ownership transition where Shelby Howard IV became the owner of Harding Group.
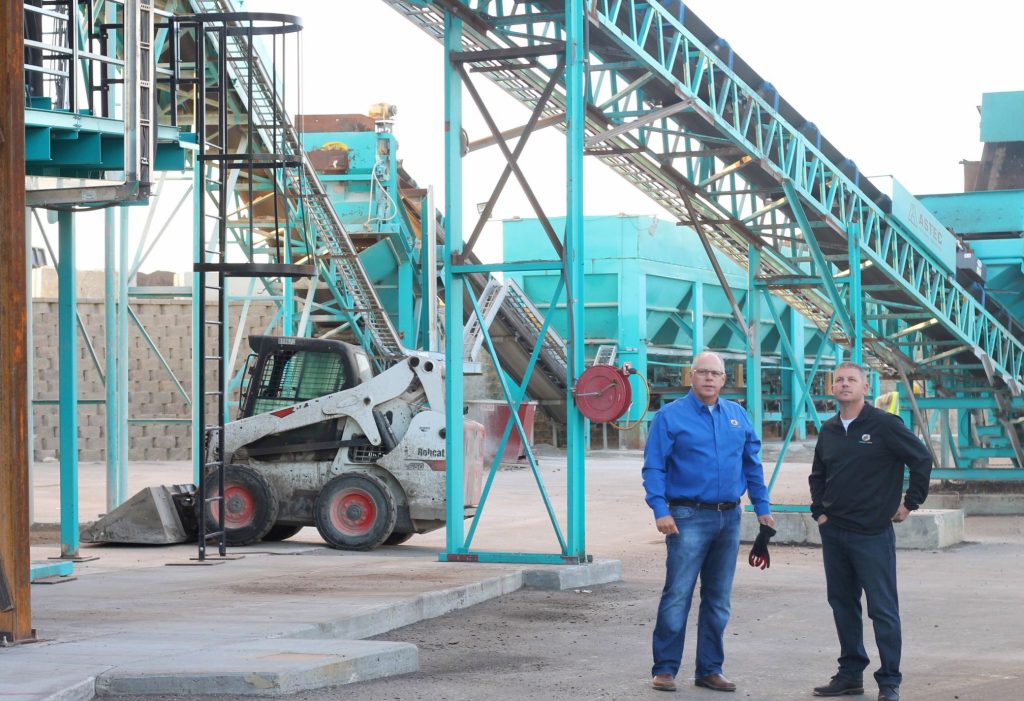
Shelby Howard IV (right) is pictured here with his Dad, Shelby Howard III (left), as they visit the Harding North Plant.

A Background in Business

Shelby IV grew up in his family commercial vehicle dealership business working his way up from the parts room. His father, Shelby Howard III, purchased his first dealership in 1992 and grew that dealership into a network of dealerships throughout Indiana and the contiguous states. In 2014, the dealerships were acquired by a national company. For the next five years, Shelby Howard IV stayed in the dealerships and became general manager for the Indianapolis and Gary locations which were two of the highest performing dealerships in the portfolio. Shelby IV wanted to transition back into a family business and made his investment in Harding Group shortly after.

COVID Encourages E-Ticketing

Shelby Howard IV learned that the keys to success in the growth of his dealerships was having strong communication between employees as well as having industry leading technology. It is anecdotally said the construction industry is a laggard in adoption of technology. Harding Group historically fell in this category; however, Shelby IV has made significant investments in use of technology in a short time.
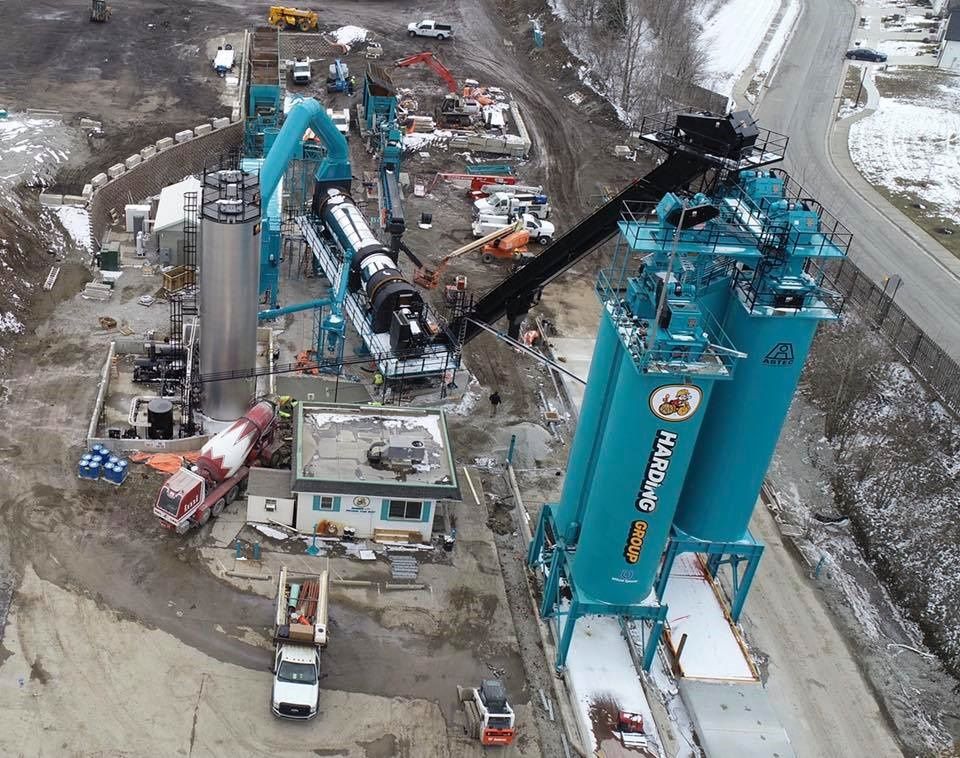
Bring Technology to the Forefront

“In today’s environment, you have to always be looking for ways to improve your business efficiencies to stay best in class,” Shelby Howard IV said. “Technology is one tool that is always advancing. We try to stay in front of our competitors by fully embracing the tools that are at our fingertips. This allows our employees to strive and at the same time, it makes it easier for our customers to do business with us.”

Operating multiple hot mix asphalt plants, Harding Group identified multiple opportunities to upgrade its communication with its own paving crews and its outside customers. Beginning in 2019, Harding Group began electronically sending invoices and tickets daily for all its transactions. The primary reason for this was to eliminate the many hands a paper ticket must go through prior to a customer entering an invoice and the corresponding tickets in its accounting system.
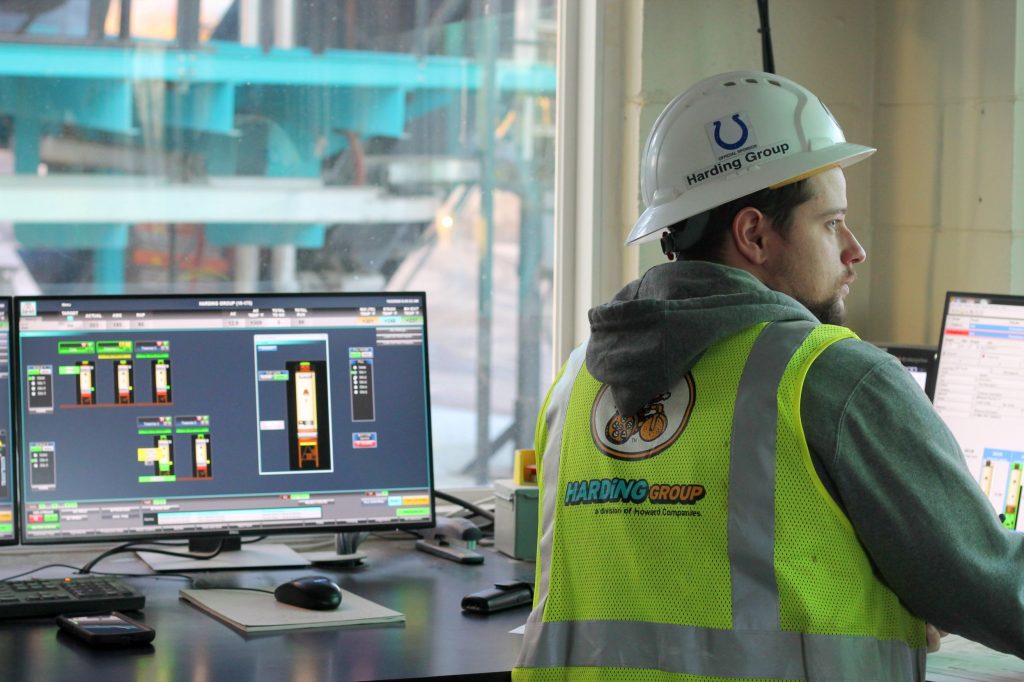
William Jacobs, a Plant Operator, is shown here in the control room at the Harding Group North Plant.

Asphalt professionals know that prior to 2020, paper tickets were often printed at asphalt plants and handed to the hauler, then to the foreman on the job site, then to an office employee and so on. Harding Group was ready to streamline this process.

“Our E-ticketing process is an internally developed process as we use both Libra and Astec loadout software at the plants to generate the tickets,” Shelby Howard IV said. “We felt it was important to have one unified delivery system of invoices and tickets when using multiple load out software partners.”

Command Alkon and Libra Systems, Inc. Team Up to Serve Heavy Construction Materials Suppliers

In changing the way Harding Group communicates its invoices and tickets to its customers, it eliminates the need for the paper ticket. This is one less thing the paving foreman needs to worry about and allows him to focus on paving and not collecting paperwork to send to the office.
“For our triaxle trucks, we have invested in GeoTab, a GPS integration technology with the triaxles. GeoTab allows us to not only monitor the location of the triaxles but certain key safety metrics, which we incorporate in our overall Key Performance Indicator model. Our crew foremen all have access to see real-time the GPS of the triaxles, whether milling or paving that day, in an effort to gauge the correct speed for paving to ensure there is no waiting in between trucks and we can pave a continuous mat.

Braen Stone Leverages Libra Systems Integrated GPS and Plant Management Tech

“Our operations team is also able to view the truck flow from the office, and communicate with the crew foreman whether or not we have the right number of trucks on the job for the day. This flexibility has allowed for significant operations improvements for the company by knowing and understanding where our assets are at all times and ensuring there is constant communication between the plant, field and office on a daily basis.”

The company found that sending this information daily allows its customers to provide feedback immediately. Harding Group discovered daily invoicing to be a key performance indicator metric for the accounting team in providing management with timely and accurate financial data as part of daily dashboard reporting of the asphalt plants.
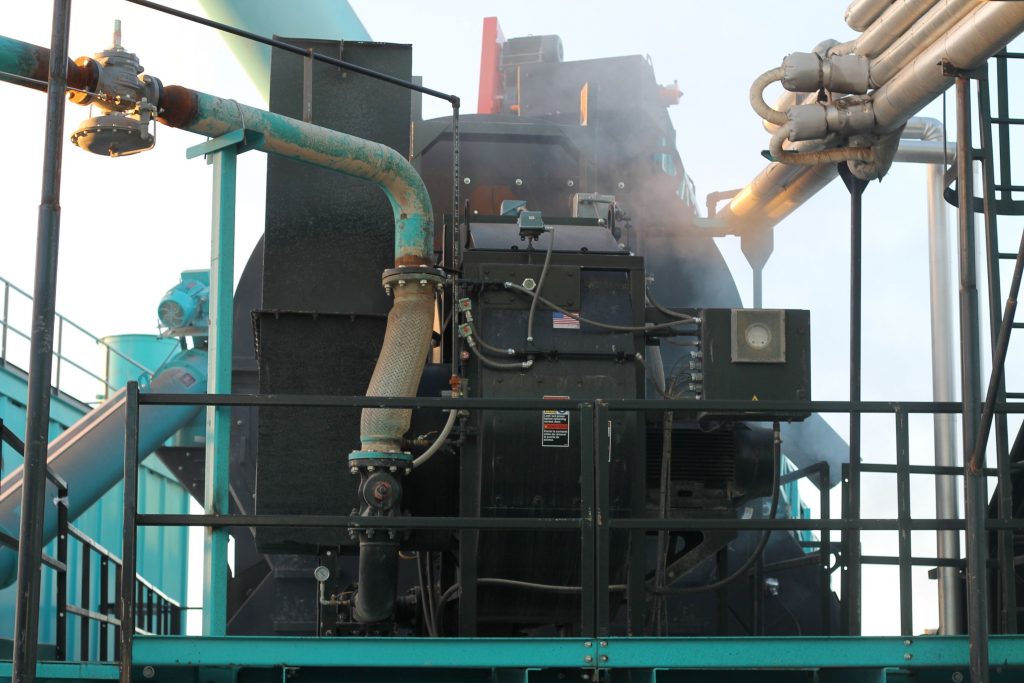
Both plants with upgrades complete fired up within an hour of each other April 1, 2020.

“This further allows the plant to understand real time what the daily production demand is to ensure a proper continuous flow of production. We are able to create digital copies of the tickets at the time of loadout. We’ve further internally developed the reporting ability to compile data and through proprietary software are able to send an invoice matched with the corresponding tickets sorted by job to each customer for the day.”

In 2020, a shift in Indiana came by requiring paperless ticketing on certain projects. With the onset of COVID-19, Harding Group was prepared to handle these requests without any change in its standard operating procedure.  During the COVID-19 peak shelter in place orders, the accounting team at Harding Group was able to work remotely while still delivering daily reporting to its customers on asphalt purchases.

Having improved the communication from the asphalt plant load out to invoicing portion of a transaction, Harding Group then shifted its focus to the front end of asphalt production: the ordering process. Servicing multiple asphalt crews from various scheduling managers presented a challenge to ensure daily production was scheduled in the most efficient manner. During the winter of 2019-2020, Harding Group took to the drawing board and reinvented its daily ordering process.

With the help from a developer and the leadership of Shelby Howard IV and Chief Financial Officer Sean Rizer, the company developed an online ordering tool which allows customers to place orders a day in advance or a week in advance. The orders are gathered and reviewed by the plant manager which allows him/her to modify the order if necessary. This tool allows for flexibility in scheduling so if a rain-day hits the plant operator can send a message to all customers such as, “due to weather conditions all orders are being pushed back a day.” Harding Group put security measures around the platform to ensure only authorized users are placing orders. Utilizing this tool improves the communication from the paving schedulers to the plant manager and operators.

Sean Rizer, CFO of Harding Group, works on the development of their new app.

With this new system, orders can be placed from smart phones, tablets, or computers in real time. Through implementation of this tool, the company no longer worries about a missed phone call or a missed opportunity to fill an order. This has improved the plant’s ability to increase sales by not missing orders and has increased customer satisfaction and improved communication and product availability.

Bring in a New Plant

In summer of 2019, Shelby Howard IV realized Harding Group needed to increase its investment in its asphalt plants.

“The key to making a consistent product is having a consistent manufacturing process.”
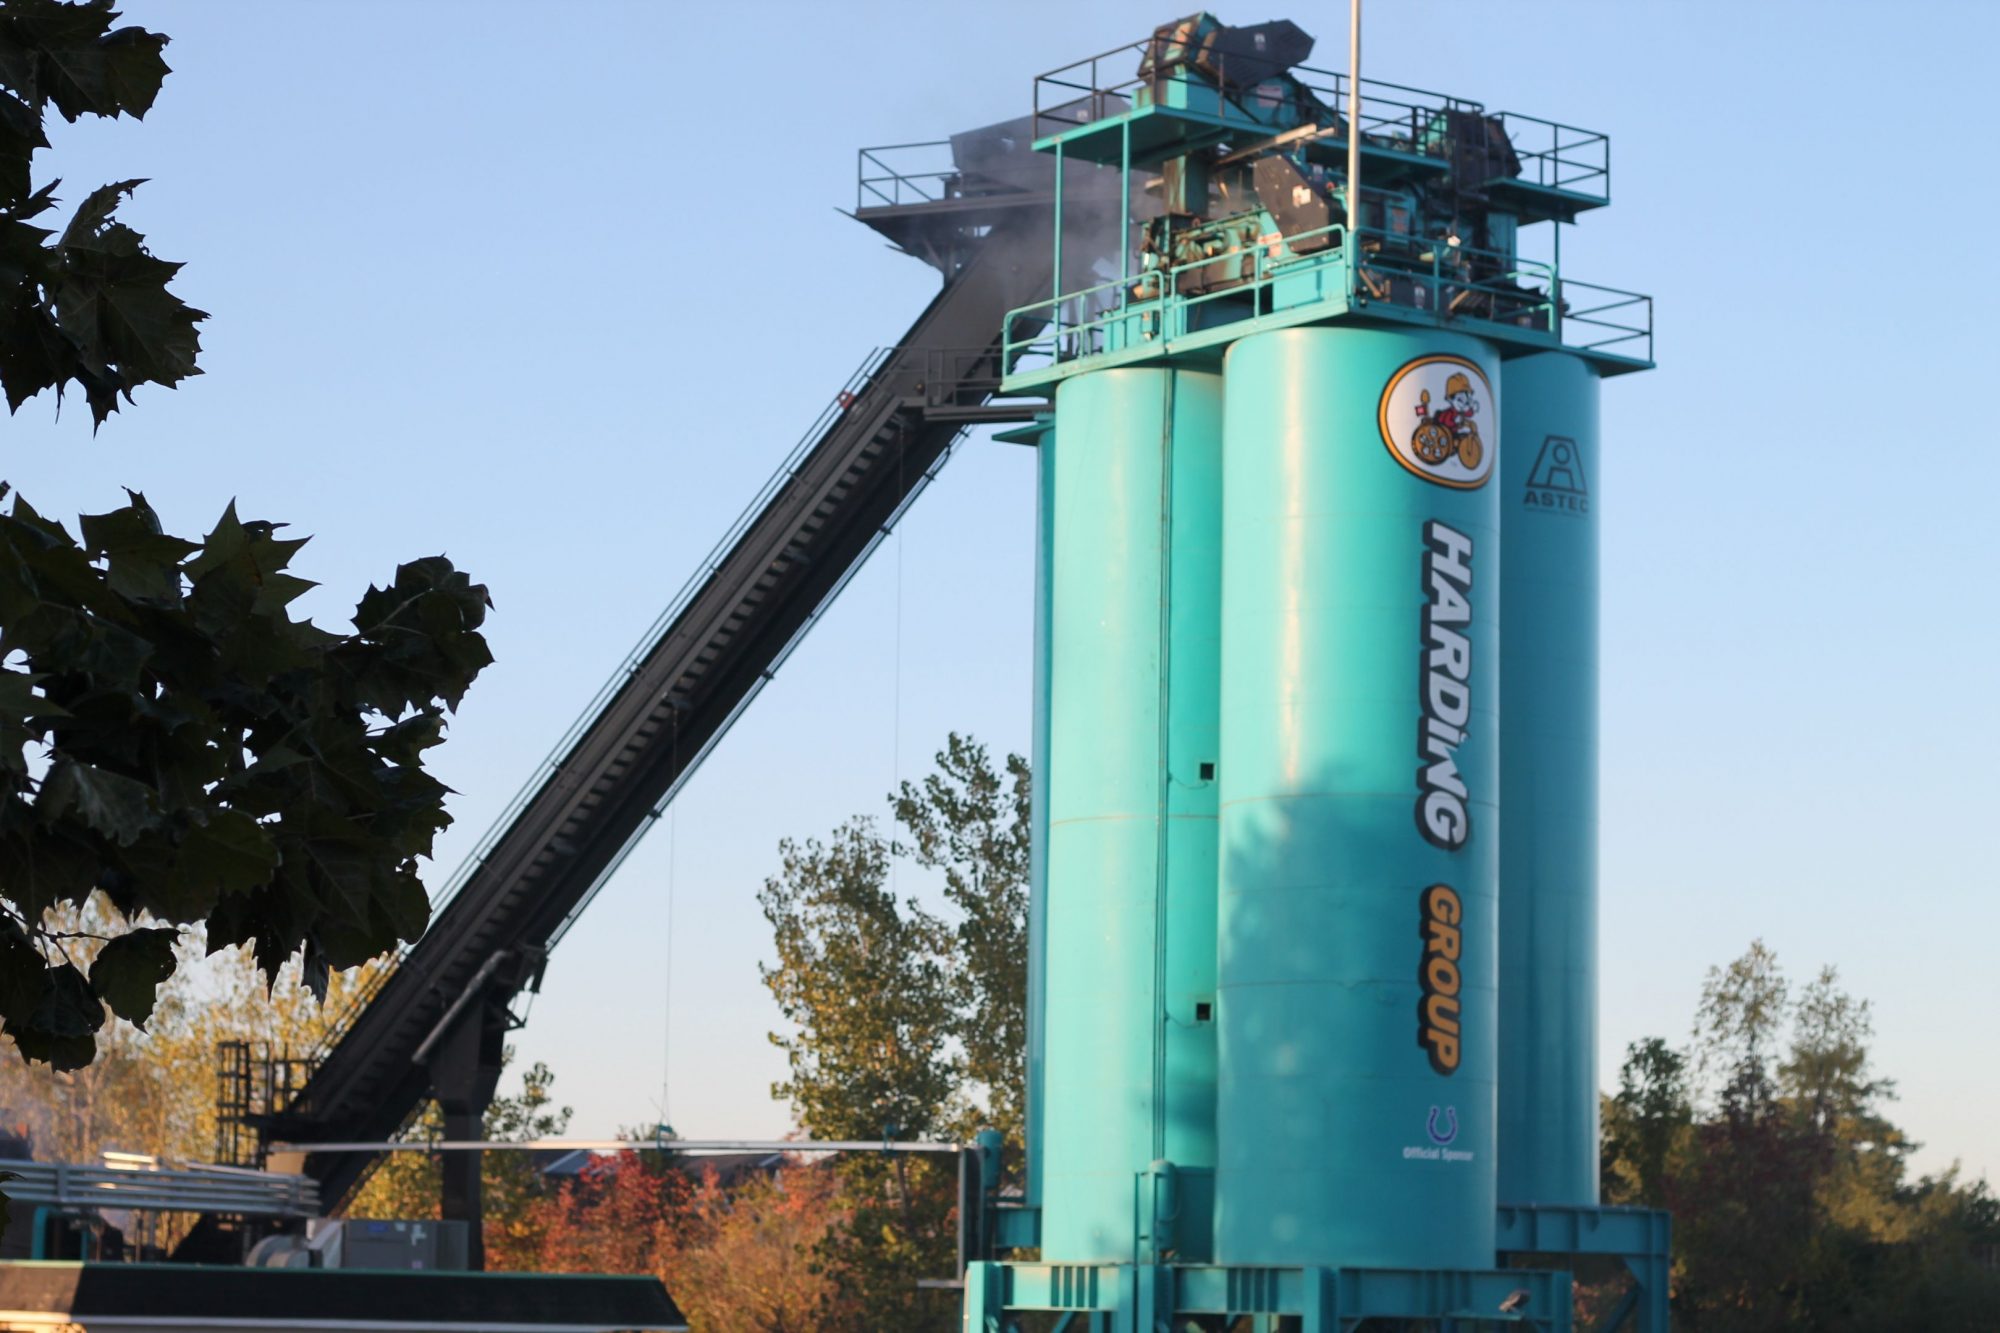
Harding Group partnered with Astec Inc., Chattanooga, to make significant upgrades to its existing asphalt plants. The two plants had very different set ups and this created additional challenges for the quality control team from a consistent manufacturing standpoint.

One plant was a batch plant retrofitted several years ago with a separate dryer and mixing drum system; the other was a prototype drum and dryer combination.
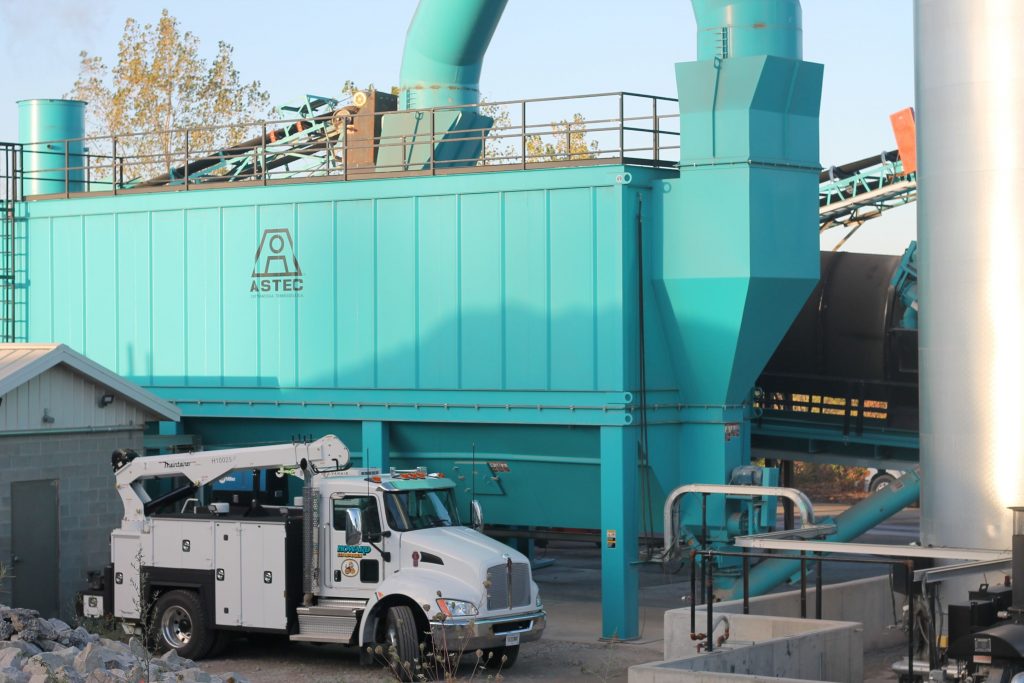
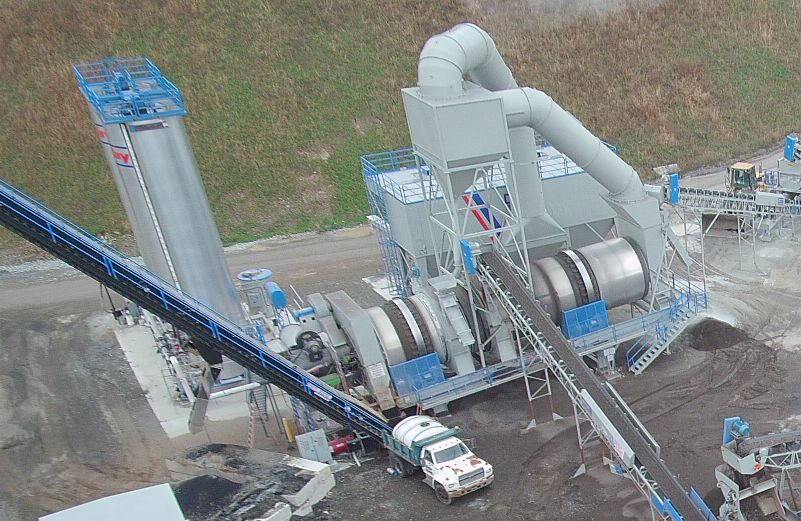
In 2019, Shelby Howard IV decided to make upgrades to two asphalt plants, enlisting the help of Astec Industries and his own knowledgeable team members. The retrofit batch plant received several upgrades including baghouse, drag slat conveyor, replacement silos and control system.

Through several discussions with Astec and the opportunity to tour its facilities in Chattanooga, Harding Group decided to upgrade both plants during the winter of 2019 with the Astec Unified Drum System. The retrofit batch plant also received several other upgrades including baghouse, drag slat conveyor, replacement silos and control system. The team at Harding Group worked countless hours during the winter on the installation with the assistance of Astec’s team.

“Some of the main initiatives of upgrading the two asphalt plants in one winter offseason were being leaders in doing our part of recycling (See this article, “Asphalt Producers Are Among Nation’s Top Recyclers”) and consistency of asphalt product from both plants. The largest challenges of getting the plants ready for the 2020 paving season were coordination of efforts and construction schedule. Indiana weather is famous for 30 plus degree swings in the same week. However, Harding Group was able to manage the construction schedule to ensure cranes and parts were on site and the necessary crew was on hand. Harding Group’s own employees did the vast majority of the construction with the assistance of Astec. There were many cold long days spent ensuring all parts were set with exact specification.”

Asphalt Producers Are Among the Nation’s Top Recyclers

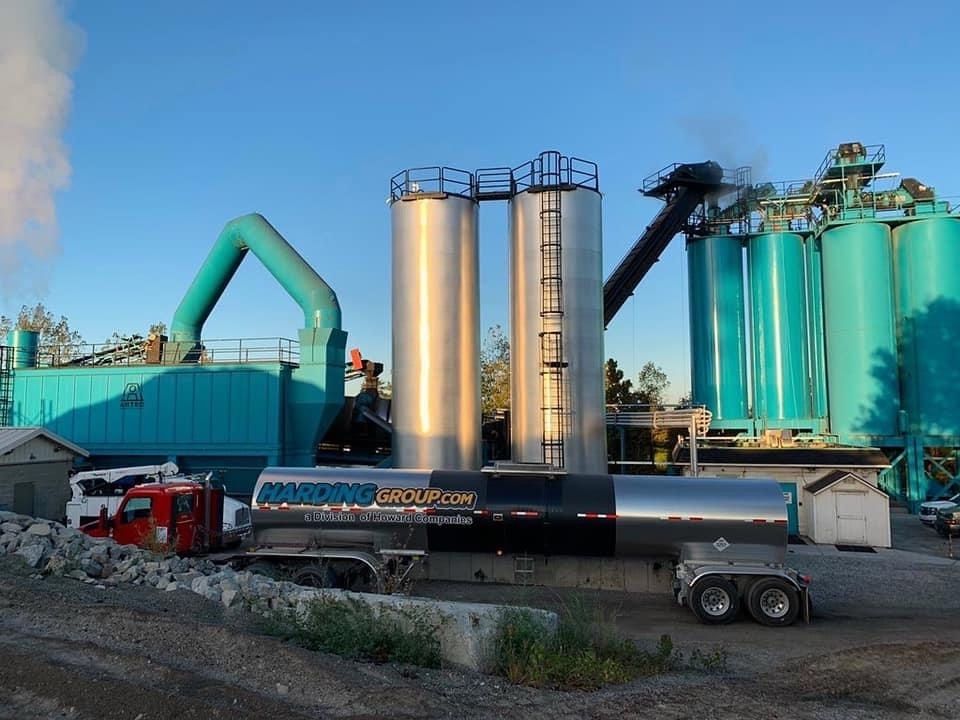
Both plants fired up within an hour of each other April 1, 2020, a huge undertaking, which was well worth the investment.

“I knew heading into the 2020 paving season we were going to have to make significant upgrades to our asphalt plants to stay competitive in our market,” Shelby Howard IV said. “We know the asphalt plants are the heart of our operations and without a reliable asphalt plant, it makes it challenging to successfully bid work and retain asphalt plant customers as well. We’ve seen already this investment has been a ‘no brainer’ as it has allowed us to retain and grow our employee base and had no layoffs due to COVID-19, which is a testament to what we are trying to do in being a sustainable company in our local market.”

In the ever changing landscape we are all in, it is important to focus on constant improvement and looking for the next opportunity. By doing so, you can differentiate yourself from the competition and streamline processes. Harding Group is planning to accomplish this by looking ahead and planning for the future through implementation of new technology.
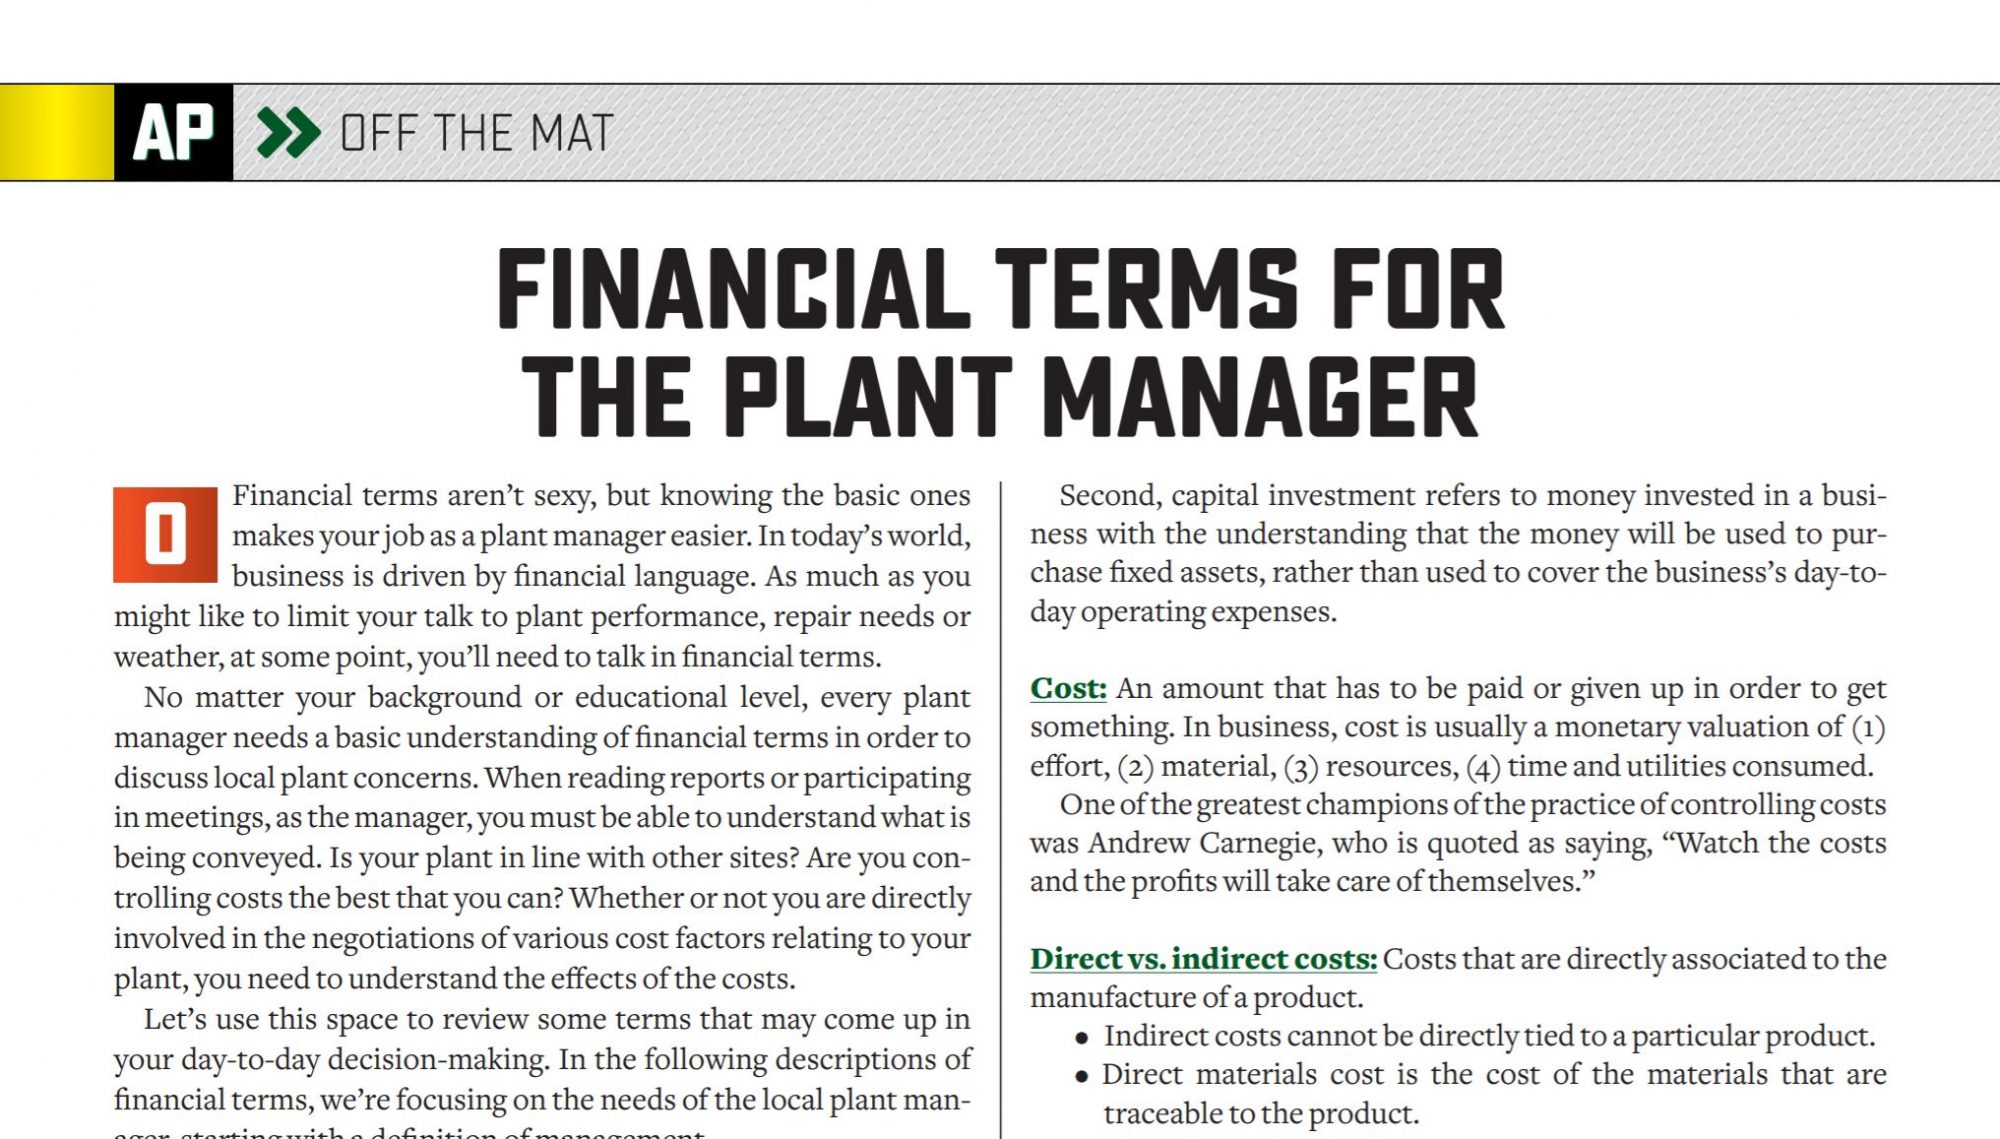

Financial Terms for the Plant Manager

Financial terms aren’t sexy, but knowing the basic ones makes your job as a plant manager easier. In today’s world, business is driven by financial language. As much as you might like to limit your talk to plant performance, repair needs or weather, at some point, you’ll need to talk in financial terms.

No matter your background or educational level, every plant manager needs a basic understanding of financial terms in order to discuss local plant concerns. When reading reports or participating in meetings, as the manager, you must be able to understand what is being conveyed. Is your plant in line with other sites? Are you controlling costs the best that you can? Whether or not you are directly involved in the negotiations of various cost factors relating to your plant, you need to understand the effects of the costs.

Let’s use this space to review some terms that may come up in your day-to-day decision-making. In the following descriptions of financial terms, we’re focusing on the needs of the local plant manager, starting with a definition of management.

Terms and Abbreviations You Should Know

Management: Combined fields of policy and administration and the people who provide the decisions and supervision necessary to implement the owner’s objectives and achieve stability and growth

Amortized expenses: The costs for assets such as buildings and computers, which are expensed over time to reflect their usable life

Assets: Anything owned by the company having a monetary value; i.e., fixed assets like buildings, plants, machinery, and vehicles (As a plant manager, your focus is to manage local site assets. You keep the assets in good working condition, evaluate the plant for improvements and ensure all assets are in safe working order.)

Break-even point: The point when a business’s revenue equals its expenditure (In most cases, the plant manager will participate in the break-even point by providing data in the budget process. It’s important to have a sense of the break-even point in order to make your day-to-day decisions.)

Budget forecast: The amount of money the company plans to spend over the course of a period, usually a year

Budget variance: The difference between a budget forecast and actual expenditures

5 Habits of Efficient Plant Managers

Capital investment: The term capital investment has two usages in business

  • First, capital investment refers to money used by a business to purchase fixed assets such as land, machinery or buildings.
  • Second, capital investment refers to money invested in a business with the understanding that the money will be used to purchase fixed assets, rather than used to cover the business’s day-to-day operating expenses.

Cost: An amount that has to be paid or given up in order to get something. In business, cost is usually a monetary valuation of (1) effort, (2) material, (3) resources, (4) time and utilities consumed.

One of the greatest champions of the practice of controlling costs was Andrew Carnegie, who is quoted as saying, “Watch the costs and the profits will take care of themselves.”

Direct vs. indirect costs: Costs that are directly associated to the manufacture of a product.

  • Indirect costs cannot be directly tied to a particular product.
  • Direct materials cost is the cost of the materials that are traceable to the product.

Direct labor: Represents the wages and fringe benefits earned by the individuals who are physically involved in converting raw materials into a finished product

  • Straight time: scheduled shift of time normally eight hours, paid at the straight time-rate
  • Overtime: request for additional time in addition to the straight time, paid at a higher rate than the straight time

Depreciation: The method used to systematically move the cost of an asset from the balance sheet to the income statement over the course of the asset’s useful life

How to Find Your Next Plant Manager

Fixed assets: Assets that are difficult to convert to cash, such as buildings and equipment.

Inventory is an asset, and is found on the balance sheet under current sssets, as it is usually assumed that these parts will be turned into products and sold reasonably soon.

Financial reports: Reports issued by a company that describe the financial activities of the company. The financial statements are broken down into three different statements:

  • The income statement shows the income and expenditure of the company, including things such as depreciation, income tax, interest income, etc. These expenditures are then compared to revenue to determine gross profit.
  • The balance sheet statement is used to value a company and to show what it owns or owes. The balance sheet lists all assets, liabilities and shareholders’ equity attributed to the company. It is always a snapshot of one point in time. The balance sheet statement must always be in balance.
  • The cash flow statement is a summary of the actual or anticipated incomings and outgoings of cash in a firm over an accounting period.

Inventory: The value of materials and goods held by an organization (1) to support production (raw materials), (2) for support activities (repair, maintenance, fuel or other energy sources held), or (3) for sale (merchandise, finished goods, spare parts)

Inventory can be valued in three ways.

  • The first-in, first-out (FIFO), method says that the cost of goods sold is based on the cost of the earliest purchased materials, while the carrying cost of remaining inventory is based on the cost of the latest purchased materials.
  • The last-in, first-out (LIFO), method states that the cost of goods sold is valued using the cost of the latest purchased materials, while the value of the remaining inventory is based on the earliest purchased materials.
  • The weighted average method requires valuing both inventory and the cost of goods sold based on the average cost of all materials bought during the period.

Inventory shrinkage: Aggregates used in the production of hot mix need to be removed and be free of all moisture in the production process. Moisture will account from 1 to 7 percent of the total weight of the incoming aggregates. This loss may be up to 35,000 tons of material shrinkage over a one-year period. When accounting for aggregate inventory, we need to take into consideration the loss of moisture. In addition to moisture, you also need to account for any inventory that is not part of the final delivered mix.

Indirect labor: Employees or workers who do not directly produce goods or services, but who make their production possible or more efficient. Indirect labor costs are not readily identifiable with a specific task or work order. They are termed indirect costs and are charged to overhead accounts.

Manufacturing overhead: Includes all of the other costs incurred in the manufacturing activities. These indirect costs include repairs and maintenance, depreciation of the manufacturing equipment, utilities, salaries of manufacturing supervisors, etc.

Operating expenses: Expenses such as administrative employee salaries, rents, sales and marketing costs, that occur in operating the business

Tips to Succeed as an Equipment Manager

Operational annual budget: A plan for expenditures, to which most plant managers will be asked to contribute, required to maintain the functioning of a business

Overhead: An expense that cannot be attributed to any one single part of the company’s activities

ROIC: Return on invested capital is a calculation used to assess a company’s efficiency at allocating the capital, under its control, to profitable investments. The return on invested capital ratio gives a sense of how well a company is using its money to generate returns.

Variable costs: Costs that are incurred in relation to sales volume; examples include the cost of materials and sales

To the non-financial manager, financial terms can be confusing. Many times, you’ll be asked to attend a meeting with the accounting department, which may cause you some stress. Don’t allow yourself to be intimidated; if you’re not sure what they’re talking about, ask questions. I cannot tell you how many times I have been asked to give a plant tour to a group of accountants or bankers. You would not believe the questions they asked. Never forget you are the expert at your plant. The accounting department houses the experts in the documenting of the cost of doing business.

As a suggestion, you may want to cut out this article and file it somewhere in your office. It can be used as a resource. When the time comes for a financial meeting, take it out and review the financial terms as part of your preparation.


Ken Monlux is an asphalt industry veteran with 30 years experience in all areas of operational management. For more information, contact him at (209) 495-1017 or kenmonlux@yahoo.com.
How to Start Up Your HMA Plant

With the proliferation of automation and robust plant controls, a newbie plant operator should be able to step into the control house and click the mouse over the button labeled “Startup Plant” to make the day begin. But there are steps he needs to make sure have happened first.

Most asphalt plant controls manufacturers and plant original equipment manufacturers (OEMs) who build controls into their systems will have the series of motors coming online in a logical pattern that keeps your operator from sending dry rock to the silo or blowing up the baghouse, but does your operator know why? Does he understand that the asphalt cement (AC) pump should warm up and circulate before delivering liquid to ensure there are no slugs of cool AC traveling around?

There’s theory and logic behind starting up an asphalt plant. Bringing the air compressor up before throwing a flame in the drum matters. Whether you’ve customized the controls so plant startup requires multiple clicks of the mouse—giving your operator time to listen to components and feel the vibration of slingers and conveyors—or you’ve purchased a system that starts with one click and moves through the startup protocol on its own, you want to know why you’re warming one piece before another. You want to know the method behind the madness.

How to Set Up a Portable Asphalt Plant

Let’s pretend you have a plant with blending automation. That’s downright essential these days. What we’re going to focus on with this article is getting all the mechanicals going, and then go to the computer for the mix design.

Depending on the weather, time of year, area of the country you’re in, and so on, your start-of-day will fluctuate. You may be turning the lights on in the control room at 3 or 4 a.m., depending on whether or not you had rain or frost the night before. Thinking about the night before, if the RAP bin isn’t enclosed, it should have been emptied. I’m one who believes you never leave the RAP bin full overnight. The recoverable AC in the RAP congeals with condensation and other elements. Depending on how fine the RAP is, it could develop a crust that your ground man will have to break up. Throughout these steps, we’ll look at a couple other tips for shutting down the night before, but let’s focus now on the morning startup.

Step One: Turn on the air compressor to build up air throughout the plant.

You shouldn’t see a surge of power here unless you’ve got a bad belt or something else the mechanic should take a look at. Back in the day, I had three different air compressors for the large plant I ran. One was dedicated to the baghouse, one was dedicated to the silos and gates, and one was dedicated to the rest of the plant. You get the air compressor going to get the plant full of air.

Step Two: Turn on the AC pump to circulate liquid back into the tank you’re pulling from.

You’re putting the pump in circulation mode at this time. When you turn it on, watch the amperage. It should spike and then level off. If the needle peaks and stays buried, something’s wrong. A cold AC pump requires attention from the ground man. The newbie plant operator has no business running around trouble-shooting componentry so, send the ground man to the pump with an infrared or space heater, depending on safety regulations for your operation, if the AC pump has a tough time getting going. He just needs to put some heat around the pump; he’s heating the cast iron metal.

You’ll want to make sure you have hot oil at this point as well. The hot oil pumping through jacketed lines is the lifeblood of the plant.

Top Questions to Ask Your Liquid Asphalt Provider

Step Three: Turn on the screen decks for both virgin and recycle material.

When shutting down the plant the night before, you should have emptied the decks, but some stray material might be waiting to shake off. When starting up these big motors, you’ll see a power surge.

Step Four: Turn on all conveyor belts including the collector, incline and weigh scale belts.

With this step, you’re warming up the conveyor belts; you want them fairly dry and you want the weigh conveyors zeroed out. If the belt is soaking wet, guess what happens to material you feed to it? That material will slide off the incline and your whole operation goes to crap. Get the belts warm and dry.

Whatever little bit of material was laying on the belts from the night before needs to move on to the screens at this point. This is why you’re starting up in a particular sequence.

Move old material along. Then zero out the virgin weigh scale belt and the RAP weigh scale belt. (You’ll zero them out again right before making mix.)

Step Five: Start up the slat conveyor or bucket elevator.

Step five is to start up the slat conveyor. With this component running, open the control house door or step outside and listen to it running. Listen for anything that sounds “off” or “different” from other mornings. All photos courtesy of Eagle Crusher, Galion, Ohio, and Tresco Companies, Mount Pleasant, Pennsylvania

These are big motors again. Make sure you listen to the conveyors. Physically open the control house door and listen to the conveyors out there. When you start up the slat conveyor, listen to it. You can hear if a bearing’s going out or if a slat’s about to tear off.

Learn the sounds of your plant when it’s running smoothly and you’ll be well aware of a sound that’s “not right.”

If you see a funky amp reading on the screen, you need to call for the ground man’s help.

It’ll be natural to see an initial spike because some material might have been left in the tail end of the slat conveyor the night before. Sometimes it takes a little effort to “bust loose” and move, so you’ll see that initial peak. If the plant operator made a mistake shutting down the night before and buried the slat’s tail in mix, you’ll probably trip a breaker trying to start this motor. Moral of the story: Empty the slat before shutting down.

Interstate Asphalt Powers Up Updated Plant

If you have multiple silos, also start your crossover conveyors at this time. Check the flop gates. Open and close the batchers to make sure everything is operating correctly. Listen to the flop gates going back and forth. When switching from filling silo 1 to filling silo 8, a malfunctioning flop gate means you’ll have mix piling up on top of the silos. That’s an expensive, potentially dangerous, mess you can avoid if you listen for proper operation now.

Step Six: Open and close silo gates.

Bring the loader operator or a dump truck over to pull a plug of mix out of full silos to make sure HMA is flowing correctly. You might think a silo is empty, but a portion of mix that fell out of a batcher in the night could be sitting in the bottom of the silo, waiting to cause a quality control problem. Dump that into the back of a truck for the RAP pile.

Step Seven: Start the exhaust fan.

This involves a pair of giant motors. As I mentioned with other amp indicators, if you see the amps peak without recovering, something’s going wrong. The folks at Libra Systems Inc., Harleysville, Pennsylvania, have their PlantWise drum mix control system set up so you can pull up a screen that monitors 32 analog inputs in a color-coded range. If you’re in the red range, you know something’s going wrong and you have the option of clicking on the component on the screen to see what’s happening. You have the option of making notes for maintenance or shutting down if it’s something serious.

Transition to Liquefied Natural Gas (LNG) at the HMA Plant

Step Eight. Start the drum.

You’ll start the drum or drums with the discharge chute in the dump or “on the ground” mode. If it was emptied last night, all is well, but you might have some dry rock and sand in there. Being in “dump” mode means the sand or dry material cycles out without contaminating future mix in the silos.

Step Nine. Set the drum burner on “low fire.”

This step is to slowly heat up the drum and baghouse. You’re sending warmed air through the ducts and into the baghouse. This step is vital. You don’t want any moisture in that baghouse. You want dry dust in there.

Step Ten. Top off and zero out.

Your final step before turning to the blending controls is to top off the cold feed bins and RAP bins.

At this point, the loader operator should top off the cold feed bins and fill the RAP bin(s), and the plant operator should zero out the virgin and RAP weigh scale belts again.

With your 10 steps in sequence to starting up the asphalt plant, you’ll finally look at your screen(s) in the control house to ensure everything is up to the proper temperature for making today’s mix. Make sure you’ve selected the appropriate silo to accept product and turn your attention to the blending system. By following a consistent, logical pattern for plant startup each day, the successful plant operator moves air, heat, and energy through the system without missing vital steps or sending material to a road block.

Of course, there are controls systems on the market that will start components in a sequence with the push of one button. Plant operators still need to understand what they’re doing and why. They need to understand the need to empty slats at the end of Thursday to make startup painless on Friday, and so on. They need to learn to listen for smoothly flowing bearings when specific motors begin moving the slat conveyor. And so on. These 10 steps for starting the HMA plant take the plant operator back to the basics for best plant operation.


A.J. Ronyak is the proprietor of Asphalt Solutions, Cape Coral, Florida, and a veteran asphalt plant operator. For more information, contact him at (623) 853-2273 or nosmellasphalt@msn.com.

5 Habits of Efficient Plant Managers

You can train good habits into your plant managers. I recently revisited Stephen R. Covey’s “The 7 Habits of Highly Effective People: Powerful Lessons in Personal Change.” If you haven’t read this book, may I suggest you take the time to do so? This book will not only change your view on your management style, it may also change your outlook on your personal life. For this article, let’s focus specifically on five habits of the local plant manager.

First you need to differentiate habits from routines. Merriam-Webster defines a habit as “an acquired mode of behavior that has become nearly or completely involuntary.”

In another best-selling book “The Power of the Habit,” Author Charles Duhigg makes the case for why habits exist and how they can be changed. By identifying various habits that you have developed in your daily work life you will be able to do two things:

  • Identify the bad habits and change them; and
  • Identify the good habits and reinforce them.

A paper published by Duke University researchers in 2006 found that more than 40 percent of the actions people performed each day weren’t actual decisions, but habits.

Finally, don’t confuse a routine for a habit. A routine may have habits built in, but it is a sequence of actions regularly followed.

Let’s look at five good habits that all local plant managers should strive towards.

Little Changes Make a Big Impact at the Plant

1. Document

I am a big believer in documentation. In fact, plant documentation is one of my favorite subjects. Today, however, I would like to focus on personal documentation.

Everyone needs to be in the habit of documenting their actions, decisions and observations. This recording of the day’s events doesn’t have to be in a formal report format. The main thing is it needs to be retrievable. Again, this is not part of a report from the main office or the daily production report. What I refer to are personal notes that, if needed, will support decisions made in the fog of daily operations.

You’ll want to document such things as phone calls or texts, weather, agencies or upper management site visits, any safety concern, all outside meetings you attend, issues involving crew or customers, sales agents calling on the plant, and all breakdowns or other stoppage. When in doubt, write it down.

You’ll want to develop your own system of documentation. Anything from a small notebook to a formal personal daily report you complete on a tablet will do. The important aspect is it needs some type of system to make it easily retrievable.

You’ll want to have some common denominators in your documentation. In general, all documentation should have a date, time, name, point of contact information and a connection to the company. Also include a summary of discussions and any outcomes.

Time is not always on your side; try to get down as much information as possible. If needed, you can always come back and clean up your notes. I believe “documentation of your actions is the cornerstone to good plant management.”

2. Be Visible

Always be aware of your surroundings and make an attempt to be visible. At the plant, make sure the crew and others see you on the site. Walk the plant. Inspect the aggregate stockpiles, look for proper management. Talk to the drivers. Listen to the crew. Be approachable. Some plant managers have other duties that will limit their visibility; take every chance to be seen out and about.

First and foremost, make sure that the crew work areas are safe. When you are walking the plant, take the time to notice changes such as changes in housekeeping. Is the safety equipment present and is it installed correctly? Look at the plant with a critical eye. Assure yourself that the traffic patterns are clear and well-marked. While the plant is running, listen for sounds that are not normal. Remember to bring your notebook and document what you observe.

On the job site, don’t just sit in your truck. You’ll want to get out and walk around with the foreman on the job to make a note of the number of trucks on standby and mix temperature entering the hopper. The supervisor and foreman on the job will be documenting all aspects of paving, but having notes on truck cycle times and mix temperature helps your plant operator improve his performance, making this a good habit for the manager.

3. Be a Planner (be Proactive)

In every aspect of your responsibility, be proactive. I have often been accused of being too much of a planner. I wear that as a badge of honor. You can never plan too much. I say that with one caution: once you execute a plan, be flexible enough to adjust it as needed. It is often said in the Army: “A battle plan is only beneficial up to the point of the battle.”

There is no way to cover every aspect of planning in this article so we’ll cover some of the basics.

In planning for needed raw materials (inventory), you need to know your constants and your variables. The maximum amount of storage space at the plant site is one of your constants. The cycle times needed to bring in more inventory from their sources may fluctuate depending on traffic patterns and time of day. You need to know the production demand for materials in a 24-hour period. Always remember, it is a sin to run out of inventory.

Breakdowns and repairs are an area where you should be constantly planning how to respond. Documentation of a past breakdown is the starting point in your effort to plan.

Getting into the habit of writing down lessons your team learned from previous breakdowns should be the goal of every manager.

Somewhere in your files or desk should be a written inventory of all major component parts. This list will serve as a reference. The reference list can be created various ways, the important “take away” is you need one.

Major repair projects need upfront planning prior to the start. Working with sales, your regional manager, and quality control department, the plant manager can develop a major repair plan. All aspects of the project should be examined. As many “what ifs” as possible should be identified and flushed out before any components are ordered. Prior to the start of any major project, all project suppliers should be contacted. As the project gets closer, the crew should be brought into the planning phase. Analyze the project and ask the crew for comments.

4. Participate

To the best of your ability, always participate in all aspects of your job. All managers have segments of their job that they enjoy more than others, but that doesn’t give you permission to coast through the aspects you don’t enjoy.

For example, let’s say you are not big on meetings. You are in the habit of discovering ways to be excused. To overcome that situation, be prepared. Prior to the meeting, find out as much as you can about the agenda, who will be attending, and what the expectations are of you. Bring all the documentation you may need, bring your notebook, sit up straight and be ready to participate. When called on, stick to the topic at hand. Answer all questions in a simple and straightforward manner. If you don’t know an answer, don’t make one up.

Try not to interrupt others, however, be ready if called upon.

How to Find Your Next Plant Manager

5. Lead by Leading

It’s easier said than done. Part of the job description of all managers is the ability to lead. That is not to say all managers are good leaders. It is often said that “leaders are born.” I don’t believe that statement. I believe everyone has the ability to become a good leader.

From time to time, ask yourself what you admire in the leaders around you and look for what you can learn from leaders in your circle.

Conclusion

An efficient plant manager will cultivate good habits. We all have habits, and should set a goal to enhance the positive ones while replacing the negative. I encourage you to look inward and identify some of the key habits in your daily operations. Make a list, good on one side, not so good on the other. One by one, evaluate and work to improve the habits you are not so proud of. Remember, you have the ability to change habits. If you are willing to take on this assignment, not only will upper management look at you in a different way, your output and efficiency stands to improve as well.


Ken Monlux is an asphalt industry veteran with 30 years experience in all areas of operational management. For more information, see his ad on page xx or contact him at (209) 495-1017 or kenmonlux@yahoo.com.
How to Set Up a Portable Asphalt Plant

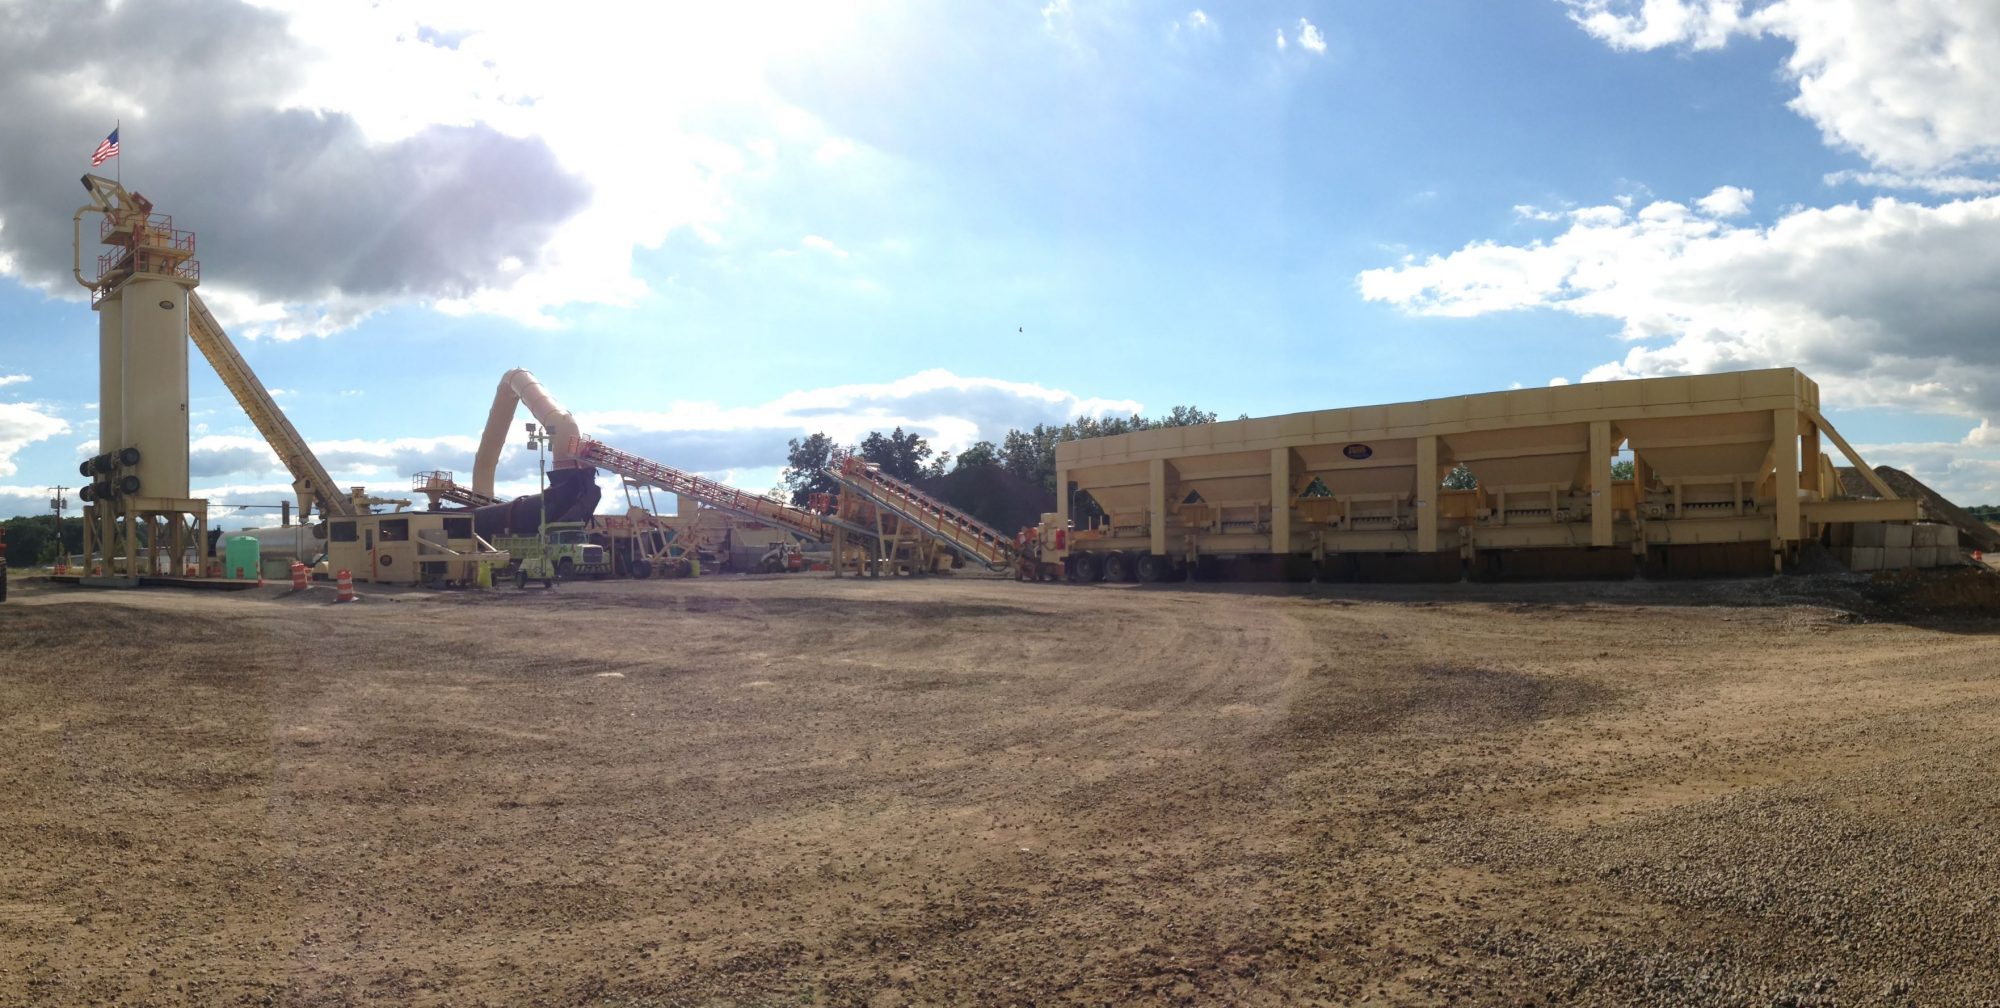
Whether hot-mix asphalt (HMA) production occurs on a permanent site or a temporary, remote site, asphalt plant needs vary from relocatable plants, to skid-mounted plants, to portable plants, based on location.

Setting up a portable unit at a remote site may seem daunting if producers are first-timers to the process, or even seasoned professionals who haven’t performed set-up in a while.

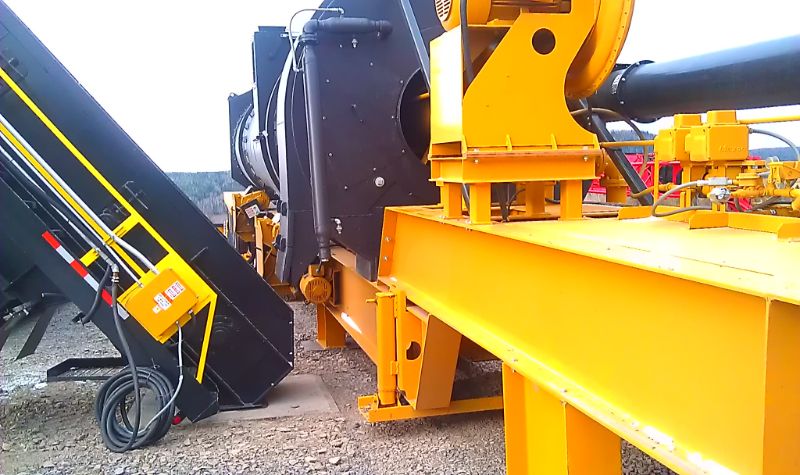
Regardless, setting up a portable plant, whether it’s the Asphalt Drum Mixers Inc. (ADM) EX Series Model 8844—or a competitive, portable plant of similar size—the same basic rules apply.

Remember to think of safety first. Read the manual and understand any safety issues before performing any work.

It’s important to refer to the set-up manual of the particular brand of portable asphalt plant. However, the following instructions will provide an excellent overview of the process, whether these instructions are being used as a primer or merely a refresher.
There are four main steps in setting up a portable asphalt plant.

  1. Prepare the site;
  2. Erect the equipment;
  3. Install electrical cables and plumbing; and
  4. Test and calibrate equipment.

1. Prepare the Site

After selecting the site location, take a few things into consideration before setting the plant. These are, among others: foundations, wind direction, stockpile location, equipment and truck traffic, and your neighbors.

Foundations

When it comes to portable plants, the type of foundations you may need can vary depending on the supports provided by the manufacturer, the soil conditions, and length of time the plant will be at the location. Fully portable asphalt plants, like the ADM EX Series counterflow asphalt plant, allow for a quick setup, directly on the ground, and in most cases, eliminate the need for any type of foundation support or cribbing. Other options for foundation support are optional full-width sand shoes, wood or steel cribbing such as railroad ties, large stones, or concrete pads. You will want to select the support that will allow you to do a quick set-up without compromising a stable support.

Wind Direction and Dust Control

One of the most overlooked considerations for an asphalt plant set-up is for wind and dust control. As materials and the ground become dry, dust may be created around the asphalt-plant site and can become a nuisance if not controlled properly. The wind may blow the smaller materials and dust around the site and this dust may damage sensitive electrical parts, increase cleaning and maintenance of filters and bearings, and equipment. Locate the plant so that any possible dust is carried away from the equipment, control house, and other buildings and neighboring lands. A dust control program that includes frequent watering of bare drives and lots, frequent maintenance, and personal protection equipment (PPE) should be implemented.

How to Find Your Next Plant Manager

Stockpiles

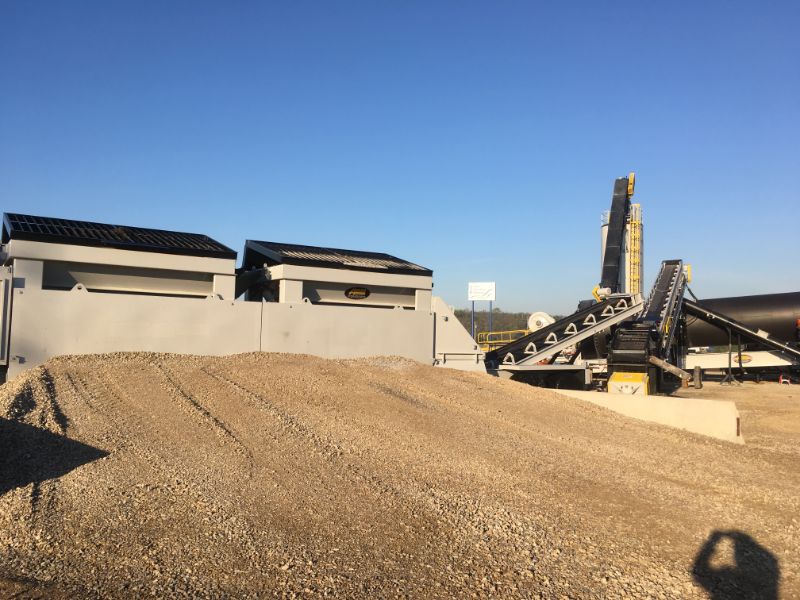
Good stockpiling procedures are crucial to the production of top quality asphalt mix. Proper stockpiling is important to allow for proper water drainage and to minimize material size segregation.

Firm, clean surfaces should be made ready and precautions should be taken to keep stockpiles separated to prevent intermingling that often leads to loss of proper gradation. Separation of the material is achieved by keeping stockpiles widely spaced, using bulkheads between stockpiles, or by storing aggregate in bins. Where bulkheads are used, they should be strong enough to withstand aggregate weight and should extend the full depth of the stockpiles.

Stockpile locations should provide ease of access to both the loader operator and the delivery vehicle while also minimizing cross traffic.

Equipment and Truck Traffic

Efficiency is at the core of any profitable system, so designing smooth traffic flow for your equipment, delivery trucks, and personnel should be top priority. Traffic flow should be designed to minimize travel time, cross traffic, blind spots, and collisions. Allow for short straight lines where possible to minimize time, fuel consumption, and wear on equipment, and to lower emissions. Eliminating cross traffic and blind spots minimizes collisions and other accidents as well as reducing stops and traffic jams.

Neighbors

Odds are that if you are installing a portable plant you don’t plan on being around too long. But whether your project lasts two months or two years, it’s always a good idea to be a good neighbor.

Always be conscious about your actions and how they affect others around you. Proper plant and lot maintenance, minimized truck traffic, reduced noise, and controlling fugitive dust will help keep your neighbors happy. Maintaining a good reputation with your neighbors will go a long way now and with future projects.

2. Erect the Equipment

Before any work is performed, please read and understand any safety issues relative to the equipment.

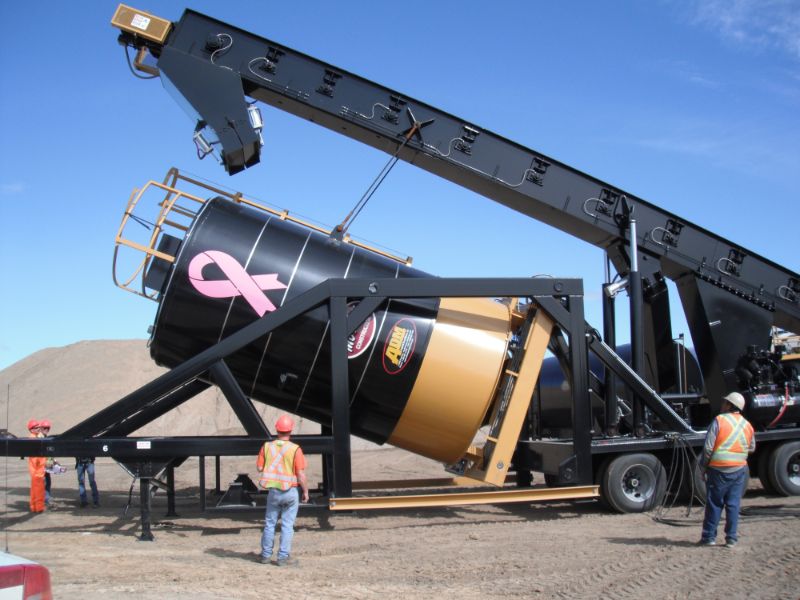
In most cases, the first piece of equipment to be erected is the surge system. There are different types of portable surge systems: some that require cranes and some that are self erecting, such as the ADM self-erecting silo. Simply maneuver the truck rig and silo unit into position marked by the installation drawings and lift the silo and drag slat conveyor using the supplied hydraulic pump unit. Follow manufacturer’s instructions for operating the hydraulic pump unit.

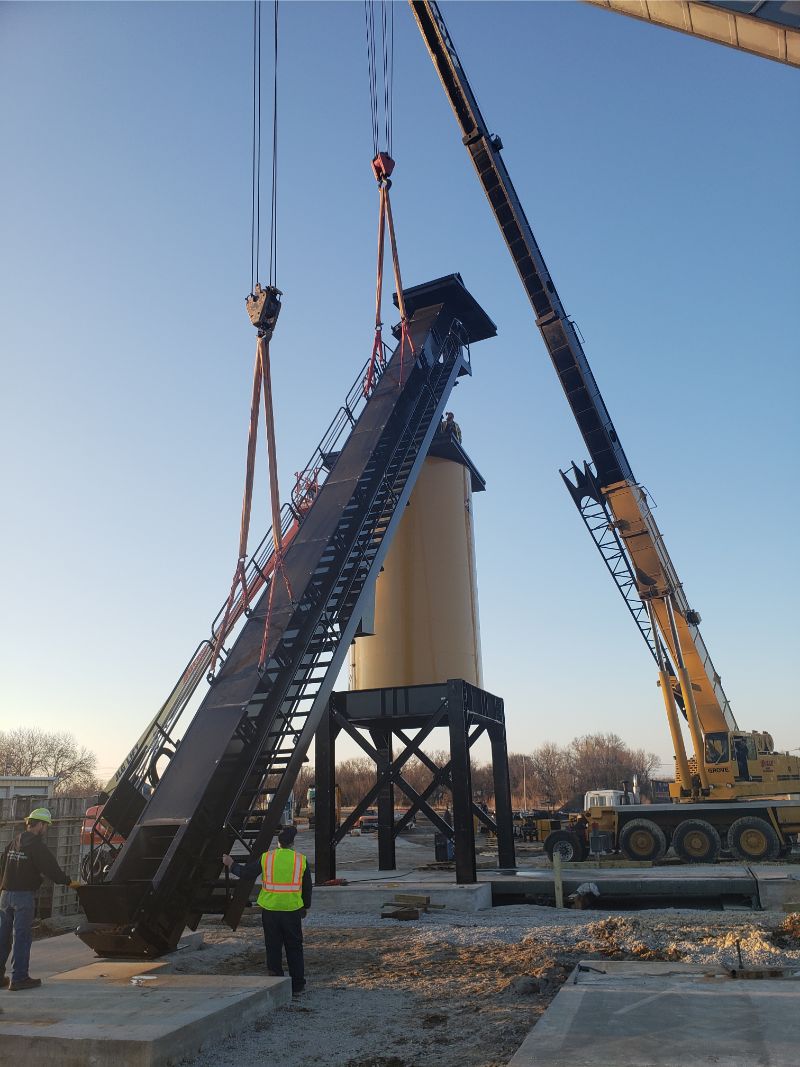
If the portable silo is not self-erecting, then a crane will be required to lift it and the drag slat conveyor into place. It is best practice to consult and hire a professional when erecting equipment with a crane. Check the shipping bill or contact the equipment manufacturer for equipment weights to properly size the crane for lifting.

  • Always use safety equipment and safety harnesses when necessary or required.
  • Always use proper rigging techniques when lifting any equipment.
  • Always check the crane, hooks, and clevises and lift cable slings for correct lifting capabilities.
  • Always use a man-lift, scissors-lift, or cage when required, to connect or remove the lift cable slings from the lifting eyes.
  • Remove the other shipped items from the trailer. Position them in a safe and clear zone away from the silo erection area.
  • Locate the necessary nuts, washers, and bolts for assembly of the unit. Count and size all bolt holes for correct bolts necessary.

How to Choose Your Asphalt Plant to Maximize Productivity

Silo

  • Install legs to silo with the silo on its side. Some silos may have the legs installed at the factory.
  • For large or wide silos, bolt the legs onto the silo base and install the cross braces before tightening leg bolts.
  • If rigging allows it, install any bolt on handrails or batch hopper (bolt-on type).
    Ladder-cage assembly installation can be performed before or after the silo is lifted into position.
  • Tighten and secure all hardware.Connect lift cable slings to the lifting eyes on the silo top.
  • If a second crane is used, connect lift cable slings to the lifting eyes on the silo base.
  • Be aware, the weight of the silo may cause the cables to go slack as they are lifted over center.
  • Lift the silo and place on the foundation plates.
  • Weld and/or bolt all four legs to the foundation plates.
  • Remove the cable hooks and release the crane cables.
  • Rig, lift, and mount the drag cradle, batch hopper, and hand railing if not previously mounted.
  • Bolt down to silo using bolts supplied.
  • Remove the cable hooks and release the crane cables.

Drag Slat Conveyor

  • In preparing to lift the drag slat conveyor, position the unit so that only a single lift is required to put the conveyor directly into the foundation position.
  • Depending on the size of the drag slat conveyor and the size of the crane(s), lift the drag slat conveyor with the lifting eyes on both ends of the conveyor. Be aware, the top end is heavier.
  • Lift drag conveyor, position head section on saddle, and place drag base on the foundation plate.
  • Weld and/or bolt drag base to the foundation plate.
  • Remove the cable hooks and release the crane cables.
  • Install or secure any drag supports that may be included.
  • Install any items such as bypass chute, guard rails, stairs, etc. that will require the use of the crane.
  • Remove the cable hooks and release the crane cables.

The Drum Unit

  • For safety reasons, do not allow anyone to enter the area below the drum unit until it is pinned and secure.
  • Use the foundation prints to find the measurements for positioning the unit.
  • Measure and mark the position of the unit from the drag chute.
  • Maneuver the truck rig and drum unit over the exact position so that the discharge point lines up to the drag slat conveyor receiving point.
  • Lift and level the unit into place using the crank-down or hydraulic legs that came with the unit.
  • Some equipment may have fixed legs that require manual placement and shimming to level the unit.
  • Secure and pin all support legs to frame and bolt and/or weld legs to foundation plate if installed.
  • Install the receiving chute on the drag slat conveyor and the discharge chute on the drum unit.
  • Install and/or fold down the receiving chute or slinger conveyor, breeching box, hand railing platforms, ladders, and any other required items.

Weigh Conveyor

  • Use the foundation prints to find the measurements for positioning the unit.
  • Measure and mark the position of the unit from the receiving chute on the dryer or fast conveyor.
  • Maneuver the truck rig and conveyor unit close to position.
  • Unfold or lift the weigh conveyor head unit into working position.
  • Maneuver the truck rig and conveyor unit so that the material will fall into the center of the receiving chute.
  • Then, unbolt the scalping screen from the conveyor. At no time must the scalping screen touch the weigh conveyor.

Aggregate Feed System

  • Use the foundation prints to find the measurements for positioning the unit.
  • Measure and mark the position of the unit from the weigh conveyor.
  • Maneuver the truck rig and bin unit close to position.
  • Unfold the collecting conveyor and place at the correct angle to match the weigh conveyor.
  • Install conveyor supports and or chains to hold conveyor in position.
  • Maneuver the truck rig and bin unit into position so that when the collecting conveyor discharges onto a screen, it discharges onto the top one-third section of the screen cloth.
  • Lift and level the bins using the crank or hydraulic legs provided, and bolt and/or weld the legs onto the foundation pads if installed.
  • Install or position into place any ladders, platforms, bin dividers, bin extensions, and other required equipment.
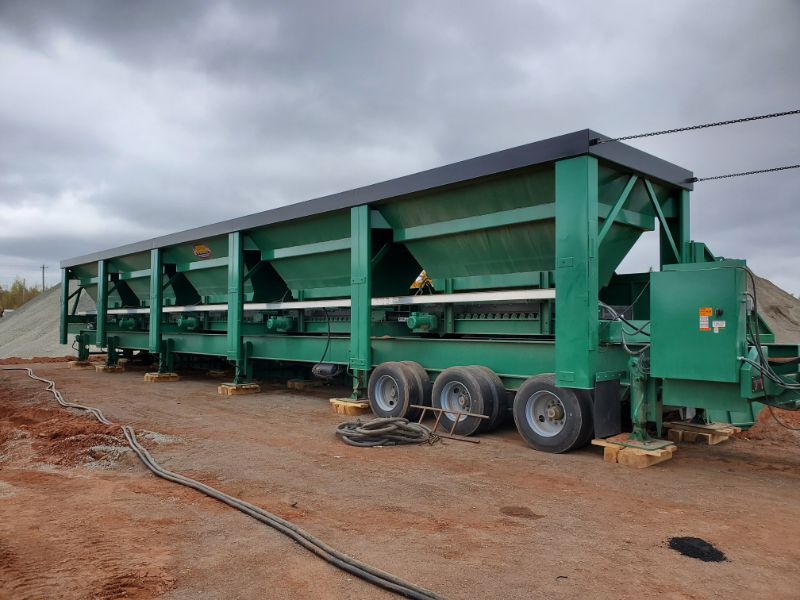
  • If equipped, install or position the folding bulkheads and tie down cables into working position so that the ramps can begin being filled.

Baghouse

  • Use the foundation prints to find the measurements for positioning the unit.
  • Measure and mark the position of the unit from the drum unit.
  • Maneuver the truck rig and baghouse unit into position.
  • Install or position ductwork on the both the drum unit and baghouse. This may require the use of a crane. Seal all duct unions using provided materials.
  • Install or position into place any ladders, platforms, railing, airlocks, blowers, dust augers, stacks, and other required equipment.

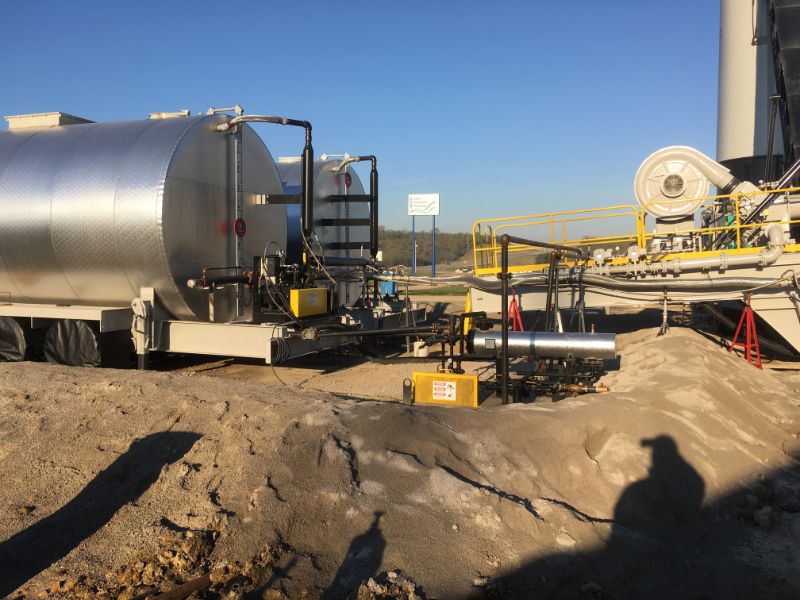
Asphalt Storage Tank

  • Use the foundation prints to find the measurements for positioning the unit.
  • Measure and mark the position of the AC tank unit from the drum unit.
  • Maneuver the truck rig and conveyor unit close to position.
  • Mount the asphalt pump on the back of the asphalt tank when both units are supplied by ADM.
  • The asphalt tank and pump should be mounted as closely as possible to the AC injection lines.
  • The asphalt tank must be supported solidly.

Fuel Tank

  • Use the foundation prints to find the measurements for positioning the unit.
  • Measure and mark the position of the unit from the center line of the drum unit.
  • Maneuver the truck rig and conveyor unit close to position.
  • The fuel tank must be at least 50 feet from the burner.
  • The fuel tank should be equipped with a fuel filter.
  • The supplied pump must also have a filter.
  • All lines must be sized to the recommendations of the burner manufacturer.

RAP System

  • Use the foundation prints to find the measurements for positioning the unit.
  • Measure and mark the position of the unit from the receiving chute on recycle collar.
  • Maneuver the truck rig and conveyor unit close to position.
  • Unfold or lift the conveyor head unit into working position.
  • Maneuver the truck rig and conveyor unit so that the material will fall into the center of the receiving chute.
  • Lift and level the RAP bin(s) using the crank or hydraulic legs provided, and bolt and/or weld the legs onto the foundation pads if installed.
  • Install or position into place any ladders, platforms, bin dividers, bin extensions, and other equipment required.
  • If equipped, install or position the folding bulkheads and tie down cables into working position so that the loading ramps can begin being filled.

3. Install Electrical Cables and Plumbing—Electrical

  • Move generator into position. Select a location near the plant and fuel source but where noise will be minimal for operations. The farther the location, the less the sound will be, but the larger the power cable might need to be.
  • Install and connect the main power cable, and test the generator for proper voltage.
  • Begin with the farthest cable, lay out the high voltage motor wire along provided cable trays, and plug into main MCC, typically at the control room.
  • Secure the cable along the way with proper wire ties.
  • Continue until all motors are plugged into their proper outlets.
  • Lay out the 110V control cables along the cable trays securing them so that they do not lie on top of the high voltage wires.
  • Secure the cable along the way with proper wire ties.
  • Continue until all control cables are plugged into their proper outlets.
  • Lay out the low voltage signal cables along the provided cable trays assuring that they do not lie alongside the high voltage cables, crossing only when necessary.
  • Secure the cable along the way with proper wire ties.
  • Continue until all signal and low voltage cables are plugged into their proper outlets.
  • Some cables may need to be hardwired.

Pennsylvania Partners to Recycle More

Plumbing

  • Simplify plumbing connections for the asphalt and fuel tanks using hoses with quick connections.
  • Hot oil-heated flex hose packages with quick connections available from ADM can provide quick connections from the asphalt pump to the plant.
  • Fuel hoses with spill-proof quick disconnects can make fuel connections safe, quick, and easy.
  • Always check all plumbing for leaks, wear, and damage to avoid any unwanted spills.
  • If your plant is not equipped with quick connections, use the plumbing diagrams provided by the manufacturer to connect the equipment.

4. Test and Calibrate

  • Once the equipment is installed and all electrical connections are made, it’s time to test and calibrate. (The following steps may need to be performed by a licensed electrician.)
  • With all breakers in the “off” position, check power at the top of the main breaker.
  • If power is correct, turn on main breaker and check power at the bottom of the main.
  • Continue this for all breakers in the circuit to assure all connections and power are correct.
  • After assuring power is correct, continue testing by turning all motors and checking rotations.
  • Once all electrical is tested, perform calibrations of the asphalt pump, weigh conveyor, cold feed bins, surge system scales, and other systems such as level indicators, temperature sensors, and others.
  • Follow the manufacturer’s instructions for proper testing of the system on your plant.

When asphalt producers follow the portable asphalt plant set-up instructions that manufacturers provide, producers are able to get plants set up safely, properly, and in a reasonable time frame to get their operations up and running.


Carlos Cardenas

Carlos Cardenas is a sales engineer for ADM Asphalt Drum Mixers Inc. with 25 years of expertise in the asphalt plant manufacturing industry. For more information, contact him at (260) 637-5729.

Best Practices for Crushing, Screening RAP for HMA Production

Asphalt producers know that many factors go into making the highest quality hot-mix asphalt (HMA) end product from reclaimed asphalt pavement (RAP). Important considerations include the need for correct size and shape of material, structural soundness, and a minimum of moisture, fines and white rock going into the mix.

Additionally, production capacity is a key factor in assuring asphalt drum mixers can operate at the sometimes 24/7 demand that is generated in peak asphalt season. A slip in production capacity at the front end leads to disruption in the whole asphalt system. This article will discuss what producers can do to assure crushing and screening of RAP meets best practices for achieving highest product quality and production capacity goals.

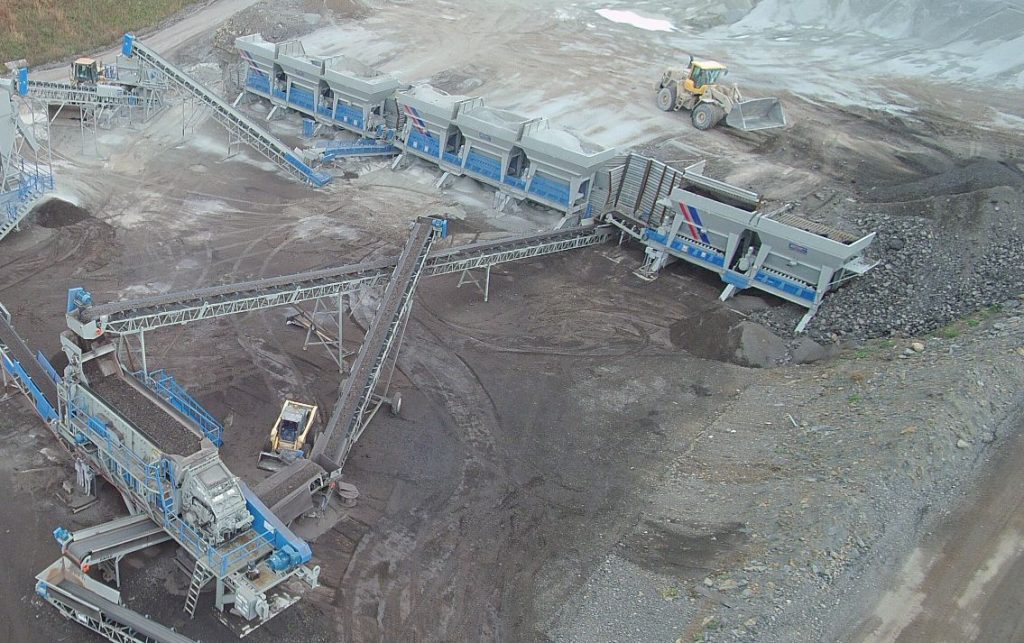
There are many choices in crushing and screening equipment to get the job done. When it comes to crushing, jaw crushers, cone crushers and impact crushers all have specific applications. Jaw and cone crushers are popularly used equipment types, but there are key reasons why an impact crusher may be the best choice for achieving the end quality product producers desire, along with providing the necessary production capacity to keep high-quality hot mix flowing.

Crushing and screening RAP is a recycling application, which requires very different end product needs than virgin aggregate and even concrete crushing applications. Jaw and cone crushers are highly effective in crushing hard rock. RAP, however, is not hard rock, and the unique characteristics of RAP crushing can actually cause cone crushers to negatively impact product output.

As cone crushers crush and re-crush the RAP to break it apart, the asphalt can be literally stripped from the RAP, creating white rock, which now requires the extra step and cost of recoating.

A jaw crusher in a RAP circuit is used for primary reduction, prepping it for the cone and requiring at least two crushers, and in some instances, a vertical shaft impactor (VSI) to make a spec product. An impactor in most RAP applications typically requires only one crusher. Two may be necessary where very high capacity or special products are required.

Cone crushers can work fairly well until heat is added into the equation, but as heat and pressure build, the RAP can become a hardened material, so compressed that it can become uncrushable, resulting in what is called “Bonne Float,” almost metal-to-metal compaction. The forces that can be created are directed down through the bearings and can destroy them, requiring extensive and expensive down time.

Impact crushers, on the other hand, use a simpler design comprised of a rotor and two bearings that spin to launch the RAP against a curtain. In my 45 years in the crushing and screening business, 26 of those selling the UltraMax® Impactor for Eagle Crusher Company, I have sold jaws, cones, impactors, hammermills, VSIs, roll crushers, and even Wood Hogs. They all have a specific application in which each one excels. The simplicity of the Eagle Crusher impactor’s three-bar, solid-steel rotor works like this for RAP:


The action of exploding the material with the force of the blow bars and launching it into the primary curtain at the proper angle, then whacking it again with the secondary curtain liners to prepare it for its final reduction, creates a very consistent mix to be sent on to the drum. The RAP impacting into the curtain breaks the interstitial lattice of the RAP’s binding matrix and creates a beneficiation of the original virgin aggregate—simply put, knocking off the arrowheads and cubing up the product. The result is a minimum of white rock and fines produced by the impactor, and a more structurally sound cubical product. Cone crushers tend to “pancake” the RAP and do little to reduce the elongated aggregate, rather than produce the cubical spec product required for highest quality recycling of RAP.

As the impactor separates the binding matrix, the material is aired out and moisture is released, making for a drier material going into the hot mix. Drier material saves energy as it eliminates the need for more gas in the burner.

Why, then, are jaw and cone crushers so popular for RAP? Many producers have grown up in quarries where they have seen, firsthand, the ability of jaw and cone crushers to effectively crush hard rock with wear parts that withstand the crushing process with minimal replacement. This effectiveness and wear-part longevity mindset carries over into the purchase of equipment for recycling of RAP, when recycling RAP is actually a very different application.

In my experience, an impactor works best in RAP with an open setting rather than a closed one. The open setting controls the size and production with speed. With that in mind, an impactor can retain its product gradation as well as capacity throughout its wear life.

Too many times, only the secondary curtain setting is adjusted because it is easier to do than adjusting the primary curtain. However, for best practice, both should be adjusted proportionately to maintain a correct reduction ratio and highest product quality.

When it comes to production capacities of impact crushers compared to jaw and cone crushers for the crushing and screening of RAP, Ryan Freeman, the general manager at Rason Materials, shared his experience.

“Rason operates five asphalt plants and four crushing operations, all on Long Island, New York,” Freeman said. “Working with our Rason company management team, I was able to make the switch from an original configuration of three crushers—a jaw, impactor, and cone with two screen decks, the impactor was not designed for the unique properties of asphalt crushing—to a new configuration of two Eagle Crusher impactors with two screen decks swapped out. We were able to double production capacity based on tons per hour with one less crusher and half the labor.”

Freeman continued, “There’s a lot less skilled labor out there for cone crushers, so finding good cone crusher help is more difficult. Plus, cone crushers are harder to maintain for the products Rason produces.”

One other and often overlooked part of any spec RAP system is the screen. A properly sized and type of screen is critical to any RAP operation. Producers are typically making finer sizes than other types of aggregate and recycling production. For RAP, the screen is the determining factor for net production.

Producers can have all the crushers in the world but if RAP can’t be screened, it probably can’t be used.