How to Pave a Segmented Parking Lot for Best Water Flow
BY John Ball
Whether you’re constructing a new route for the state or building a new parking lot for a private customer, the direction the water flows off the pavement matters. An engineer probably took care of the plan, but now your crew has to execute that plan. For Boxley Paving, Salem, Virginia, the team put together a plan to keep water out of a complex parking lot for their customer and ended up with a beautiful paving job. We’ll discuss best paving techniques in a partitioned lot with this project as the example.
The reason this lot makes such a great example of a sectioned project is because the crew had to measure and adjust each pass, paving triangles and different lengths of passes to accommodate the shape of the overall property. There was no squareness to it. It was a tough parking lot to make it come out correctly, but the crew did a great job.

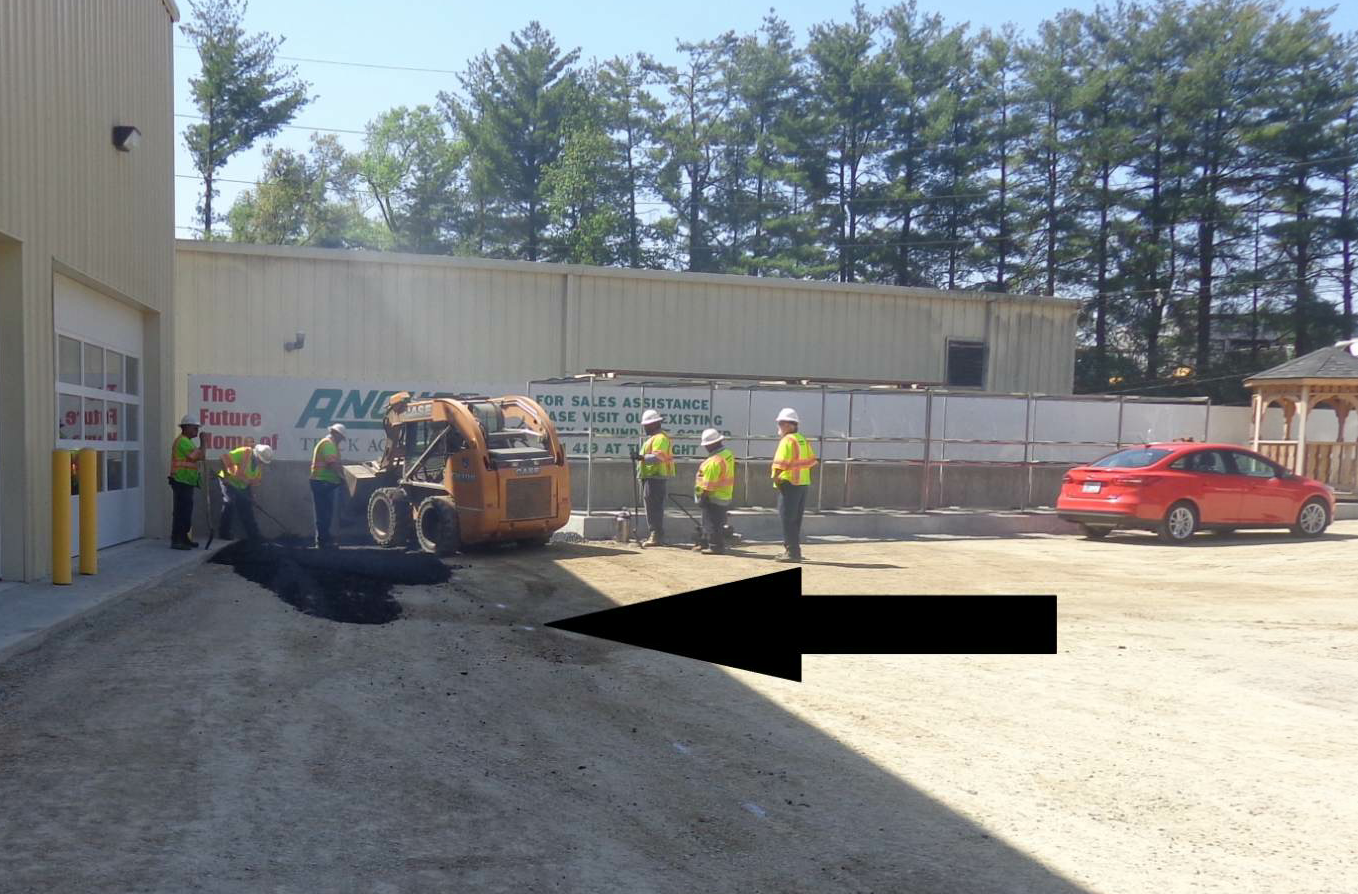
Before: The three-man grading crew built the trough for the v-joint, sloping the subgrade to guide water runoff around the corner of the property, where the black arrow points in this picture.
The parking lot in this example ran alongside a state route with a wide access. At one end of the access, 12 feet inside the lot, a railroad sign stood and could not be moved during paving. The customer’s business had two garages with a total of eight overhead doors. All the water from the high end of the property ran downhill toward the second building, and the customer needed us to pave in such a way that water wouldn’t get into his business when we were done. We needed to build a gutter to direct water to the left of the building, where you see the black arrow in the picture.
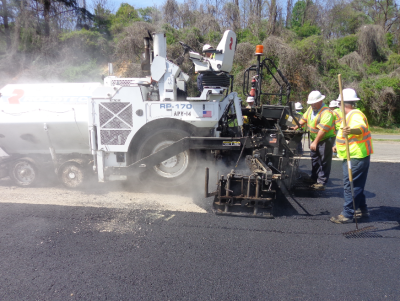
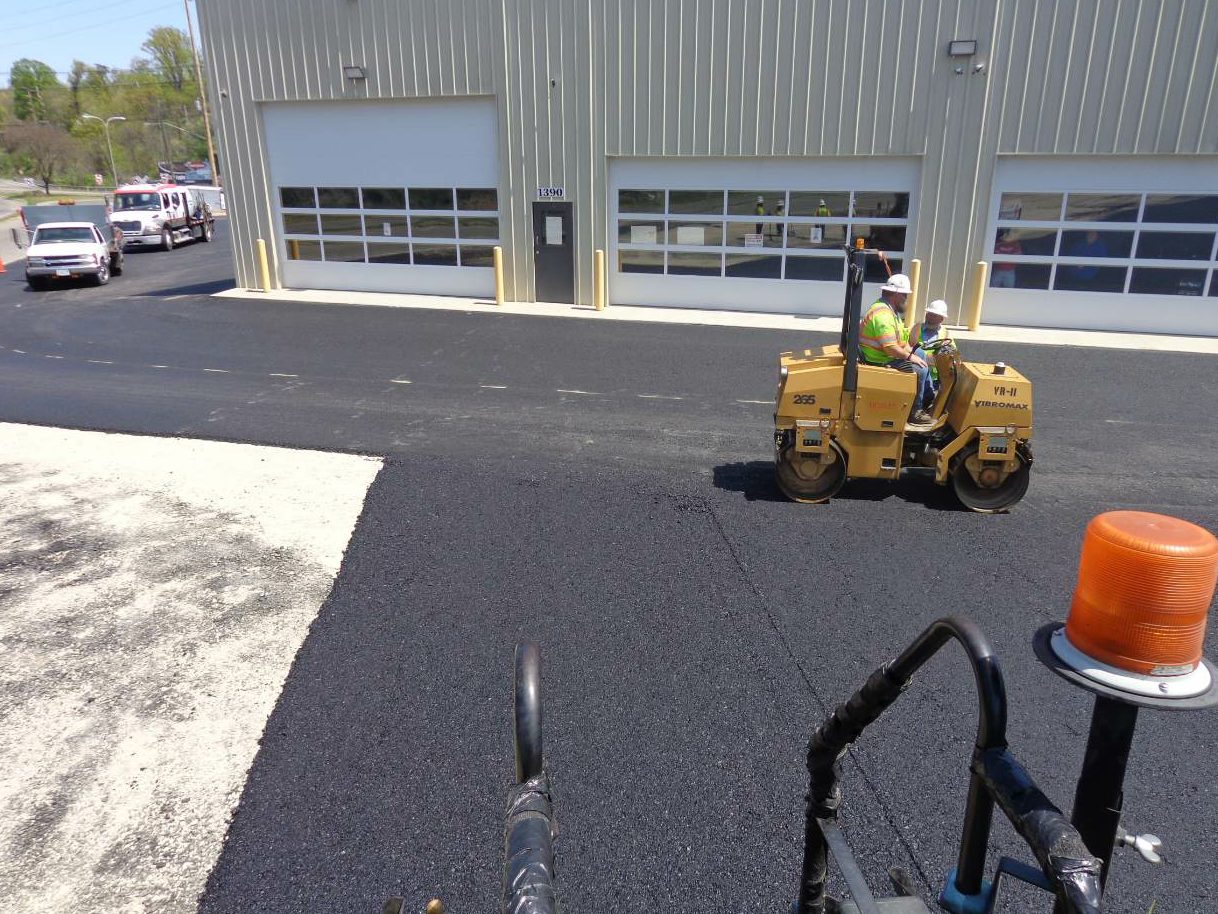
The crew used a skid steer to deliver mix to the small area in the corner to create the pad that the paver will set on to begin its first pull.
We also had to decide how to pave to ensure the water drained in the correct direction. We wanted to pave from the low end to the high end of the property.
Grade to Pave

The first two passes got a 17-foot-wide mat placed in front of the building at the low end of the parking lot. It included a slope of 6 percent to the v-joint. The third pass on the other side of the v-joint was 10 feet wide and had a slope of 3 percent toward the v-joint.
The project began with grading. The team brought in crushed gravel to get the grade and slope. It took two and a half days of grading and rolling to get the subgrade right, but the three-man grading crew did a great job of it.
On the third day, we had to begin paving while the grading team finished their part. We started by building a mat against the building in front of the overhead doors. We built our take-off pad in the corner. This is the pad that the paver will sit on to make its pull away from the wall—or other structures this lot had for us to work against. Notice that the crew uses a skid steer that holds about 2 tons to deliver mix to the area where the pad is built. It’s easier to use the skid steer than trying to back a truck into the corner and possibly compromise the excellent graded subgrade.
We built the mat in front of the doors in two passes. We went from 8 feet to 17 feet, but we had to accommodate the gutter for the water to flow. The first pass took care of the first 8 feet or so of the mat in front of the building. The second pass took care of the remaining 9 feet to reach the v-joint the grader had created for us. The third pass, which took place on the far side of the joint, was 10 feet wide. This gave us the pavement in front of the building on the low end of the parking lot. Next, we began pulling passes perpendicular to this mat from the low end toward the high end.
Roll
Once the east-west lanes of the mat in front of the building at the low end of the parking lot had solid and excellent compaction, the roller operator could line up to roll onto the north-south lanes with no worries about moving across the v-joint.
To roll the binder course, the crew used best compaction practices, but they had to take care near the v-joint. We didn’t want to collapse the joint. The foreman painted a dotted line so the roller operator would know where the v-joint had been created in the mat. The slope to that point was about 6 percent. On the other side of the v-joint, the slope of the 10-foot pass was 3 percent. The roller operator stayed on either side of the line while compacting the binder course, staying right against it as if pinching the joint.
The roller operator compacted the binder course on the garage side of the v-joint first, rolling from east to west longitudinally along the dotted line the foreman had painted to help keep track of the joint.
With the mat in front of the building fully compacted, the roller operator was able to line up “across” those passes to roll onto the perpendicular passes being pulled toward the high end of the lot, as you can see in the smaller photo.
Once we had the binder course in place, we could set up cones to keep traffic off the new binder course, and call it a day.
Finish
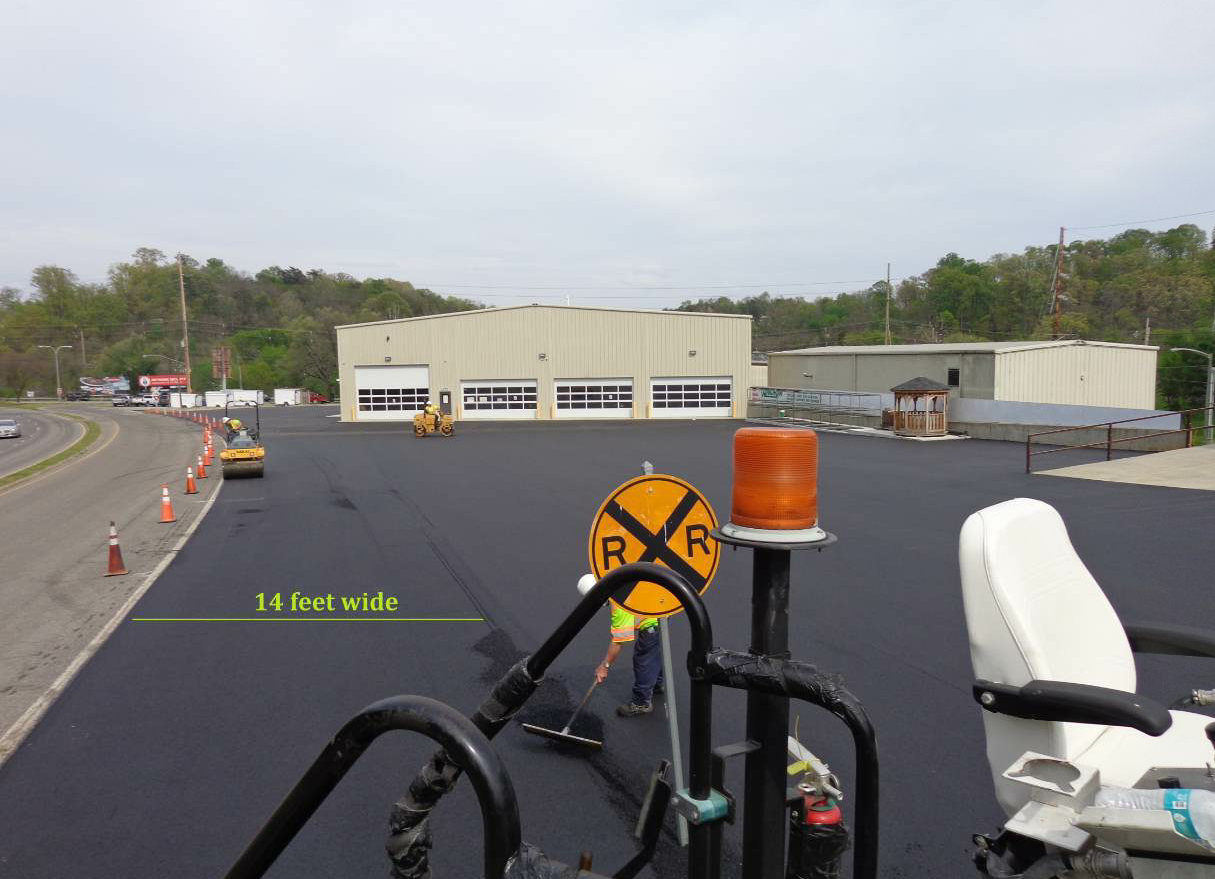
The extra planning challenge for this project was the railroad crossing sign that couldn’t be moved. The crew planned the passes so that the last longitudinal joint hit right at the sign post, which meant the outside—and final—pass was 12 feet wide at the low end and 14 feet wide at the high end where it met the sign post.
Even though the team did a great job with the binder course, we used a broom along the perimeter of the project the next day to make sure it was very clean. The client is located in an area surrounded by gravel, so we needed to make sure the binder course was clean enough for the top course to adhere perfectly. We wanted no dust or dirt getting in the way of the tack, which was to be sprayed along the edges of the project.
Because this was a brand new pavement, it didn’t need tack all over. No traffic was allowed to drive on the binder course, thus no dirt or debris was carried onto the new mat. It remained pristine. We tacked just the edges as if sealing an envelope.

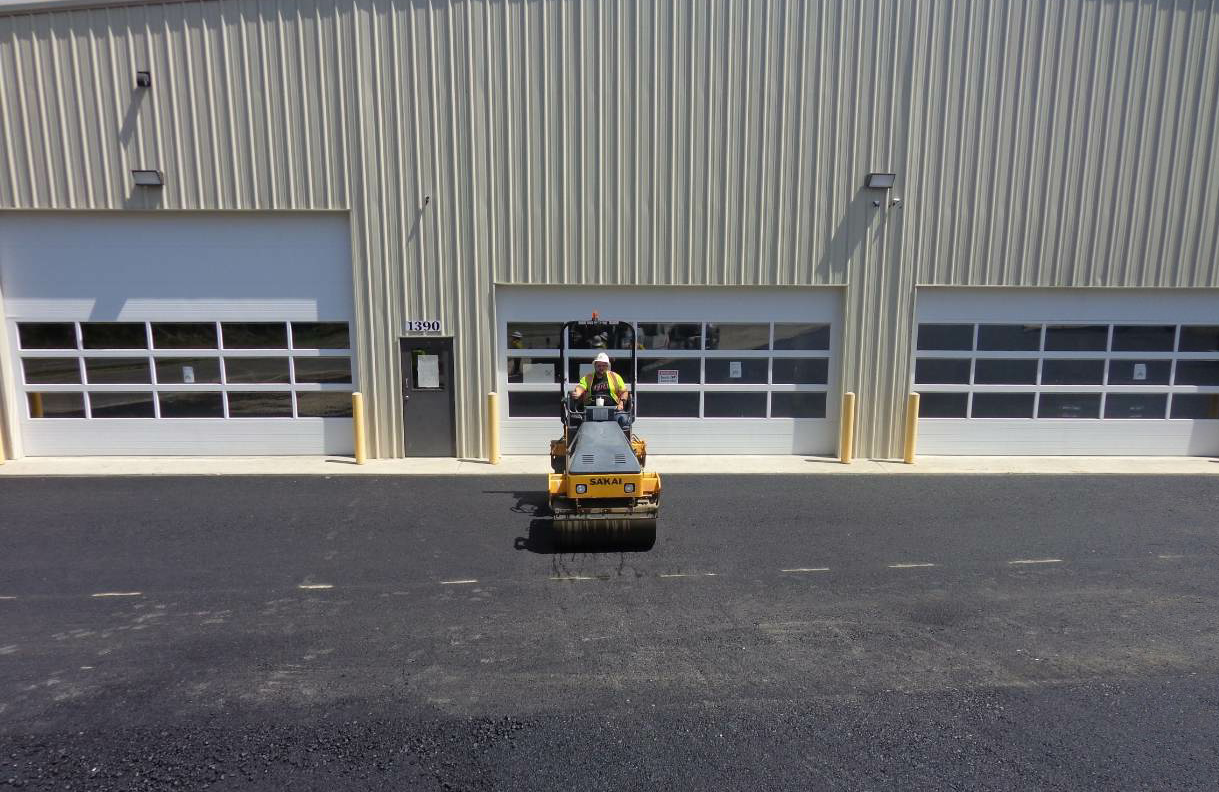
After: When the Boxley crew had completed the job, the water from the rollers proved their success. The black arrow in the picture points to the area where the water has run to the v-joint, downhill and around the corner, just as it was directed to do.
Notice that the additional planning challenge we had for this project was the railroad crossing sign that couldn’t be moved. We planned the passes so that the joint hit right at the sign post, which meant the outside—and final—pass was 12 feet wide at the low end and 14 feet wide at the high end where it met the sign post. The crew did a great job of measuring everything just right, and the endgate matched the joint just as we planned for it to do.
In the end, the water off the rollers showed us our work was right on target. You can see by the arrow in the picture how it flows downhill, to the v-joint, and around the corner of the property, just as we directed it to.
—
Keep it Clean
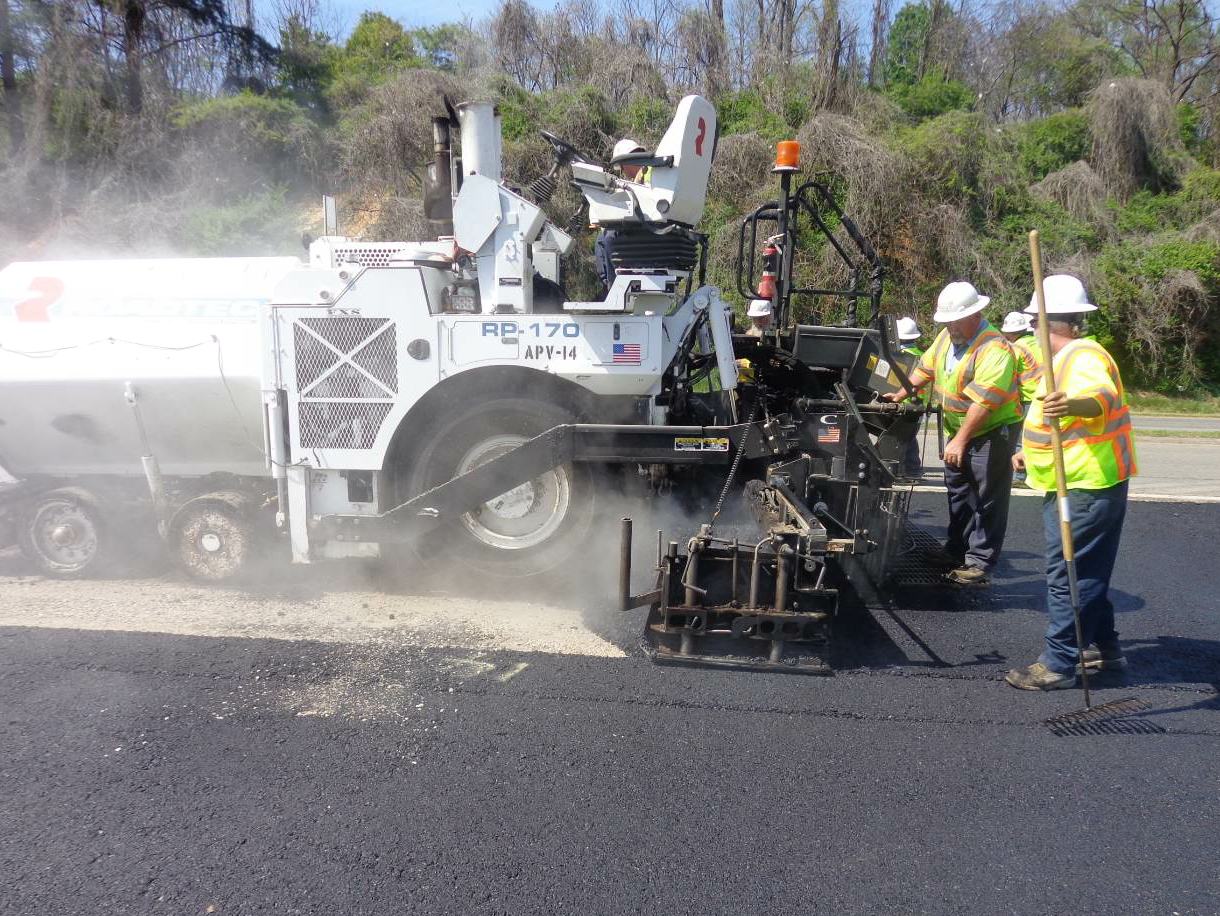
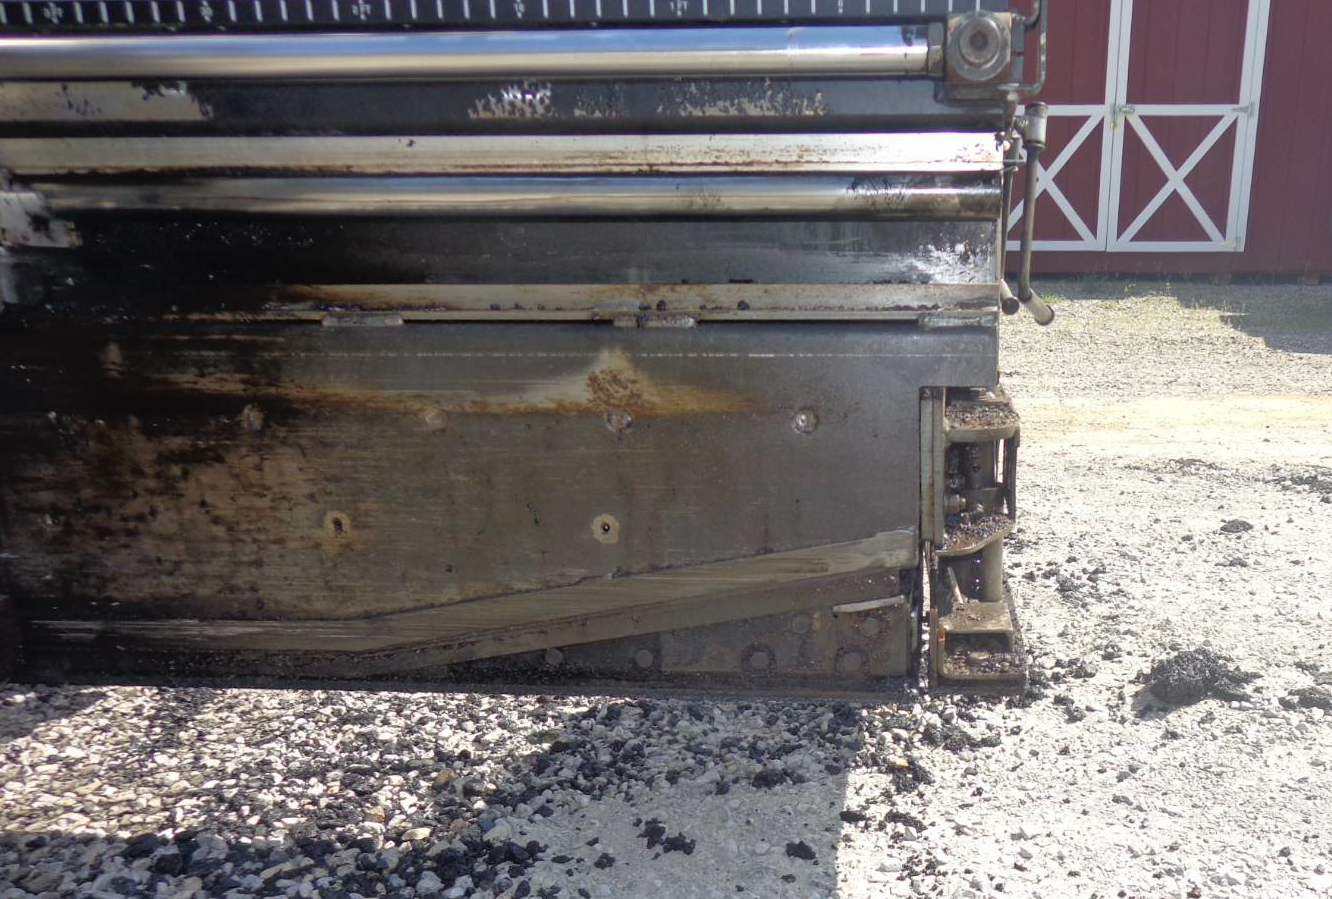
Notice that the endgate is perfectly even with the main screed. The bottom of the shoe and screed are all clean. This clean, smooth shoe on the endgate keeps it gliding smoothly on top of the joint. When it’s clean—and at the right temperature—it is less likely to grab material that’s already in place. It won’t tear the mat or cause holes and tears for the crew to repair on the fly. The clean, hot endgate is how the crew sets themselves up for a well-built joint.
—
How to Figure Yield for a Flare
A number of the passes Boxley Paving had to pull in this parking lot project were triangular. That meant the foreman had different measurements to use than normal to figure yield. The most common place you’ll find a triangle in your paving projects is the flare where a drive leads to another road. To find the area of a right triangle, multiply half of the base (A) with the height (B). Then divide the area by 9 to find the square yards you’ll pave.
For example, if the base—which represents one side of an existing pavement—is 10 feet long, and the height—which represents another side of an existing pavement—is 10 feet long, here’s the formula:
.5 x 10 x 10 = 50/9 = 5.56 square yards
John Ball is the proprietor of Top Quality Paving and Training, Manchester, New Hampshire. He provides personal, on-site paving consulting services around the United States and into Canada. For more information, contact him at (603) 493-1458 or tqpaving@yahoo.com.