Check Mix Design for Warm-Mix Asphalt in the Lab
BY Sandy Lender

At this time, states don’t expect a contractor to submit a separate mix design for warm-mix asphalt (WMA) pavements that are part of a project. Instead, the contractor will submit the hot-mix asphalt (HMA) design with modifications. No extra testing required. Does that mean the producer who is committed to quality should ignore the opportunity to produce the WMA design in the lab and double-check that it meets specs and parameters for the project?
The opportunity for quality control reminds me of the quote from Author John Wooden, who wrote, “The true test of a man’s character is what he does when no one is watching.” Perhaps the testing of mechanically foamed WMA mixes isn’t required as a separate line item on the day’s agenda, but is the savvy producer going to overlook that step? The researchers at Pavement Technology Inc. (PTI) Covington, Ga., represent one group that has developed a simple method for testing foamed asphalt mixes in the lab. There are only a handful of such devices on the market, and Wade Collins of PTI explained why.

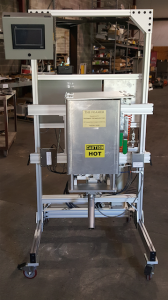
Front view of The Foamer
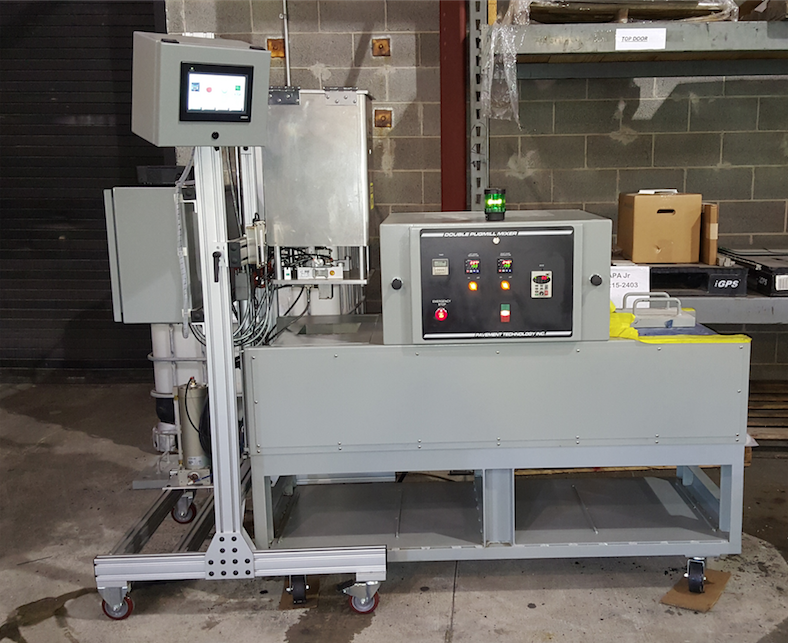
“Warm-mix represents one of the times that the industry has been ahead of the research,” Collins said. “So the producer is just lowering temperature of the hot mix; the DOT isn’t requiring a new design.” He explained that the lack of a start-from-scratch mix design sort of let producers off the hook for coming up with all-new testing methods, thus all-new testing equipment.For those producers who want the extra assurance, using lab equipment for WMA design is not rocket science. As an example, we’ll look at The Foamer WMA lab foaming system from PTI. The Foamer is designed to give repeatable foamed asphalt samples that are used for WMA mix designs in the lab. Even though it’s a “warm-mix” device, it has multiple heated surfaces. The lab tech must remember his or her safety practices around this machine, and never touch the inside reservoir or exit tube when the unit is heated. PTI recommends the following safety protocol:
- Allow 36 inches of access on all sides of the unit.
- Locate the unit on a level floor, using shims to adjust and level it if necessary. Lock the wheels in position.
- Before you turn on the HMI touch panel, make sure the bag thermocouple has been plugged into the female receptacle on the inside of the chamber.
- Allow all components to cool before replacing the disposable high-temperature polymer bag in the reservoir.
- Always turn the main breaker off before disconnecting the plug from the receptacle.
- And never attempt to clean, oil or adjust the unit while it’s in operation.

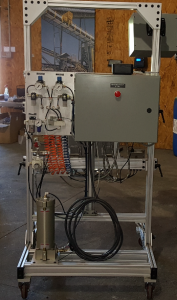
Back view of The Foamer
Here’s how The Foamer works.
Step 1. Remove the cover of The Foamer by pulling the right back side of the cover out and then bringing it forward.
Step 2. Put the high-temperature polymer bag in place. To do this, first move the cylinder piston to the far left. Unlatch the chamber and open the lid. Remove the can adapter from the top of the reservoir chamber. Insert the bag into the top of the reservoir by placing the end of the tube through the bottom of the reservoir and through the clamping valve into the reaction chamber. Route the thermocouple wire between the bag and the reservoir, and then plug the thermocouple end into the female thermocouple receptacle located on the back top wall of the chamber. The bag will be in place when there is about 1 inch of tube on the inside of the reservoir. Conform the bag to the inside walls of the reservoir and fold the end of the bag over the outside edge of the reservoir. Place the gallon can adapter on top of the reservoir to hold the bag in place.
Step 3. Connect the air to the “up and down” valve using a quick disconnect.
Step 4. Using extreme caution, pour asphalt into the reservoir.
Step 5. Set the main regulator for 100 psi.
Step 6. Prepare to run the process at the control panel.
6a. First, power up the touch panel by touching the “On” switch located on the left side of the screen.
6b. Go to the “Set Up” screen and press on the Asphalt SP (set point) icon. Enter the temperature and press on the bottom left arrow.
6c. Press on the “Exit Temp” button, enter the exit temperature, and press on the bottom left arrow.
6d. Press on “Target SP” and enter the amount of asphalt, in grams, to be foamed, and press on the bottom left arrow.
6e. Press on the “Soak Time SP” and enter the amount of time that you want the asphalt to stay at the set point temperature (up to 60 minutes). The ambient asphalt will melt down into the reservoir and the soak timer will allow for proper heating of the asphalt.
6f. Press on the water percent icon and enter the percentage of water that will be used in the foaming process.
Step 7a. Remove the water fill plug on the top of the water tank.
7b. Fill to the level indicated on the sight glass. (Ordinary tap water is sufficient for this process.)
7c. When the water has reached the indicated level, tighten the fill plug.
Step 8. Open the ball valve on the bottom of the water tank and the ball valve on the top of the water tank.
Step 9. Verify the asphalt temperature by a traceable thermometer before clicking on the “Foam” button on the touch screen. Check by unlatching and lifting the chamber lid. (Use extreme caution.)
Step 10. Once the asphalt has reached the appropriate temperature, the “Foam” button will appear. Pressing “Start” and then “Foam” starts the foaming process. The process will continue until target grams have been reached.
Collins shared that about 90 percent of all foaming taking place in the United States at this time uses water. The other 10 percent of foaming uses additives and chemical agents to assist in the foaming process. Whichever method taking place in your process, finding a method of quality control is the savvy producer’s leg up on the competition.
